Author:
Peter Berry
Date Of Creation:
19 February 2021
Update Date:
1 July 2024
Content
You can use a USB removable storage device to quickly copy music from one computer to another. This is a convenient way to share music with friends or listen to music on a USB-enabled audio device, or simply create a backup. If the USB drive is not working properly, you will need to reformat it.
Steps
Method 1 of 4: Windows 10 and 8
Plug the USB into the USB port on the computer. Try using the port directly on the computer. Avoid using an extension port as it will slow down data transmission.
- Windows will notify when a USB drive is connected to the computer and an AutoPlay window will appear. You can close the AutoPlay window.
- If this is your first time plugging the USB drive into the computer, Windows may install some drivers. The process can take a few minutes.

Open the "This PC" (This PC) window. On Windows 10, click the Windows button and select File Explorer. Windows 8 users can right-click the Windows button and choose "File Explorer", or type ⊞ Win+E.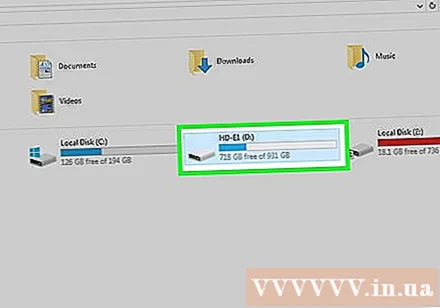
Find the USB drive. The USB drive will appear in the "Devices and drives" section of the window.- If you don't see the USB drive, see Troubleshooting at the end of this article.
Remember the letter that corresponds to the USB drive. You'll find this symbol in brackets next to the drive, for example "(E :)" or "(F :)". Remembering the drive letter will help simplify file transfers.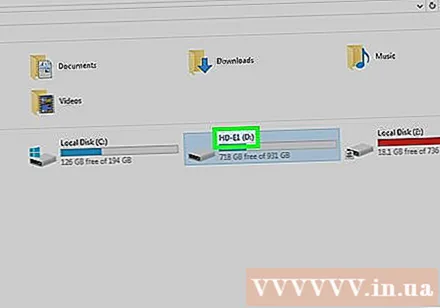

Check the amount of free space on the drive. The free space of the drive determines the number of music files you can store in it. You can check out the memory directly under the drive.- The average size of an MP3 file is about 3-5 MB, but depends on the length and quality of the file. See the chart at the end of this article for an estimate of the number of songs that can be stored.
- You can quickly erase anything on a USB flash drive by right-clicking and selecting "Format". Begin the formatting process and everything on the drive will be erased.
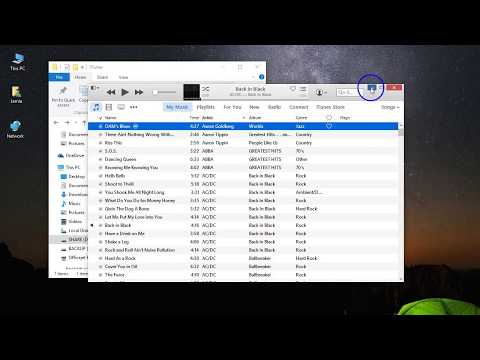
Find the music files you want to copy to the USB drive. Music files can be stored in many locations on the computer:
- Many programs are stored in the "Music" folder.
- If you download music from the web, the file is usually stored in the "Downloads" folder.
- In Windows Media Player, right-click on a file in the library and select "Open file location" to open the folder containing the file.
- In iTunes, right-click on the song in the library and select "Show in Windows Explorer" to open the folder containing the song.
- You can perform a search for "mp3" on Windows to find all the MP3 files on your computer. Open the Start menu and type "mp3" to start searching.
Select all the files and folders you want to copy. You can send multiple files and folders to a USB drive at the same time. Click and drag in the selection dialog, or hold down the key Ctrl and click on each file you want to select. You can press the key Ctral+A to select everything on the current directory.
- Check the size of the selected files by right-clicking and selecting "Properties". Make sure that the size of the selection is less than the available space on the USB thumb drive.
- You'll find it easier to move all your music files to one location on your computer and organize them into a folder. You can copy all folders and files at the same time.
Right click on the selection. A new menu will appear.
Select "Send to" and select the USB drive. In this step, if you remember the symbol or letter corresponding to the USB drive, it is very convenient. You will usually see the USB drive at the bottom of the destination list.
Wait for the file to copy. The file you have just selected will be copied to the USB. The copying time depends on the number of files with the USB speed and the computer.
- The original file is not deleted. The machine will make a copy of each file on the USB.
- If you get a message that USB is full, you have selected more files than the available USB space. Try repeating the process with fewer files.
Click the "Safely Remove Hardware" button in the system tray. This button has an icon of a USB plug with a check mark. If you don't see this option, expand the hidden icons in the system tray. When you click here, a list of USB drives connected to the computer will appear.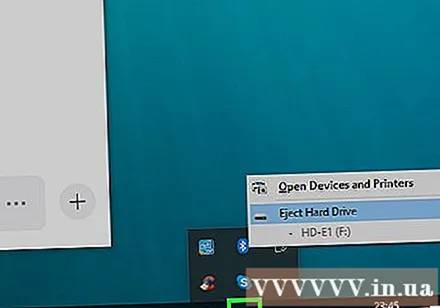
Click on the USB to safely remove the device. This is the action of disconnecting the USB from the system, allowing you to safely remove the USB drive without damaging your data.
Remove the USB from the computer. Your music files are now safely stored on the USB. advertisement
Method 2 of 4: Windows 7 and earlier
Plug the USB you want to use. Use the USB port directly on the computer. Connecting via an extended USB port may reduce data transfer speed or connection problems.
- The AutoPlay window will appear if it has not been disabled before. You can select "Open folder to view files" or continue to open the file without using the AutoPlay window.
- Windows can install some drivers if you've never connected the USB drive before.
Open the "Computer" window. You can look in the Start menu or press the key ⊞ Win+E. At the same time, you can see the shortcut on the desktop. On Windows XP, this option is called "My Computer".
Find the USB drive. You can see the "Devices with Removable Storage" item in the window. The USB drive can be named after the manufacturer or model name, or simply "Removable Disk".
Remember the name and letter of the USB. This will make it easier to send files. The drive letter is displayed inside parentheses after the drive letter.
Check the amount of free space on the drive. The bar below the drive will show how much free space is available. Knowing the free space, you can estimate the number of files that can be stored on the drive.
- See the chart at the end of the article for an estimate of the number of files that can be stored on the device.
Find the music file you want to copy. Use Windows Explorer to find the music files you want to copy. Music is usually stored in different locations depending on the media player settings.
- Windows uses the "Music" folder as the default storage location for many programs.
- Music downloaded online is usually stored in the Downloads folder.
- If you are using Windows Media Player, you can right-click the song in the library and choose "Open file location" to see the folder containing that file.
- If using iTunes, right-click the song and choose "Show in Windows Explorer."
Select the files and folders you want to copy. You can copy anything in the window by clicking. You can drag selection dialog, press key Ctrl+A to select all files or hold down the key Ctrl and click on each file to select it.
Check the selected file size. Right click on the selection and choose "Properties". This option allows you to see the total size of the selected files to compare with the available USB space.
Right click and choose "Send to", then select the USB drive. You will easily identify the USB drive by name and letter.
Wait for the music to copy. The time it takes depends on the number of files you are copying, the speed of your USB drive and your computer. Do not remove the USB from the machine while copying.
Click on "Safely Remove Hardware" in the system tray. This is the row of icons in the bottom right corner of the screen, next to the clock. If you don't see an icon, click the arrow to display all icons.
Select the USB drive from the "Safely Remove Hardware" menu. This is the operation of disconnecting the USB from the computer, allowing you to safely remove the USB drive without damaging the files. advertisement
Method 3 of 4: Mac
Plug the USB into the USB port on the Mac. Avoid using the extended USB port as it may decrease data transfer speed. You should see the USB drive appear on the screen.
- If the USB flash drive does not appear, read the Troubleshooting section below.
Open iTunes or Finder. If you use iTunes, you can quickly copy music to a USB flash drive through this program. If you don't use iTunes, the process is similar, but you have to manually find the music file in Finder.
Select the files in the iTunes library you want to copy. You can copy entire songs or albums, but not playlists. You can hold down the key ⌘ Command to select multiple files or press the key ⇧ Shift to select a file array.
- If using Finder, open the folder containing the music you want to copy, and select the files and folders you want to copy.
Drag the selected content to the USB icon on the screen. The file will be transferred to the USB. The original file is not deleted.
- If you want to move a file from Finder, hold the key ⌥ Option while dragging them to the USB drive. The original file is still saved on the computer, the data on the USB is a copy. You don't need to do this if you use iTunes.
Wait for the data to transfer. This can take a long time if you are copying a lot of music files.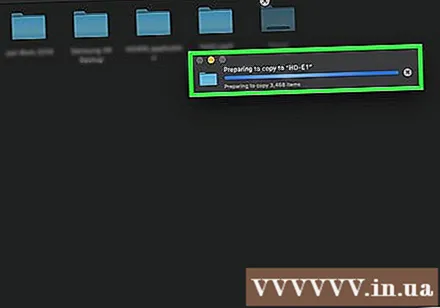
Drag the USB to the Trash. After completing the data transfer, drag the USB to the Trash to safely disconnect it.
Remove the USB from the Mac. After dragging the USB icon to the Trash, you can remove the USB from the machine without fear of data corruption. advertisement
Method 4 of 4: Fix the problem
Try a different USB port. Many times the USB port is damaged so the USB drive won't work, try plugging the device into a different port on the computer.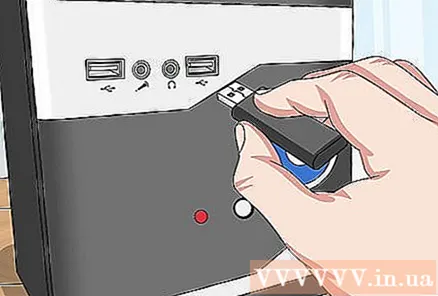
- Avoid using the USB extension port as it may decrease data transfer speed.
Try the USB on another computer. If the USB flash drive appears when you plug it into another computer, then the problem is with your computer and how you connect the device to the computer. You should try updating or reinstalling the USB driver, or maybe the USB is damaged.
Look for the USB in Disk Management (Windows) or Disk Utility (Mac). Although the USB flash drive does not appear, it is probably still connected to your system. If you see the USB flash drive in Disk Management or Disk Utility, you can format and use it.
- Windows - Press the key ⊞ Win+R and type diskmgmt.msc. Find the USB drive in the list of devices at the top of the window, or in the volume view at the bottom of the window.
- Mac - Open the Utilities folder in Applications, then run Disk Utility. Look for the USB drive in the list of drives on the left side of the window.
Reformat the drive when it appears in Disk Management or Disk Utility. If the drive appears in the drive utility, the device is most likely not in an operating system-compatible format. Formatting the drive with exFAT file system allows you to use USSb on both Windows and Mac. All data stored on the USB will be deleted during the format.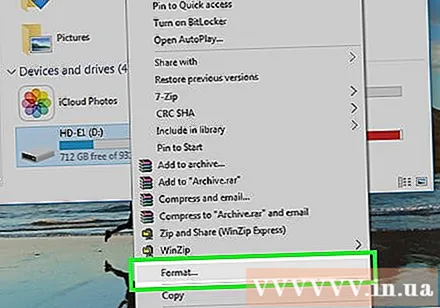
- Windows - Right-click the drive in Disk Management and select "Format". Choose the "exFAT" file system as it is a format compatible with most computers and devices.
- Mac - Select the USB key and click the "Erase" tab. Choose "ExFAT" in the Format menu and click the "Format" button.
Make sure you are not trying to copy too much. If you receive a message saying that there is not enough free space, you are copying too much. Make sure the USB flash drive has enough memory to store the file of your choice. Note that actual memory is typically less than advertised memory. The following is a list of the maximum number of songs you can store on each device with their respective capacity. advertisement


