Author:
Louise Ward
Date Of Creation:
3 February 2021
Update Date:
1 July 2024
Content
Overlay is a creative way to create a new background for an image, stitch two photos together, or create a scene with a celebrity. Whether you want to decorate a greeting card, or joke with someone with fake photo collages, you can use free software to make them. Read the following article to learn the technique of stacking.
Steps
Method 1 of 3: Simple Photo
- Apply this method with simple collages. You can apply this method if you just need to stitch multiple small photos into one larger image, quickly and easily. This is not very technical, so you can completely follow it if you want to create a fun holiday card or other simple things without spending too much time.
- For best results, download free image processing software like GIMP, Paint.NET, or Pixlr. If you own professional photo editing software like Photoshop or Paint Shop Pro, you can learn how to use them, but buying these software is not necessary.
- Because this method only requires a few tools available in basic editing software like Windows Paint. HoweverYou may not be able to use the "brush tool" for advanced editing. And without the "layer" function, you will have difficulty editing photos.
- First, open the background image. This is an image that is used as the backdrop of a good image that is superimposed. In the editing software, select File → Open the image.
- Select File → Save As to save as a new file if you want to keep the original image. You can perform the above step after finishing editing, but if you do it first you won't have to worry about forgetting to save or overwrite the original photo.
- Open the photo you want to overlap. You will place this photo on top of the background image. Using the software in the above step, open the second image in a new window. Select File → Save As to save it as a new file, avoiding changes to the original image.
- Select the circle selection tool. You will see a column of different buttons, usually on the left side of the screen. These are tools. Click the circle icon, or dashed oval, usually above the tool column.
- You can mouse over each tool to see its name. The name of this tool is usually "ellipse selection", "ellipse select", or similar names.
- If you can't find a selection tool, you can use the string "lasso tool" or the square "rectangular selection" tool instead.
- Click and drag around the image area you want to move. Drag the mouse around the figure of the person, animal, or an area of the image you want to overlap the background image. Choose areas of the image that are interesting, with objects in the center, and avoid selecting unreasonable parts (such as someone's arm appearing at the edge of the image).
- Most image processing software have an Invert Selection command that allows you to select the entire image except the part you localize. This command comes in handy if you want to check the selected area: use Ctrl + Shift + I (or command + Shift + I on a Mac) to invert the selected area, then choose Edit → Cut (Cut) to erase leaves only the area you want to move. You can choose Edit → Undo to go back to the previous step and try to select a different area of the image.
- If you do not agree with any area of the image, you can follow these steps to Overlay a Detailed Image.
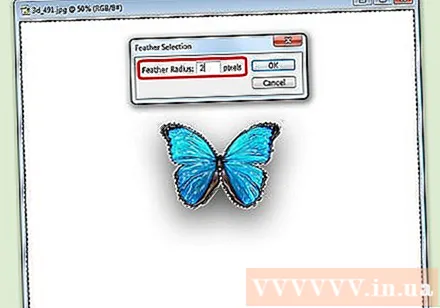
Soften the edges of the selection (optional). The selected image area may look a bit stiff or have odd edges, which can result in the final image looking unnatural or overly revealing corrections. You can make this adjustment using the "feather tool" or "feather setting" to soften the edges of the image, with each software you will have to use different ways to access the image. Access this tool:- In Photoshop, right-click in the selection and then select the Feather button.
- In Gimp, use the menu above: select the Select → Feather button.
- In Paint.NET, you need to download the Feather Plugin and open the plugin menu to use this tool.
- In Pixlr or Paint Shop Pro, click on the selection tool and change the brush settings before start to select the image area.
- With any software, you will find the number input that adjusts the softness of the brush, in pixels. With this method, choose 1 or 2 pixels to avoid losing detail.
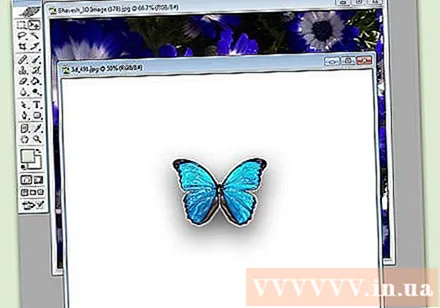
- After selecting the desired photo area, copy and paste in the background image. You can choose from Edit → Copy and Edit → Paste commands, remember to choose a previously opened background image to paste the photo.
- If you mistakenly copied an unselected area, you need to use the Invert Selection command to select the correct selected area.
- Resize and position to drag photos. Select a scroll tool, with the mouse pointer icon or four-point compass, then click and drag the overlapping image to the desired position. If you need to resize the background image, follow these steps:
- Select File → Free Transform (or use Ctrl + T keys) to resize the image.
- A border appears around the image, and click and drag to the sides and corners to resize and shape. To keep the proportions correct, hold down the Shift key while dragging the corner.
- If you move the wrong image, check that you have selected the correct layer by choosing View → Layer or Window → Layer, then click on the layer containing the image. stack up.
- Choose File (File) → Save As (Save As) to save the result with a new name. Make sure you select the correct image containing your edits before saving. It is the first layer of the image.
- You can add photos by following the same steps as above, add as many photos as you like.
- To change the position between the two layers of the image, open the Layer section by selecting View → Layers or Window → Layers in the menu at the top of the screen, then scroll. move the thumbnail in the list until it looks satisfied. The bottom layer is the background image, and the top layer is the cover.
Method 2 of 3: Detailed Image
- Examine the complexity of the original image to decide which steps you should follow. This method will guide you to use the "magic wand" tool, which allows you to quickly remove areas of a specially colored image so that you can separate the area you want to move. However, this tool is more effective on images with simple background colors, with little shadow, or when the area of the image to be moved has a border separate from the background.
- If the area of the image you want to select has a complex background, you should skip to the "Use selection tool" step in this method and outline the area you want to move with your mouse.
- For a quick, easy method without merging images, see Quick Stacking of Pictures.
- Download a free photo editing software. The most effective way to stack images is to use image processing software. If you do not own professional software like Photoshop or PaintShop Pro, you can download alternatives like Pixlr, GIMP, or Paint.NET.
- If you are using a Mac, look for GIMP software on your computer before downloading it because it may be pre-installed on your computer.
- Among free software, GIMP is almost identical to the most professional software. If you just need to stack your photos, other software will be easier to use.
- Before trying to use the software listed here, make sure that they support the class functionality. Try searching for "Layers" in the Help menu of the software, or read the functional description on the website.
- This does not apply to MSPaint, Windows Paint, or Inkscape software.
Open the background image using the software. This is the image used as the background, the smaller images will be placed on top of this image.- If you double-click on an image and the software won't start, you'll need to open the software first, then use the File → Open command in the top menu to select the image file.
Create a new window and open the second image. This is an image containing the details to overlap the background image. If you choose File → Open, the image will automatically open in a new window. From now on, you can switch between two windows, click and drag a window to the corner of the screen if that makes it easier for you to edit. You can also resize individual windows by dragging in the lower right corner.- The easiest photo to edit is the one with the selected object in thin contrast to the background.
- Save the second photo under a different name. Select File → Save As, and change the image name. Now you can edit photos without worrying about damaging the original photos.
- You will need to select Save As and rename it to create a new file. If you selected Save only, or selected Save As but didn't rename the file, you are still editing on the original image.
- After saving a new file, be sure to save it as often as possible using the File → Save command to avoid losing your edits.
Select the magic wand tool to remove unwanted areas. Click on the magic wand tool on the toolbar on the left side. This is a tool that allows you to select a large array of colors within a certain range of monochrome by clicking anywhere in the image; The selected pixel establishes a baseline for the selected color range.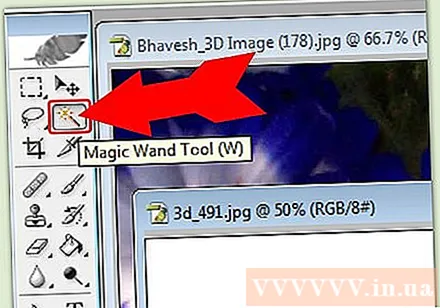
- The symbol of the magic wand tool resembles a wand that emits light. If you are not sure that you made the right choice, hover over each tool and wait to see the name.
- In GIMP, this tool is called "select blurring", and has a similar icon.
Adjust the magic wand settings. The settings section appears above the icon when you select the tool. Remember to check the box "Contiguous", then you only delete the image area adjacent to the selected pixel, not all areas of the same color band on the image. Adjusts tolerances consistently with the background and image resolution: a low tolerance limits the selected color area and matches a background with a similar range of colors, while a high tolerance chooses a wide color area. and suitable for high contrast images.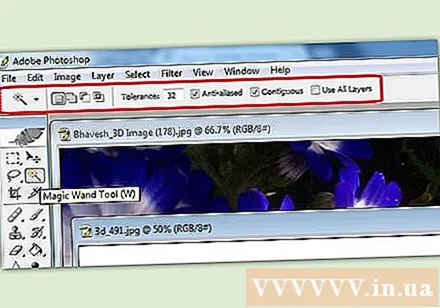
Select the area to delete around the image area you want to move. First, click on the colored pixels in the area you want to delete to localize the area with the same color range. You will see a flashing border around the area you selected. Hold down the Shift or Ctrl key while clicking on the neighboring areas until the entire area around the image area you want to move.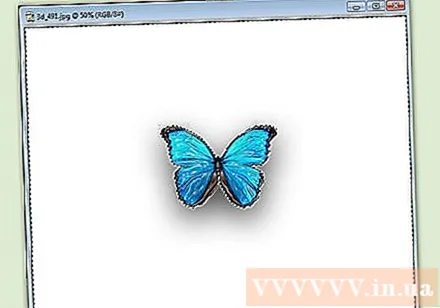
- You also need to adjust the tolerances a few times when doing this, applying the same setup as the wand tool. Small tolerance adjustments if you need to move a large image area, large tolerance if you only select a small area.
- Select Edit → Undo when the wrong area is selected. This allows you to go back to the previous step, not back to the original image. Alternatively, you can use the key combination: Ctrl + Z on a Windows computer, or command + Z on a Mac.
- If you cannot separate the image area to be deleted from the area to be moved, you can go to the "Use selection tool" step and localize the image yourself with the rope tool.
Soften the edges of the selection (optional). The selected image area may look a bit stiff or have odd edges, which can result in the final image looking unnatural or overly revealing corrections. You can adjust this by using "feather tool" or "feather setting" to soften the edges of the image, with each software you will have to use different ways to access the image. Access this tool: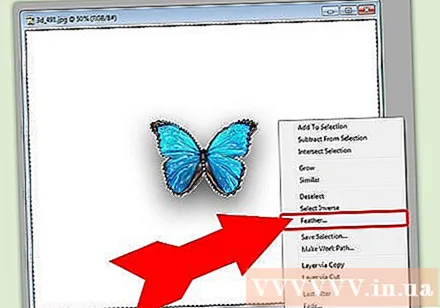
- In Photoshop, right-click in the selection and then select the Feather button.
- In Gimp, use the menu above: select the Select → Feather button.
- In Paint.NET, you need to download the Feather Plugin and open the plugin menu to use this tool.
- In Pixlr or Paint Shop Pro, click on the selection tool and change the brush settings before start to select the image area.
- With any software, you will find the number input that adjusts the softness of the brush, in pixels. With this method, choose 1 or 2 pixels to avoid losing detail.
Press the button Delete (Delete) to delete the selected area. You can choose the Edit → Cut command from the menu at the top of the screen. You should localize and erase instead of zoning the rest of the photo and erasing once. Doing so will help you avoid making mistakes along the way.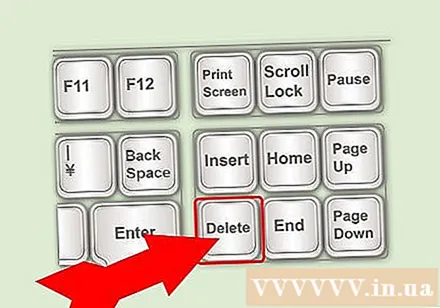
- When there is only a small portion left around the image area you want to move, you can zoom in to see the details clearly before erasing. The Zoom In Tool has a magnifying glass icon with a "+" inside it. You can also use the command: View → Zoom.
- When you clear the selected area, it will appear a "checkerboard" pattern or monochrome color. Either way, the coating will work just fine.
Select a selection tool. It is usually located at the top of the toolbar, with a square, circle or rope icon. The square or round tool will localize it exactly in its shape, while the rope tool can circle it in any shape. The rope tool easily avoids the area that does not need to be erased near the image area to be moved.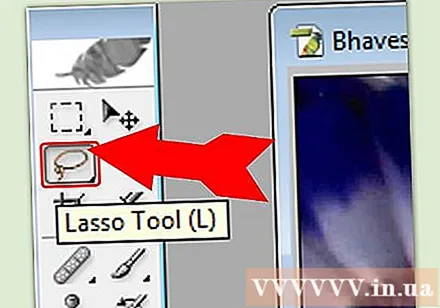
Click and drag around the image to select the area you want to move. If you remove the background, be sure to not delete unnecessary areas.You can add areas of monochrome color or grid pattern to replace them, and they won't get localized.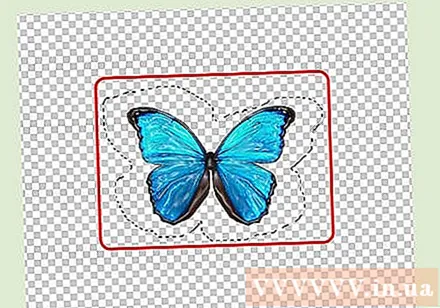
- If you cannot delete a complex background with the magic wand tool, enlarge the image with the View → Zoom command and slowly circle the image you want to move with the rope tool. This may take a few minutes, but will give better results. After copying and pasting the first area of the image into the new background image, continue using this tool to remove the excess area that you accidentally copied with.
Copy the selected area, switch to the background image window, and paste in. You can use the keyboard shortcut (Ctrl + C to copy, Ctrl + V to paste), or the Edit command on the menu. If the image looks too "sharp" or unnatural, go back to the previous step and increase the brush setting by a few pixels.
- See the instructions directly above, "Software Edge Software", to learn how to software the edges of a selected image area.
- If you have already pasted the image but you cannot see it appearing, open the Layers Palette with the command Window → Layer or View → Layer. You will see each layer through thumbnail images pasted on the grid pattern. Drag the pasted photo layer to the top, above the background photo layer.
Resize and position to drag photos. Select a moving tool, with an icon resembling a mouse pointer or a 4-point compass, then click and drag the selected area of the image to the appropriate location. If you need to resize the background image, follow these steps: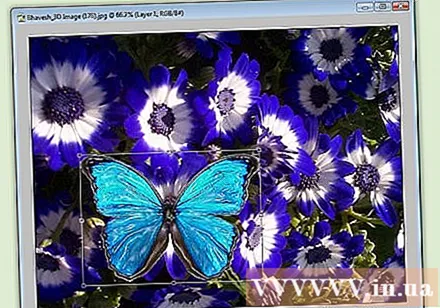
- Select File → Free Transform (or the keyboard shortcut Ctrl + T) to resize the image.
- A border will appear around the image, click and drag to the sides, or drag the corner to resize and shape the image. To keep the proportions correct, keep key Shift when pulling corners.
- If the action is wrong, check that you are editing in the correct layer using the View → Layer or Window → Layer command, then select the layer containing the cover image.
Choose File (File) → Save As (Save As) to save the result with a new name. Remember to save the cover photo. Don't accidentally select the window that contains the rest of the image after being cropped. advertisement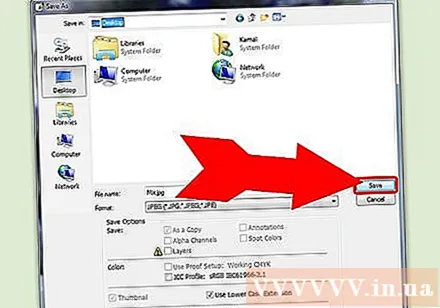
Method 3 of 3: Add Effects
- Open photo layer to husband. Open the Layer menu using the View → Layer or Window → Layer command and select the layer containing the image to overlap. You can try several options to change its appearance.
- There are many image processing software out there, and each has a variety of options. To find the popular recommendations below, or experiment with the effects yourself, choose the Filter and Layer menus.
Make the overlap image transparent with ghost effect. If the image is transparent, the result of stacking will also look better, especially when you use the Quick Overlay method. This is just a small adjustment that doesn't take long.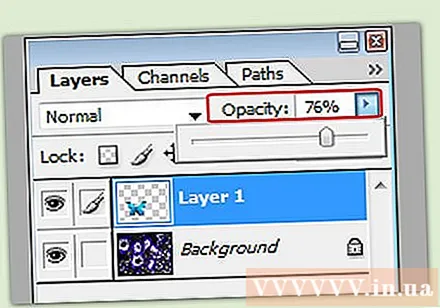
- Right next to the list of layers, where you can observe the previous actions, you will see a box called Opacity. Here you can enter a number from 0 (invisible) to 100 (completely opaque), or adjust the slider to gradually change the transparency.
- Add a drop shadow to link the overlaid image to the background image. Shadow effects to create shadows below the subject and make it look like part of the background, you should follow this suggestion for a more natural look.
- In GIMP, this function can be found under Filter → Light and Shadow.
- In Photoshop, look under Layer → Layer Style → Drop Shadow.
- Select the shadow layer to adjust. You can use the Filter → Blur command to reduce the sharpness of the shadow.
- You can use the Edit → Free Transform command to change the position and shape of the shadow to match the direction of the light in the background image.
- Try and add more effects. There are countless effects in image processing software. Try using the Blending Options to make the overlapping photo more natural, or use any other effect to make simple or artistic changes. advertisement
Advice
- You can use the eraser tool to erase any aberrations, or areas of the image that are far from the subject.
- The help dialog is very useful for learning how to use the tool.
- If a monochrome color appears after you've deleted the selected area of the background, and it hinders the localization of the rest of the background, open the Layer Palette using the command (View → Layers ), or Window → Layers and find the "Background Layer" item of the colored area.If you see the padlock icon, double click on it and choose OK to unlock it. you can drag it to the trash at the bottom of the Layer Separator Panel or right-click and select Delete Layer. Then you will see a grid pattern.
Warning
- Never overwrite the original image file.
- If you tried using the Invert Selection command mentioned above but the image colors became weird, then you mistakenly used the Invert command. Look for the Invert Selection command in the Select menu for most software, or use the keyboard shortcut Ctrl + Shift + I (command + Shift + I on a Mac).


")
