Author:
Virginia Floyd
Date Of Creation:
10 August 2021
Update Date:
1 July 2024

Content
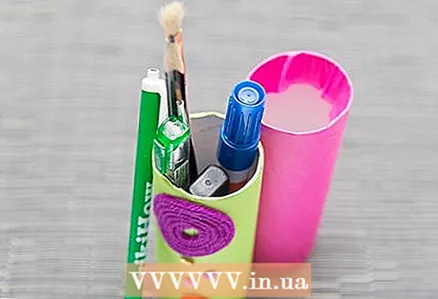
1 Used aluminum cans. Banks are perfect for the task at hand, as they have a suitable shape and can be found in any home. Don't throw the can away the next time you cook soup, vegetables, beans, or pineapples. Wash the jar and set it aside to make a stand out of it.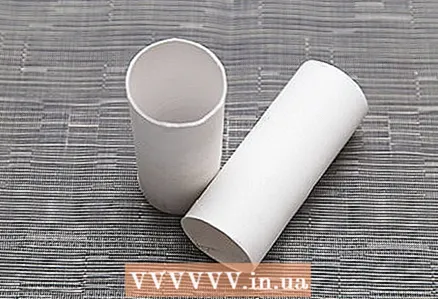 2 Toilet rolls. Such materials are available in every home. You can take more than one sleeve and make a custom-shaped stand assembly. You will also need to make a bottom for the stand, this is not at all difficult. Place the sleeve on a piece of cardboard and draw a circle with a pencil, then cut the cardboard and securely fasten the round bottom to the sleeve with tape. It doesn't look very pretty, but it doesn't matter now, as later the stand will need to be decorated with various materials.
 - If you want to make a stand from several bushings, then you need to attach a bottom to each of them. Assemble the design of their three to five bushings (be guided by your own wishes). In the stand, the bushings can be arranged in a row or in a circle. You can also trim some of the bushings to varying heights.
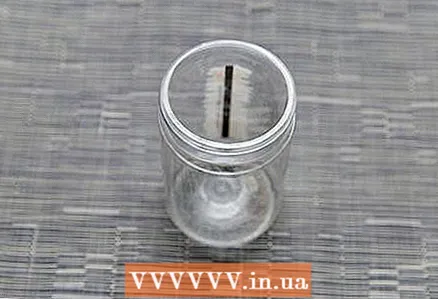
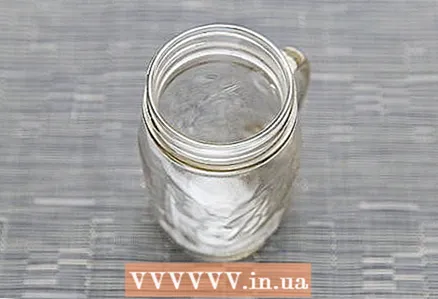 3 Glass jar. The canning jar can be used to make the perfect rustic stand, or to decorate and transform into a cute classic stand. If there is no old one in the house, then a new can can be bought in almost any large store. You can also use a sauce or other product jar or glass.
 - If there is a label on the can, then it should be soaked in water. Place the jar in a bowl of hot water. After an hour, try gently peeling or scraping off the label. If it doesn’t give way, then leave the jar in the water for another hour.
- It is best not to try to remove the label immediately, as it is usually firmly adhered to the jar. Hot water will dissolve the glue and keep the jar clean.
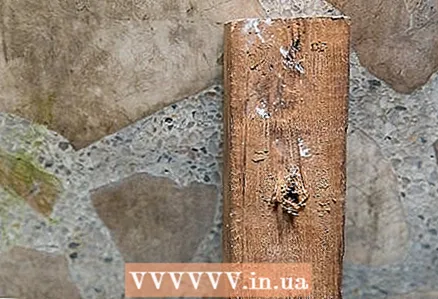 4 Wooden block. For the stand, you will need a wooden block of such a height that it fits a third of the height of the pencil (about 5-8 centimeters). Use a piece of wood or a thick branch. Saw off excess material to get the desired height. Take a drill bit (for example, 11 millimeters) and drill holes in the wood. Then sandpaper the stand to get a smooth surface.
 - The holes can be positioned arbitrarily. For example, make 15 symmetrical holes or drill holes in a random order.
 5 Plastic container. Use any tall, round or oval plastic container. Empty the container, carefully remove the label and the future stand can be decorated!
  6 Shampoo bottle. Don't throw away the bottle when you've used up all of your conditioner or shampoo. Wash and cut the container to use as a stand. Remove the cap from it and cut off the top quarter of the bottle. If the bottle is too tall or too low, then adjust the height as you see fit. Use scissors or a utility knife. Now you can decorate the bottle!
 - If the bottle is not completely round, then it will not be very stable. This stand can be hung on the wall. Use a textile fastener. Attach one part to the bottle, and the other to the wall. Try hanging a bottle holder over a table.
Part 2 of 2: Finish and Appearance
 1 Wash the container. Before starting finishing work, the stand must be thoroughly washed. If using glass or plastic, rinse the container with soap and water inside and out. The walls of the container must be clean so that they can be decorated. Blot and dry all surfaces of the future stand with a paper towel.
 - If you use a regular cloth towel, fluff may remain on the container, which will make the stand more difficult to decorate. Try using an old washcloth that has been washed many times, as it shouldn't have a lot of lint on it.
- If you are using wood or toilet paper roll, just make sure they are free of dust and dirt. You can wipe the sleeve with a slightly damp towel (but not too much, so as not to damage the cardboard). Take a cleaning brush and brush off any dirt and sawdust from the wood that may have remained after sanding.
- 2 Cover with paint. There are many ways to decorate your stand. One of them is to apply a solid layer of paint to the workpiece or draw patterns. If it initially looks unsightly (aluminum can), then first apply a uniform layer of paint with a spray can. Wait for the stand to dry and then paint with other colors. You can also coat the containers with chalkboard paint.
- Spray paint is an excellent base coat as it adheres better than conventional acrylic paint. Apply the paint in a well-ventilated area and remember that dust and insects can settle on the surface during the drying process, so ensure the safety of the workpiece.
- If you plan to apply multiple colors to the first coat of paint, choose a neutral color such as white or light gray to provide the necessary contrast.
- If you want to make a stand in a modern style, then use bright yellow, silver or white paint.
- 3 Use dyes. A transparent glass jar is difficult to paint on the outside because paint does not adhere well to it. But you can use dyes and paint the inside of the jar, giving it a nice look. There are a number of ways:
- To tint the glass (the surface remains transparent, but takes on a tint), use glue, food coloring and water. Take one teaspoon of all-purpose glue, three drops of food coloring (any color), and one and a half teaspoons of water. Mix all ingredients in a small bowl. If you need to get an unusual shade (like turquoise), then mix several colors (blue and green). Pour the mixture into a jar and close the lid tightly. Then shake vigorously to completely cover the inside of the jar with the solution. Turn the jar upside down and let the dye run down. When the bulk of the paint has drained, remove the lid and let the can dry for a few hours. You can also paint the outside of the jar using the same colored solution (the sides of the stand will be translucent).
- Heat the jar in the oven. Mix 10 drops of food coloring, two tablespoons of decoupage glue, and one tablespoon of water, then pour into a jar. Rotate the can until the dye covers the entire inner surface. Turn upside down and let sit for 30 minutes to drain down. Place the jar upside down on wax paper and place in an oven preheated to 100 degrees. Leave it to warm up for about 10 minutes, then remove the jar and turn it over, and then put it back in the oven for 20-30 minutes.
- Give the jar an antique look. Apply two coats of the desired color of ultra-matt paint to the outside of the can. Each layer must dry completely. Chalk paint is very suitable for such a task, because it fits perfectly on glass. When the paint is dry, take a small piece of sandpaper (200 microns) and sand the protruding parts. Apply a final coat of clear matte sealant to protect the paint from external influences.
- 4 Use a cloth or brown paper. Instead of dyeing, you can use cloth or even wrapping paper. Cut off the required amount of material. Hot glue it to the jar, or apply decoupage glue and spread the fabric over the glue.
- The decoupage adhesive will provide a good hold, but will give the material a wet look.If you are not satisfied with this result, then apply hot glue to the top, bottom and side edges of the stand, and then apply the material and make sure there are no bubbles or gaps on the surface of the can.
- To cut off the required amount of material, take a stand and place it on a layer of material. Place the jar on the fabric and mark the starting edge of the material on the stand itself. Then wrap the stand, marking the top and bottom along the entire length of the fabric until you reach the first mark on the stand. Next, mark the required length with a margin of two centimeters and cut the fabric according to the template.
- Take your cut fabric and wrap it around the can, starting at either end. The edge of the fabric should meet the beginning and the excess material should be cut off.
- You can also wrap the jar with plain white paper and then draw patterns using a marker, paint, or crayons. This option will allow young children to decorate their own stand without messing up the room.
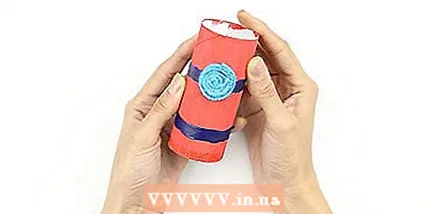 5 Decorate with twine or yarn. Sometimes you want to give your stand a rustic look. For this, you can use twine, twine or yarn. Select the material of the desired color and texture. Start from the bottom of the stand. Secure the beginning of the twine and continue to apply hot glue to wrap the can completely. Wrap to the very top and cut off excess material.
 - In the process, make sure not to leave gaps. Make one turn around the stand, then apply a bead of glue just above the twine. This will avoid gaps and gaps.
 6 Add embellishments. When the stand is covered with paint, cloth, paper, or string, add some embellishments. Make a sparkly or antique stand, apply a floral ornament. For a glitter stand, apply glitter directly onto wet paint or glue. Add lace at the neck or bottom of the can for a vintage look. You can also use old fashioned buttons. Make felt flowers to decorate the stand with floral designs.
 - You can also completely cover the new stand with twigs or wine corks. Another fun option is to wrap the stand with an old map or a map of the place you want to visit one day. Decorate the stand with tape to hide the unsightly edge of the fabric or paper. The options are truly endless!
 7 The stand is ready.
What do you need
- Stand at least 8 centimeters high
- Paint and brushes
- Decoupage glue or hot glue
- Textile
- Wrapping
- Other decorations


