Author:
Charles Brown
Date Of Creation:
10 February 2021
Update Date:
1 July 2024

Content
- To step
- Part 1 of 3: Getting to know the program
- Part 2 of 3: Drawing and painting
- Part 3 of 3: Mastering additional functions
- Tips
Windows comes with Microsoft Paint, the successor to Paintbrush. A simple, easy to use image editing program. With this program you can draw, paint and do basic image editing without having to use expensive, advanced software like Photoshop. Although MS Paint is not known as a particularly powerful program, it is surprisingly rich in features if you know where to find them.
To step
Part 1 of 3: Getting to know the program
 Start Paint. Just like other functions, opening Paint is slightly different in each version of Windows.
 - Windows 10: Click the Start button, then the Magnifier. Type paint, and select "Paint" when it appears as a search result.
- Windows 8: Swipe in from the right side of the screen and select "Search". Type paint. Select "Paint" when it appears as a search result.
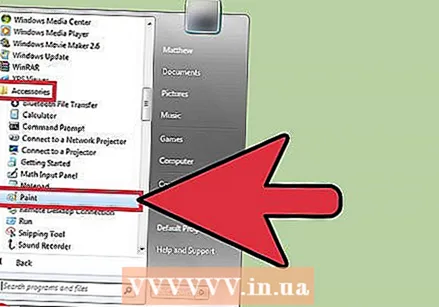
- Windows Vista and 7: Click the Start button, and open the "All Programs" group. Open the "Accessories" menu and select "Paint".
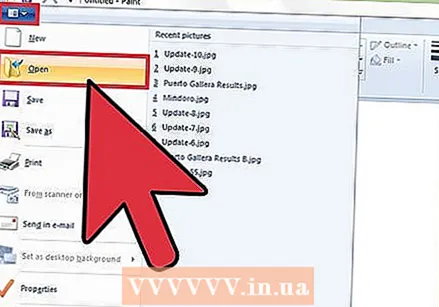 Open an image file. Paint can handle many different image types, including *. Bmp, .gif, .webp / .jpeg, .tif / .tiff, .ico, and .png. To open a file in Paint, click "File", then "Open". Navigate to the folder where your image file is saved and click "Open".
 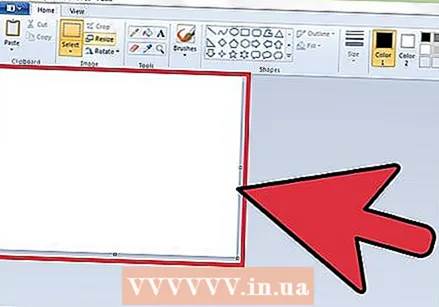 Understand the canvas. When Paint starts, you will see a white window appear on the screen. Imagine this white window as paper that you can draw or paint on. You can adjust the size of the canvas or canvas before starting your masterpiece.
 - Windows 7 and later: In the Start tab, click "Resize". Select "Pixels" and type in the desired size from the "horizontal" and "vertical" boxes. Or if you prefer to resize as a percentage, select "Percentage" and enter the percentage by which you want to enlarge or reduce the current image. For example, if you want to make the image 50% smaller, type 50 in each box. To double the current size, enter 200 in each box.
- Vista: Click on "Image" and select "Features". Enter the desired canvas size (in pixels) in the width and height fields.
 Crop an image. Open an image in Paint, and click the "Selection" tool in the main menu. Click once in the top left corner of that part of the image you want to keep and drag the mouse down to the right until the dotted square surrounds exactly that part. Release the mouse button and click "Crop".
 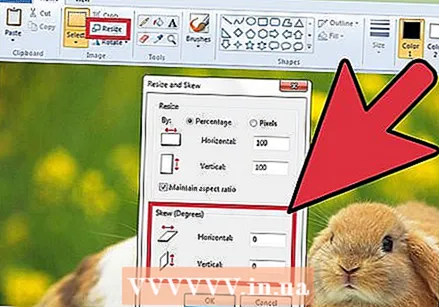 Resize an image. Click on "Image" and select "Resize / Slope" (in Windows 7 or later, click "Resize" in the main menu). You can also do this with the keyboard shortcut Ctrl+W. to display the Resize / Slant dialog box. Type in a new size (in pixels or as a percentage, as when creating the canvas) to change the size of the image.
 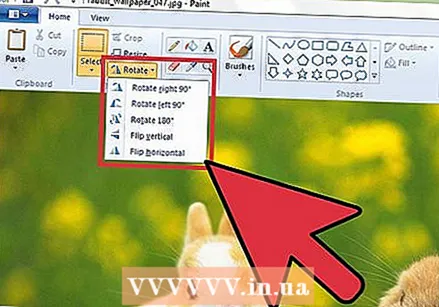 Rotate an image. To rotate an image (in one direction or another), use "Flip and rotate".
 - Windows 7 and later: In the toolbar, click "Rotate" and choose an orientation from the menu.
- Vista: In the "Image" menu, click "Flip and rotate", and select a direction to rotate or flip the image.
- You can also press Ctrl+R. to display the Rotate tool (any version).
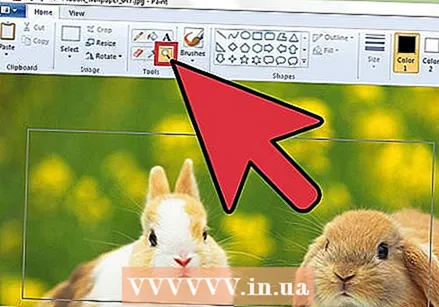 Zoom in and out. Click on the magnifying glass to activate Zoom. To zoom in, click anywhere in the image with the left mouse button. To zoom out, click the right mouse button. You can also use the keyboard for this, so Ctrl+⇞ PgUp to zoom in and Ctrl+⇟ PgDn to zoom out.
 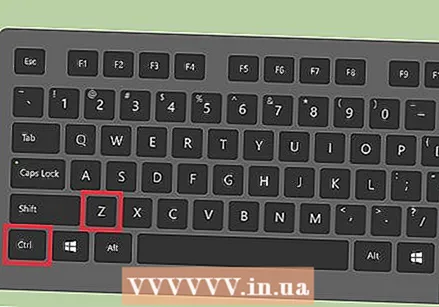 Learn to undo your mistakes. If you made a mistake using any of these tools, you can "undo" your action by tapping Ctrl+Z to push.
  Save your work. Click "File" and then "Save As" to choose a file name and save location. You will also be presented with the option to choose a file format. This depends on what you plan to do with the image. JPG is a good option for photos or images with many colors. If the image is low in color and detail, GIFs are versatile and small in storage space. If you want to use this image in Paint, you can save it as Bitmap (.bmp), the default file type.
 - You can always convert your images to another file format later. Read Convert images to JPG or other extensions.
Part 2 of 3: Drawing and painting
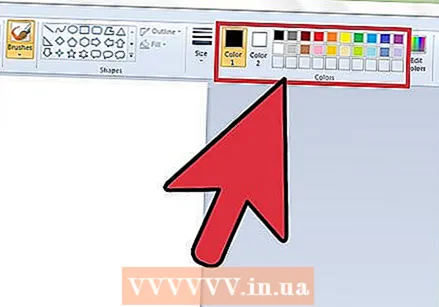 Get to know the color palette. The assortment of colored squares at the top of the screen is the color palette. By clicking on a color you select that color as the foreground color (main color) for each tool in Paint. You can also set a background color for when you start working with shapes.
 - Windows 7 and later: The foreground is called "Color 1", the background is "Color 2". To choose a foreground color, click "Color 1" and select a color from the palette. For the background color, click on "Color 2" and then on a color.
- Windows Vista or earlier: Locate the two overlapping colored boxes on the left side of the palette. The front box is the foreground color, the back box is the background. Set the background color by right clicking on the color of your preference.
 Draw a straight or curved line. Depending on your version of Windows, you will see the two line tools (Line and Round line) to the left or right of the main menu.
 - Draw a straight line by clicking the straight line tool, then choose a color from the palette. Click anywhere in the canvas. Hold down the mouse button and drag the mouse away from that first click in any direction. Release the button when the line is long enough to your liking.
- For a curved line, click on the symbol of the round line (a squiggly line). Draw a line as you did with the straight line tool. When you release the mouse button, click anywhere on the line and drag it in a direction so that the straight line will bend in that direction.
 Draw a free line with the Pencil. The pencil is a free-hand drawing tool, just like an actual pencil. The width of the line can be adjusted by clicking the Size menu and choosing a different line width. To draw, press the mouse button while moving the mouse over the canvas.
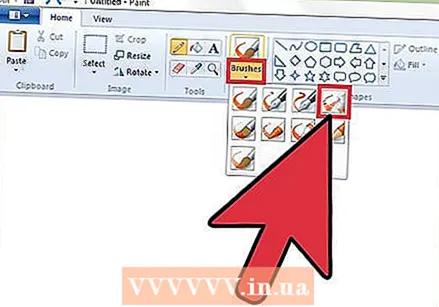
 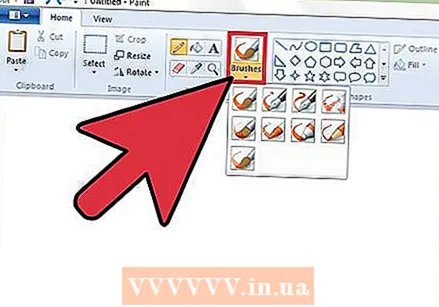 Paint with the Brush. The Brush is more versatile than the Pencil because you can choose different brush tips for more unique strokes.
 - In Windows 7 and later, click the down arrow under "Brushes" and choose one of the brush tips. You can adjust the size of each brush by clicking the "Size" icon.
- In Windows Vista and earlier, click on the Brush icon, then choose a brush shape from the menu that appears below the main menu. Select a color from the palette and drag the mouse to draw a design on the canvas.
 Use the Aerosol. This tool works in the same way as the Brush tool, but is more like an Aerosol Paint.
 - Windows 7 and newer: This tool can be found in the "Brushes" menu.
- Vista and earlier: Click on the symbol that looks like an aerosol can. Draw with it as you would with the Pencil or other brushes.
 Use the Eraser. To erase something you've drawn, click the Eraser Tool and swipe the mouse over the area you want to delete. As with the other tools, you can adjust the width of the Eraser Tool in the Size menu.
 - Note that the background color ("Color 2" in Windows 7 and later) will appear when you use the Eraser Tool. If you delete a red line on a white background, for example, make sure that the background color is also set to white.
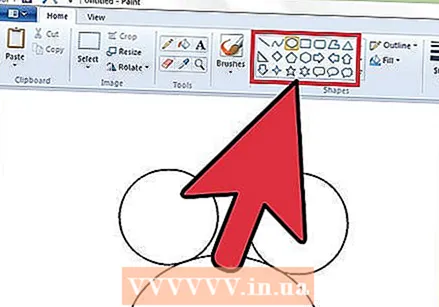 Create shapes. Select a shape from the toolbar that you want to draw to create that shape. Once you've chosen a shape, you will see a number of options for the shape's appearance.
 - In Windows 7 or higher, click on the "Outline" and "Fill" menus to view the (slightly more extensive) options. If you have Windows Vista or an earlier version, you will see the outline of a shape, an outline of a shape around a fill color, and a solid-colored shape.
- Select your preferred outline and fill, then click on the canvas where you want the shape to be. Hold down the mouse button while dragging the cursor to enlarge the shape. Release the mouse button when the shape is the size you want.
- Once you've chosen a shape and outline, the outline color becomes the current foreground color. If your color has a solid coloring, the fill color becomes the background color.
 Fill an area with the color. The fill tool, also known as the "Paint Bucket", paints an indicated area with a single color.
 - Click on the symbol that looks like an overflowing bucket and choose a color from the palette. Now click on the canvas to fill it with the color you selected.
- The fill tool will fill the space between all closed lines. Create a square or circle with the shape tool in a color, then use the fill tool to change the color of just that shape.
Part 3 of 3: Mastering additional functions
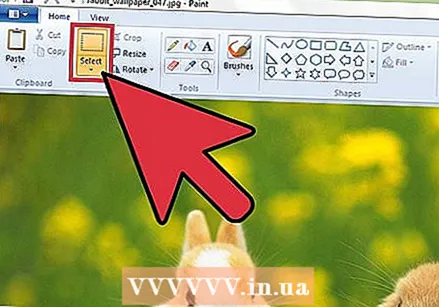
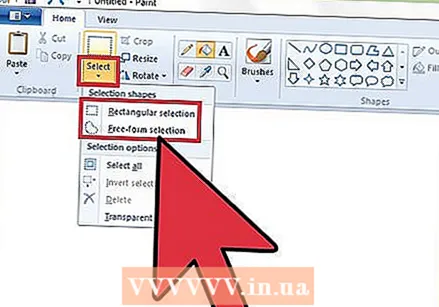 Get to know the different selection tools. There are several tools you can use to make a selection in your image: free-form selection (a dotted outline of an oval) and rectangular selection (a dotted outline of a rectangle). Freeform allows you to manually draw a selection around an image, while drawing a rectangle with the rectangular selection tool.
 - In Windows 7 and later, click the arrow below "Select" and then choose "Rectangular" or "Freeform". In Windows Vista and earlier you can see both in the toolbar.
- To use one of these tools, first click in the top left corner of the image, then hold down the mouse button while drawing a line around it. The rectangular selection is fast, but with the free-form selection you can indicate more clearly what exactly you want selected. Release the mouse button when you are done selecting.
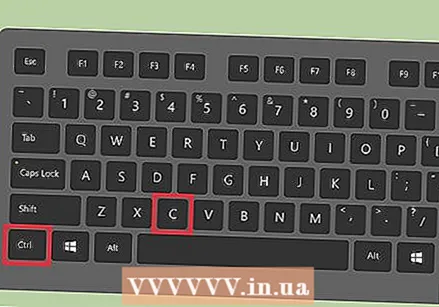 Copy and paste your selections. Copy the selected area by pressing Ctrl+C. to push. Now paste it elsewhere (in Paint or in other compatible programs, such as Microsoft Word or PowerPoint) by clicking in a new location Ctrl+V. to push.
 - If you don't want the background color to be part of your selection:
- Windows 7 and later: Check "Transparent selection" in the selection menu.
- Windows Vista or earlier: Look for the two icons with multi-colored shapes and a "selection" rectangle on top. Click on the selected bottom (transparent) of the two icons. To turn this off again, click on the top selected icon again.
- If you don't want the background color to be part of your selection:
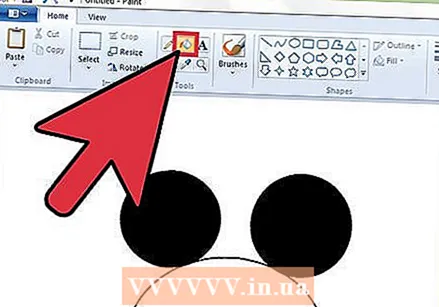
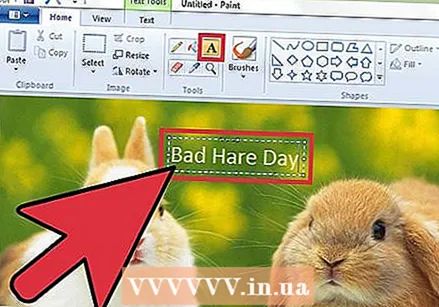 Add text. Select the Text tool, indicated by the letter "A", then double-click anywhere on the canvas to type text.
 - A dotted text field with square boxes appears in each corner. Make sure that the text in the text field is exactly right before you choose another tool (after closing the text field you can no longer change the text.
- To make the text field larger (so that you have more space for your text), hold the mouse over one of the square boxes at the corner until the cursor becomes an arrow, then drag the field larger.
- Choose a Font and Size from the main menu and start typing. To change the color, size, or font of the text after typing, select the text and choose a new color, size, etc. When you are done, type anywhere outside the text field to close the tool.
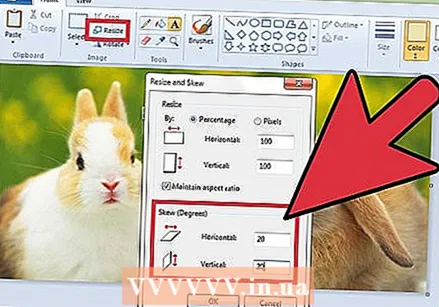 Stretch or distort an image. You can distort an image with the "Hellen" function. Click on "Image", and select "Resize / Slant" (in Windows 7 or later, click "Resize" in the toolbar). To stretch or distort the image by a certain degree, enter a value (in degrees) in the "horizontal" and "vertical" fields.
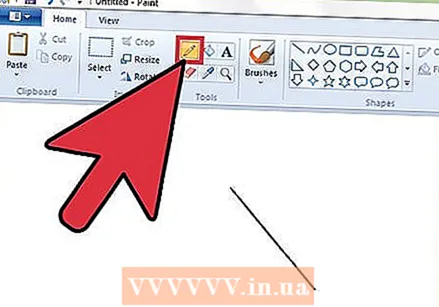
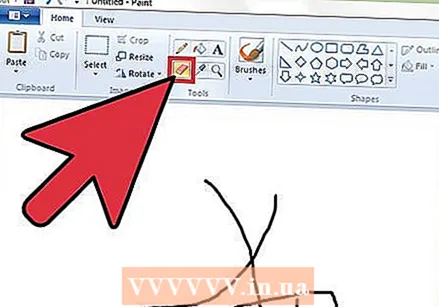
 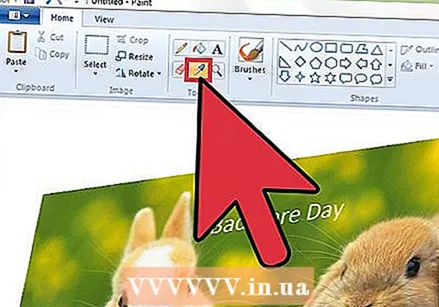 Use the color picker. The small eyedropper icon is the Color Picker. Click on this tool and then somewhere in your image. The area where you click now becomes the foreground color for the next tool you choose.
  Create your own colors. You can edit any of the colors by changing their hue, brightness, and other properties with Paint's color mixer. Click on "Edit Colors" or "Define Custom Colors" to open the color mixer. Once you have chosen a color you like, click on "Add to custom colors".
 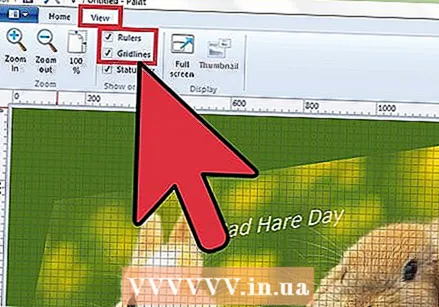 Use a ruler or grid. It's not easy to draw symmetrically with a mouse, so you can help yourself with guides. Click the "View" tab, and place a check next to "Ruler" for horizontal and vertical rulers around your canvas. Place a check next to "Gridlines" for a grid on your canvas. You can turn off both items at any time by removing the check marks.
  Learn key combinations. Keyboard shortcuts can greatly improve your productivity. Here are some of the best known:
 - To turn: Ctrl+R.
- New canvas: Ctrl+N.
- To cut: Ctrl+X
- To stick: Ctrl+V.
- To copy: Ctrl+C.
- Save: Ctrl+S.
- Remove: Del
- Print: Ctrl+P.
- Undo: Ctrl+Z
- Select all: Ctrl+a
- To open: Ctrl+O
- Again: Ctrl+Y
- Hide toolbar: Ctrl+T.
- Open features: Ctrl+E
- Stretch and tilt: Ctrl+W.
- Hide color bar: Ctrl+L.
Tips
- To create thicker lines with a tool, select a tool and press Ctrl++. To thin the line of a tool, use Ctrl+-.
- To constrain straight lines to 45 degree angles, hold down ⇧ Shift while drawing a line. If you want the Shapes tool shapes to have exactly the same dimensions on all sides, hold down the key ⇧ Shift while creating the shape to get this effect.


