Author:
Roger Morrison
Date Of Creation:
24 September 2021
Update Date:
1 July 2024

Content
- To step
- Method 1 of 3: Safely empty with trash
- Method 2 of 3: Change file permissions
- Method 3 of 3: With the terminal
Locking files is useful for controlling who can open or edit a file. While this is good for security reasons, it can cause problems when you want to delete locked file on Mac. Fortunately, there are some ways to delete hard-to-erase files and this is entirely possible from within the operating system.
To step
Method 1 of 3: Safely empty with trash
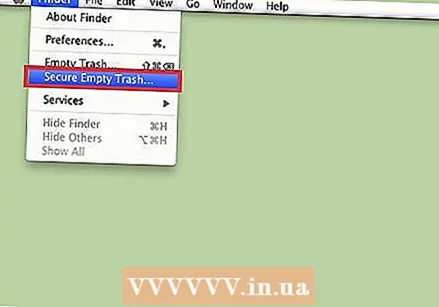 Know the difference between Empty Trash and Empty Trash "Safely". Safely Empty Recycle Bin is a safety feature of Apple to ensure that indexing sensitive files are removed from the hard drive and overwritten the space they occupy. Due to the way solid-state drives store data, this method is less reliable on solid-state drives and is thus being phased out by Apple.
 - The Safely Empty Recycle Bin option has been removed in OSX 10.11+.
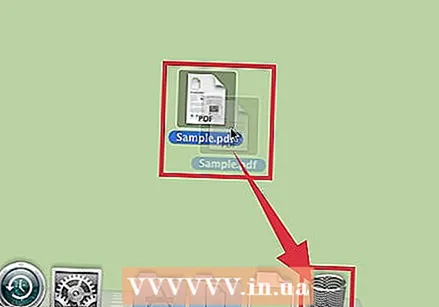 Move the file to the trash. Drag the locked file to the trash.
  Safely empty the trash. Open the trash can in the finder and select "File> Safely Empty Trash". You can also open this with "Ctrl + Click> Safely Empty Trash ". The file should be deleted without any problem.
Method 2 of 3: Change file permissions
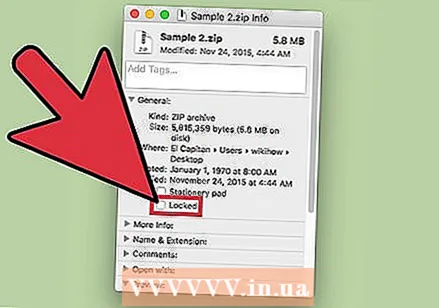 Check the lock status of the file. Select the file and go to "File> Get Info". A check box marked "Locked" will display the current status of the file. If the box is not gray, you can simply check it and try to delete the file again. If the box is gray, it means you don't have the necessary permissions on the file.
  Open the inspector. Press Option, hold down and go to "File> Show Inspector" (holding down the Option key will change "Get Info" in the menu to "Show Inspector"). In this menu, press the triangle next to "Property and Permissions" to expand.
 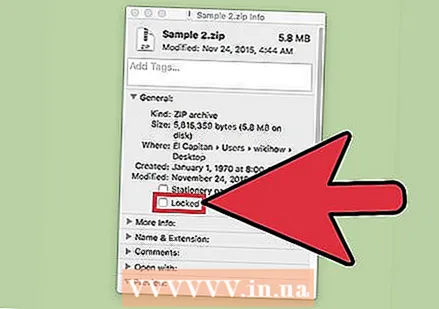 Unlock the options. From here you can view the file permissions, but to change them you have to press the lock icon first. You will now be asked to enter your administrator password.
  Change the permissions to unlock. Press "You Can" and select the "Read and Write" option. With this change, the check box next to "Locked" should no longer be cleared. Clear the check box and delete the file normally.
Method 3 of 3: With the terminal
 Open the terminal. Go to "Applications> Applications> Terminal" to open it. The terminal makes it possible to execute commands with code in the operating system. Use the tag “sudo” to access the root directory. After entering a command, you may be asked to enter your administrator password before executing the command.
  Change the lock status. Enter “sudo chflags nouchg [path to file]”. This should change the locked state of the file.
 - For example: “sudo chflags nouchg ~ / Applications / Microsoft Word / test.doc”.
- You can also drag the target file in the terminal window to enter the file path automatically.
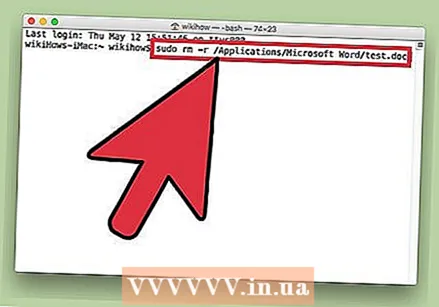 Force delete the file. If nothing works, there is another terminal command to force the file to be deleted. Enter “sudo rm -r [path to file]”. In most cases, this command will delete the file once a password has been given by an administrator.


