Author:
Frank Hunt
Date Of Creation:
13 March 2021
Update Date:
27 June 2024
Content
Excel can automatically recognize text that uses a tab as a separator (tab delimited) and place the data in separate columns appropriately. If this does not work, and everything you paste will be placed in the same column, then the Excel separator is set to a different character, or there are spaces instead of tabs in your text. The "Text to Columns" utility in Excel can quickly choose the correct separator and distribute the data across the correct columns.
To step
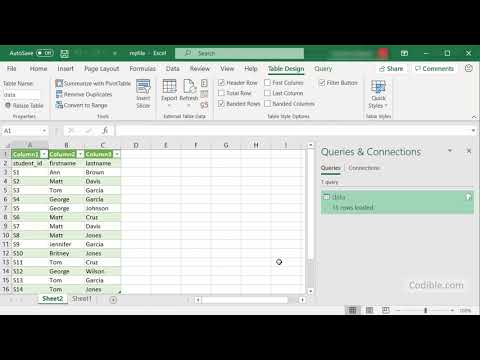
 Copy the tab-delimited text. Tab-delimited text is a format for saving data from a spreadsheet as a text file. Each cell is separated from the others by a tab, and each entry is on a separate line in the text file. Select all the text you want to copy to Excel and copy it to the clipboard.
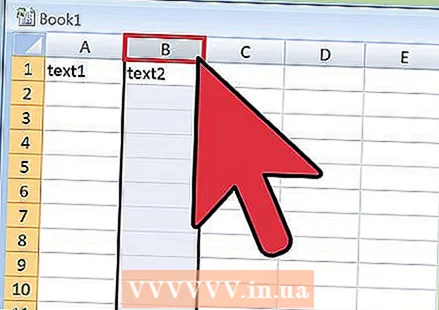
  Select the cell in Excel where you want to paste the data. Select the top left cell where you want to place the pasted data. Your pasted data will fill the cells below and to the right of the first cell.
  Paste the data. In newer versions of Excel (and if your data is properly separated with tabs), the cells should be correctly filled with the correct data. Each tab should result in the entry of the entry in a different cell. If all data is in a single column, the data may not be separated by tabs, but by another character, such as a comma. You can correct this by using the Excel Text to Columns utility.
  Select the entire column of data. If your tab-delimited data is not pasted correctly, you can use the Excel utility "Text to Columns" to correct it. You do this by selecting the entire column with all the data you pasted.
 - you can quickly select the entire column by clicking the letter at the top of the column.
- You can only use Text to columns per column.
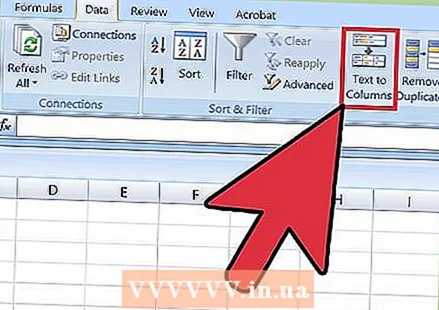 Open the Data tab and click "Text to Columns". You can find these in the Data Tools group in the Data tab.
 - If you are using Office 2003, click the Data menu and select "Text to Columns".
 Select "Separated" and click "Next". This makes it clear to Excel that it should look for a specific character to mark the separations between cells.
 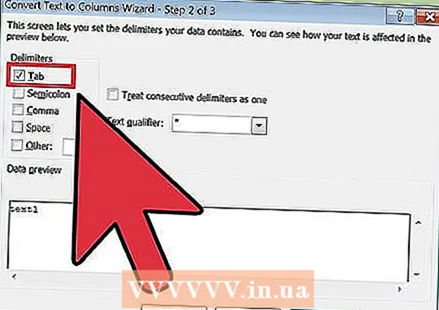 Select the separator. If your data is tab-separated, check the "Tab" box and uncheck the other boxes. You can choose a different separator if your data is separated by another character. If your data is separated by multiple spaces instead of a tab, check the "Space" box and the "Consider double delimiters as one" box. Note that this can cause problems if spaces are part of your data without being a column separator.
 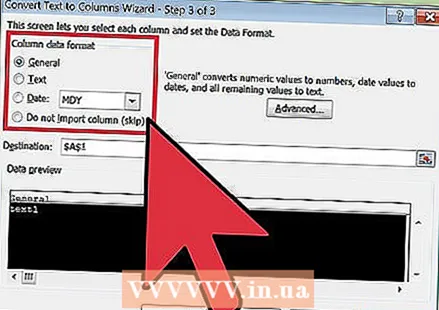 Choose the format of the first column. After selecting the separator you can choose the format for each of the columns that will be created. You can choose from "Standard", "Text" and "Date".
 - Choose "Standard" for numbers or a combination of numbers and letters.
- Choose "Text" for data that consists only of text, such as names.
- Choose "Date" for data in standard date format.
 Repeat this for the other columns. Select each column in the frame at the bottom of the window and choose the order. You can also choose to skip the column when importing / converting.
 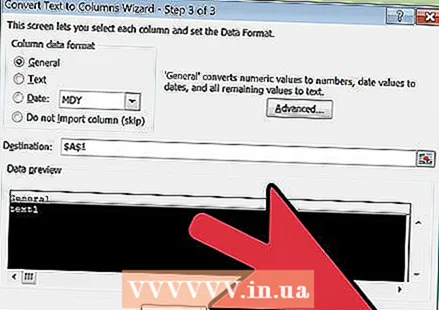 Close the wizard. Once you have formatted each of the columns, click Finish to apply the new separator. Your data will be split into columns according to the settings of the "Text to Columns" utility.


