
Content
- To step
- Method 1 of 2: Loosen the old seal
- Method 2 of 2: Remove residual silicone sealant
- Tips
- Necessities
- Loosen the old seal
- Remove residual silicone sealant
Silicone sealant is a flexible type of sealant often used to seal openings in damp areas such as kitchens and bathrooms. Unlike regular sealing, which requires special solvents to remove it, lines of silicone sealant can be easily stripped with a few simple tools. Simply heat the seal with a regular hair dryer for 30 to 40 seconds to soften it. Then cut into it with a utility knife and gently pull it up as much as possible with pliers. When you're done, wipe the area thoroughly with mineral spirits to remove any remaining residue.
To step
Method 1 of 2: Loosen the old seal
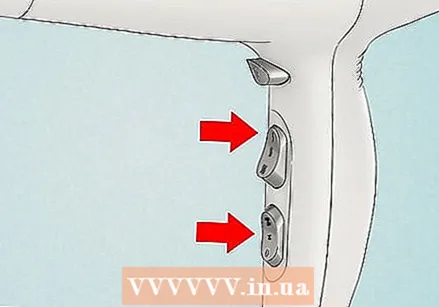 Take a hair dryer and turn it on the lowest heat setting. You probably have one of the most effective silicone sealant removal tools in your own bathroom right now: a regular hair dryer. A blow dryer can generate enough heat to soften old hard silicone sealant without the risk of damaging surrounding surfaces.
 - To work safely and save energy, it is a good idea to start with the lowest heat setting and use a warmer setting if necessary.
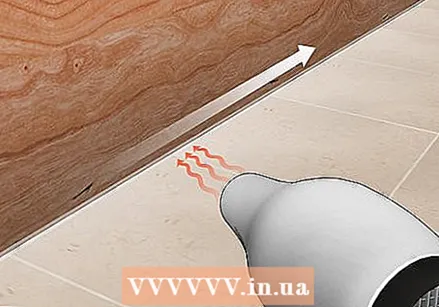 Heat the seal for 30 to 40 seconds. Turn on the hair dryer and place the nozzle directly against the start of the old seal you want to remove. Slowly move the heat flow back and forth over a section of 8 to 12 inches to warm it up.
 - Within about half a minute, the heat from the blow dryer will have partially melted the seal, making it gummy and flexible.
- If the hair dryer doesn't seem to have much effect after about 40 seconds, turn it on to the next highest heat setting.
Warning: Prolonged exposure to heat can cause permanent damage to plastics and similar materials, so be careful not to heat in the same area for too long.
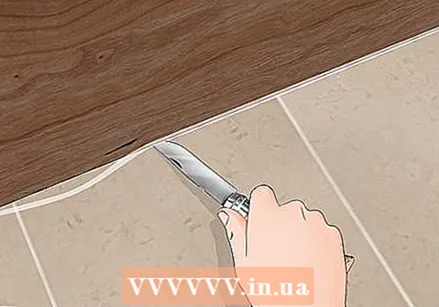 Cut the seal every 5 to 7 cm with a utility knife or razor blade. Slightly drag the blade of the razor or utility knife across the width of the seal line, taking care not to scratch the material on either side. Once you've separated the softened seal, pry one end up with the tip of the knife.
 - A hobby knife is the best option for this, as the long handle and thin blade offer more precision and control.
- For safety reasons, it is not recommended to use a separate razor blade for cutting. However, if you have no other option, wear thick gloves to protect your hands and work with caution.
 Pull up as much of the seal as possible with pliers. Place the knife or razor on your work surface and grasp the loose end of the seal with pliers. Then peel back the seal to remove any part of it.
 - Do not twist or pull on the seal as it rises. This increases the chance that it will be broken into smaller pieces, which you will then have to remove individually.
- If you don't have pliers handy, you can try to strip the seal with your thumb and index finger - don't forget to put on gloves first!
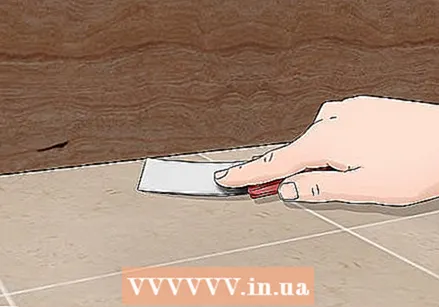 Loosen the remaining seal with a putty knife or glass scraper. Chances are you will encounter at least one stubborn part of the seal that refuses to give way. When this happens, simply place the end of the scraper under the seal at a shallow angle and push it forward with short strokes. The seal should then come off without any problems.
 - If you don't have any of these other tools on hand, buy an inexpensive grout removal tool from a DIY store. These are usually made of hard plastic and cost no more than a few dollars.
Method 2 of 2: Remove residual silicone sealant
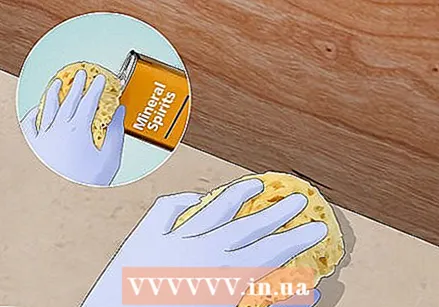 Wet the entire area with turpentine. Dip one corner of a scouring pad or sponge in a container of turpentine and apply the solvent directly to the affected surface. This can be done with all types of applicators, but you will get the best results using an abrasive object as the rough texture will wear off stubborn residue.
 - Turpentine can cause mild irritation if it gets on bare skin. Make sure to put on disposable gloves before starting work.
- If the residue is showing signs of mold, consider using bleach instead of turpentine.
 Let the cleaner sit on the work surface for up to five minutes. Give the turpentine or bleach a few minutes to soak in completely. As it sets, the remaining pieces of seal are eaten away, which you can then easily wipe off.
 - Both turpentine and bleach give off powerful fumes that can be harmful if inhaled. Open all doors and windows in your workspace and run the air conditioner or a fan while you soak the seal to create as much ventilation as possible.
Tip: If you still have trouble breaking up stuck-on residue, try covering the residue with rags soaked in rubbing alcohol and leaving it overnight.
 Scrub the area thoroughly to remove all traces of sealant. Dig firmly into the residue and press into the scouring pad with your fingertips for extra strength. For a more efficient cleaning, make sure that each part is thoroughly soaked with turpentine or bleach.
 - The seal is designed to stay in place after it has been applied so it may take some patience and strength to get the last bit out.
 Rinse and dry the area before applying new sealant. Once the work surface is clean, wipe it thoroughly with warm water to rinse out the turpentine or bleach. Let the exposed grout air dry overnight, or use a hair dryer to speed it up. Then it is ready to be resealed.
 - It is important to make sure there is no seal or mold on the area. If any residue remains, the new seal may not adhere properly.
Tips
- A simple hair dryer can save you valuable time and money compared to many sealant removers that cause more mess.
- If you are unsure whether you can remove the old silicone seal without causing damage, hire a qualified sealant to lend a hand.
Necessities
Loosen the old seal
- Hairdryer
- Craft knife or razor blade
- Needle nose pliers
- Putty knife or glass scraper
- Kit remover (optional)
Remove residual silicone sealant
- Scouring pad or sponge
- Turpentine
- Clean lint-free cloths (optional)
- Bleach (optional)


