Author:
Roger Morrison
Date Of Creation:
22 September 2021
Update Date:
1 July 2024
Content
Nowadays you may find MP3 players and smartphones everywhere, but sometimes it can be useful to just have your music on a CD. Whether it's playing music in your car or on your stereo, the ability to burn your favorite songs to a CD ensures that you always have access to your favorite music.
To step
Method 1 of 3: iTunes
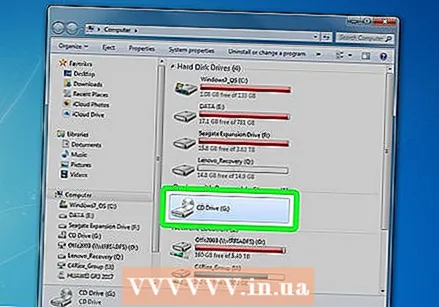
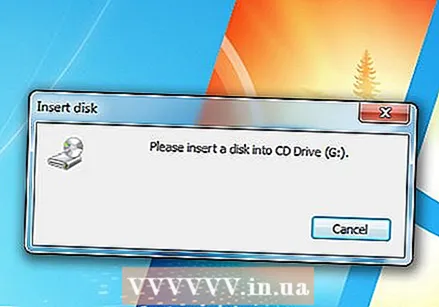
 Insert a CD-R into the computer. Almost all modern computers are equipped with a CD / DVD burner. You may run into a problem with an older machine, but a computer made in the last 10 years will likely have it. Netbooks without a player need an external burner.
 - If you want to burn an audio CD, you need a CD-R. This can be described, but not rewritten again. A CD-RW can be overwritten, but many players cannot play it, so avoid such discs if you want to create an audio CD.
- The more expensive CD-R lasts longer and is less prone to errors. The best-known brands are Memorex, Phillips and Sony.
- Although you can burn an audio DVD, there are few devices that can play these discs. Avoid this format if you can play the music on as many devices as possible.
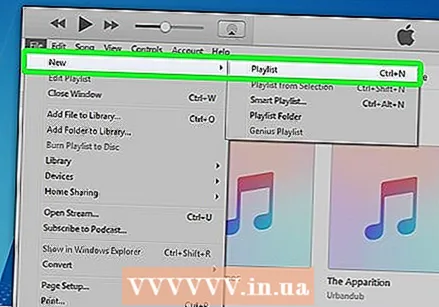 Create a new playlist. CDs can be burned from playlists. Click File → New → Playlist. You can give the playlist a name, which will be the name displayed by the CD player when you put the CD in the player.
 - You can create a new playlist in Windows by pressing Ctrl | N or on the Mac by pressing Cmd | N.
 Add songs to a playlist. Once you've created a playlist, you can start adding or removing songs. Click and drag songs from your Music library to the playlist.
 - Pay close attention to the length of the playlist. Most audio CDs can hold up to 74 minutes of music, some up to 80 minutes.
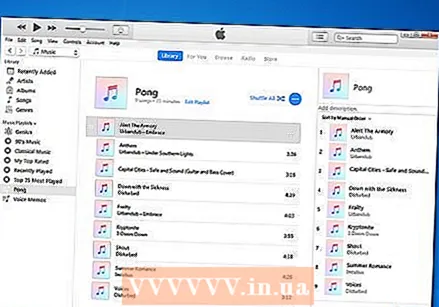 Organize your playlist. Before burning, it is a good idea to arrange the list of songs in the order you want to hear them when you play the CD.
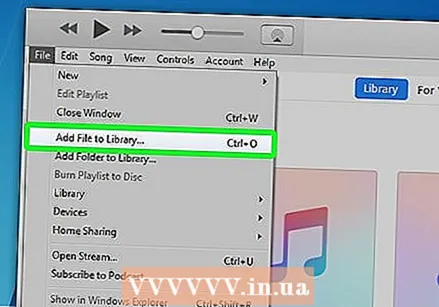
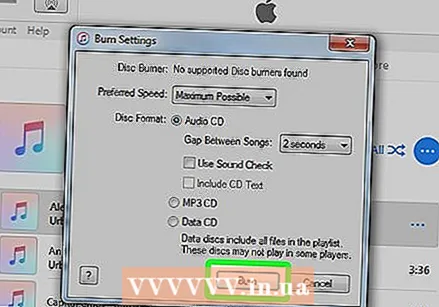
  Start the burn process. Click File → Burn Playlist. This will open the Burn Settings window. Make sure "Disc Format" is set to "Audio CD".
 - If you want the song titles to be also displayed on your CD player, check the "Include CD Text" box.
- By default, iTunes will have a 2-second pause between each track. You can change this to 0 or another value. These seconds are added to the total playing time.
- Slowing down the writing speed can help prevent errors on older computers.
 Wait for the burn to finish. Depending on the speed of your burner, this can take a few minutes. When it is done, your CD will likely be ejected.
  Test the CD. After the burning process has been completed, you can start testing the CD. If it all sounds good and the tracks play well, you can label it and share it with others or use it yourself.
Method 2 of 3: Windows Media Player
 Insert a CD-R into the computer. Almost all modern computers are equipped with a CD / DVD burner. You may run into a problem with an older machine, but a computer made in the last 10 years will likely have it. Netbooks without a player need an external burner.
 - If you want to burn an audio CD, you need a CD-R. This can be described, but not rewritten again. A CD-RW can be overwritten, but many players cannot play it, so avoid such discs if you want to create an audio CD.
- The more expensive CD-R lasts longer and is less prone to errors. The best-known brands are Memorex, Phillips and Sony.
- Although you can burn an audio DVD, there are few devices that can play these discs. Avoid this format if you can play the music on as many devices as possible.
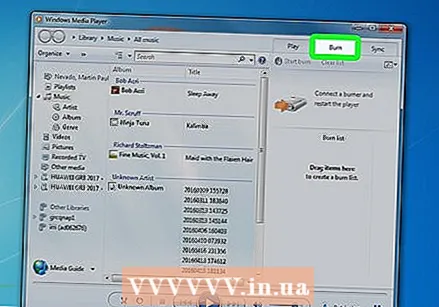 Click the Burn tab. It can be found on the right side of Windows Media Player, between Play and Sync. This will open a list for adding numbers.
 - If Windows Media Player is in Now Playing mode, you will need to switch to Library mode by pressing Ctrl | 1.
 Add music to the CD. Click and drag songs, albums or playlists from your library. If you have an empty CD-R in the burner, you will see a bar at the top of the list, which indicates how much space is left on the CD.
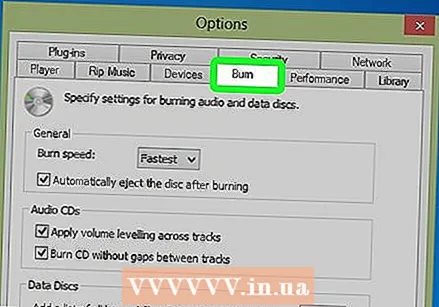
  Specify the settings for burning. Click the Tools menu and select Options. Click the Burn tab. Among other things, you can set the CD to be ejected automatically when burning is complete, the volume should be equal for all tracks on the CD, or burn without a pause between songs. If you are satisfied with your settings, click Apply and then OK.
 - Slowing down the writing speed can help prevent errors on older computers
 Burn the CD. Click the "Start burn" button at the top of the Burn tab. Your CD will be burned automatically according to the settings in the options indicated. Depending on the speed of your burner, this can take a few minutes.
  Test the CD. After the burning process has been completed, you can start testing the CD. If it all sounds good and the tracks play well, you can label it and share it with others or use it yourself.
Method 3 of 3: RealPlayer
 Insert a CD-R into the computer. Almost all modern computers are equipped with a CD / DVD burner. You may run into a problem with an older machine, but a computer made in the last 10 years will likely have it. Netbooks without a player need an external burner.
 - If you want to burn an audio CD, you need a CD-R. This can be described, but not rewritten again. A CD-RW can be overwritten, but many players cannot play it, so avoid such discs if you want to create an audio CD.
- The more expensive CD-R lasts longer and is less prone to errors. The best-known brands are Memorex, Phillips and Sony.
- Although you can burn an audio DVD, there are few devices that can play these discs. Avoid this format if you can play the music on as many devices as possible.
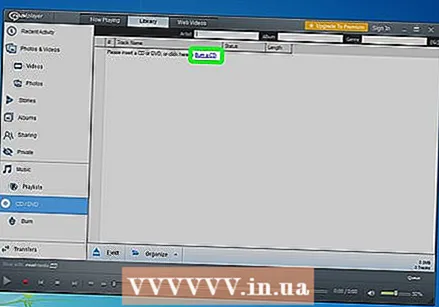
 Click the Burn tab. You can find this at the top of the RealPlayer window. This will open the taskbar on the left side of the window.
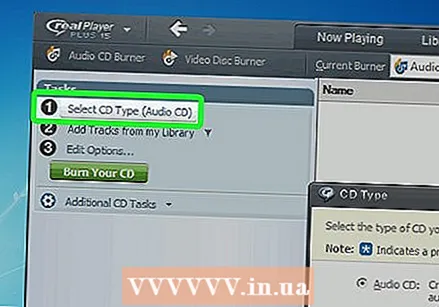
 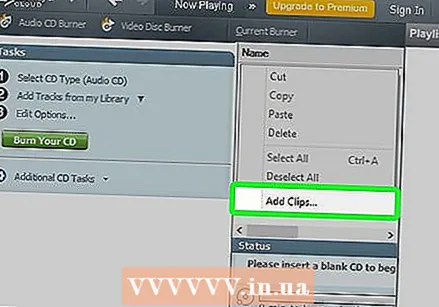 Select your CD type. RealPlayer will ask you to choose a certain type of CD to burn. Audio CD is set by default. Leave this to make a CD that you can also play on your stereo.
 - You can also make an MP3 CD. This is a data CD containing folders containing MP3s and files. Here you can store many more songs, but then it is probably no longer possible to play the CD on your stereo.
 Add music to your CD. Use the Library browser in the taskbar to find the music you want to add. You can search individual songs, albums or playlists. The progress bar at the bottom of the window will let you know how much time is left on the CD.
 - Click and drag the songs to the Burn window to indicate the order of the songs on the final CD.
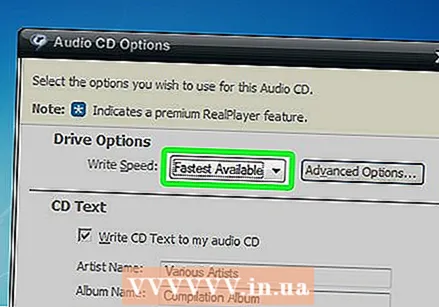
 Set the options for burning. Click on "Edit options" at the bottom of the toolbar. This will take you to the Audio cd Options window. You can control the writing speed, text for the CD, pause between tracks and volume. If you are satisfied with the settings, press OK.
 - Slowing down the writing speed can help prevent errors on older computers.
 Burn the CD. When you are ready to burn the CD, click the "Burn Your CD" button at the bottom of the taskbar. The CD will be burned and the progress bar will show how long this will take. Depending on the speed of your burner, this can take a few minutes.
  Test the CD. After the burning process is completed, you can start testing the CD. If it all sounds good and the tracks play well, you can label it and share it with others or use it yourself.
Tips
- You can't burn CDs through Spotify, Google Play Music and other streaming services because the music is synced with their servers to track the number of times the song is played and its owner.


