Author:
Frank Hunt
Date Of Creation:
16 March 2021
Update Date:
1 July 2024

Content
- To step
- Part 1 of 3: Learning the basics of cross hatching
- Part 3 of 3: Using the right materials
- Necessities
Cross hatching is a popular drawing technique used to add depth and shadows to drawn objects. In this technique, a space or shape is filled with at least two sets of lines, with the second set crossing the first set to darken the space or shape.To get the hang of crosshatching, start with regular shading, use a sharp pencil or fine-tipped pen, create a value scale, and see how the light hits an object and where the shadows are.
To step
Part 1 of 3: Learning the basics of cross hatching
 Draw a series of parallel lines. This is just shading and is the first step in cross shading. There are two types of plain shading, namely parallel shading and contour shading. Both techniques can be used as a basis for cross hatching. With regular hatching, the lines don't cross, no matter which hatching technique you use. Also, try to draw the lines evenly spaced to get neat, smooth shadows.
 - With parallel hatching, the lines are straight and horizontal or vertical.
- In contour shading, the lines follow the contours of the shadowed shape.
- If you're using the regular hatching technique in your drawing, use this skill to draw parallel lines where you want shading.
- Practice shading by drawing lines on a piece of paper that are parallel to each other.
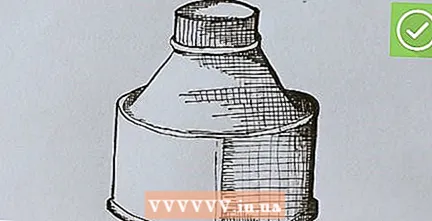
 Determine how the light falls. Before you start shading, take a moment to look at the object and determine how the light source falls on the object and the light is reflected. This will help you figure out which parts of the drawing should be shaded slightly and which parts should be shaded darker.
 - If you are drawing from your imagination, try to imagine how the light would fall or find a similar object to view.
- Know that the lightest areas do not have lines or cross lines. Your imaginary light source falls directly on these places and so there should be no shadow in those places.
- Places and surfaces that are further away from the imaginary light source must be darker and you must crosshatch darker.
- If you have a hard time imagining a light source and where the shadows will appear, find a picture of a simple object with a single light source shining on it. See where the light falls and where the shadows are and practice by simulating this effect with cross hatching.
 Erase the pencil lines when the ink is dry. Let the ink dry, then use an eraser to erase all visible pencil lines in the drawing.
 - Do not start erasing until the ink is dry. If you wipe the drawing with the eraser while the ink is still wet, you will smear the ink and your drawing will no longer look neat and tidy.
Part 3 of 3: Using the right materials
 Use a sharp pencil or fine-tipped pen. Because you draw thin lines close together when hatching crosswise, you have to use a pencil or pen with a fine tip. Whether you're using a pencil or a pen, make sure it's sharp and has a fine tip so you can draw neat lines.
 - Even if you want to trace your drawing with ink, it is still a good idea to start with pencil. Use a drawing pencil, mechanical pencil, or standard HB pencil.
- Use a dip pen or a fineliner to trace the drawing. Both options work well, so choose the one that works easiest for you.
 Use a piece of paper to cover certain areas. When drawing, place pieces of paper in places that you do not want to cross hatch. This way you also ensure that you draw neat lines and prevent accidentally drawing too many lines.
Necessities
- Drawing paper
- Scraps of paper
- Sharp pencil
- Eraser
- Fine-tipped pen or dip pen and a jar of ink


