Author:
Charles Brown
Date Of Creation:
9 February 2021
Update Date:
1 July 2024
Content
- To step
- Method 1 of 4: With a curling iron
- Method 2 of 4: With hairpins
- Method 3 of 4: With a flat iron
- Method 4 of 4: With a hair band
- Tips
- Necessities
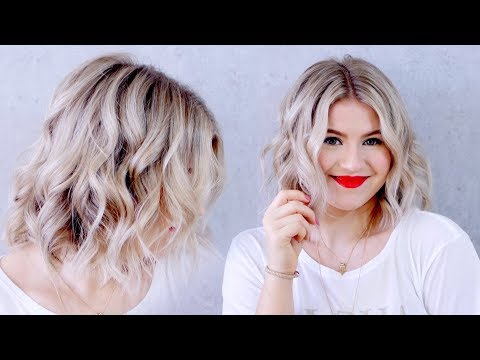
Beautiful curls can add volume and playfulness to short hair, making you look different from your normal weekday hairstyle. It is very easy to curl short hair, and you can style it much faster than long hair. This article will teach you how to have curls in short hair in no time with a curling iron or without heat with clips or a headband. Have fun with your seductively beautiful bunch of curls!
To step
Method 1 of 4: With a curling iron
- Prepare your hair. Before curling your hair with a curling iron, it should be dry and clean. It should also be as steep as possible. If you have a lot of waves or weather brushes, try to make it as straight as possible with a flat iron first.
- It can help to put a little bit of gel or wax in your hair to make it stay better, but never use hairspray in front of curling because it will damage your hair.
- Also, put some heat protection spray in your hair before you start.
- Divide your hair into pieces. Make a top and a bottom layer with a comb.Use hairdressing clips to secure the top on top of your head so that you can reach the bottom layer better.
- Don't do anything with your bangs. You can leave your bangs hanging or pin them on top of your head. Either way, curl your bangs not with the curling iron.
- If your hair is very thick, you may need to divide it into thirds.
- Start curling. Start at the front with a small section of hair and wrap it around the curling iron. Keep the curling iron a safe distance from your face so that you don't burn yourself.
- Roll the curl away from your face and not towards it.
- The wider the section of hair, the greater the curl will be. For short hair, a 2.5 to 5 cm tuft is fine. Then you get medium curls.
- Depending on how short your hair is, you may need a thinner curling iron. If your curling iron is too thick, it will be difficult to wrap small tufts around it and prevent beautiful curls. A curling iron about 2-3 cm in diameter should work fine.
- Leave the ends straight. With short hair it is better to keep the ends straight. Then you keep a little more length so that the curls don't seem to stick out of your head.
- If you are using a curling iron with a clamp, clamp the section of hair about 1 cm from the bottom before rolling it up.
- If you are using a "wand", start wrapping the section around it from above, stopping 1 cm from the end of the hair.
- Hold the hair around it for about 5 to 10 seconds. Depending on how tight you want the curls to be, you can keep the curling iron in it longer or shorter.
- For loose waves, remove the curling iron after 5 seconds. For tight curls, let it sit for 10 seconds or more.
- Once you've loosened the curl from the curling iron, spray a little hairspray over it. That way it stays in better shape. If the curl has gotten a little tighter than you wanted it to, let it set for a few minutes before applying hairspray.
- Finish the bottom layer and then do the top. If you want a more natural look, don't divide it completely into equal pieces. Vary the size of the sections and individual strands that are close to or further from your face.
- Always loosen a piece of the top and curl it with the curling iron. Always take some bits out of the hairdresser's clamps. Curl it in the same way as the undercoat.
- Finish it. If you've curled your head all over, you can loosen it up with your fingers. Touch up curls that didn't turn out so well.
- Tease the roots. If you want more volume you can grab your hair by the roots and back it up a bit.
- Add some more hairspray. Then it will certainly stay in shape.
Method 2 of 4: With hairpins
- Wash your hair as you always do. Use lukewarm water and shampoo that is suitable for your hair type.
- Add some conditioner if you want soft curls. Rinse it out with cold water. If you want firmer, wild curls, skip this step.
- Dry your hair, but not completely. Pat your hair dry so that it no longer drips. It must still be damp to set the curls properly.
- Put a little mousse in your hair. Mousse makes the hair firmer so that it stays in better shape. Gel or cream can also work, depending on your hair type.
- With fine hair it is best to use a mousse.
- Medium to thick hair works better with a gel.
- Divide the hair into small sections. With this style, neat, even sections are better than uneven sections. The sections should be about 1 to 1.5 cm in size. The larger the pieces, the softer and looser the curls become.
- Put your finger on the end of a section of hair. Wrap the hair around your finger at the bottom, away from your face. The curl should be just tight enough that it doesn't slide off your finger.
- Secure the curl to your head with bobby pins or a barber clip. Slide the pins diagonally over the curl.
- Spray water over it. When you've curled all your hair, spray water on it. This way you ensure that it dries evenly.
- You can also use stiffener instead of water. Then you get firmer curls.
- Let the curls dry. Keep the pins in for a few hours or let it dry overnight. If you want to go to sleep with it, put on a shower cap.
- If you are in a hurry, you can use a hair dryer to speed it up. But your curls will not stay in place as well.
- Take out the pins. When your hair is completely dry, remove the clips and loosen the curls. Run your fingers through your hair to separate them so that it loosens up a bit.
- Run your fingers over your roots and shake your curls to make them look natural.
- Add a good hairspray to keep it in shape.
Method 3 of 4: With a flat iron
- Start with dry hair. Before using a flat iron, your hair must be completely dry, otherwise your hair can be damaged.
- You shouldn't wash your hair the day you curl it, especially if you have fine hair. If it feels a little greasy, put in dry shampoo before you start.
- Always apply a heat protection spray to your hair before using a flat iron or it will become dry and frizzy. Ask your hairdresser what is a good product for you.
- Use a narrow flat iron. With short hair, a thin flat iron works best, because then you can wrap your hair around it better and get better curls.
- If you only have a wide flat iron, you can, but you will get waves rather than curls.
- Set the flat iron to the lowest temperature. Fine hair can be curled at 160 ° C, but thick hair may need 200 ° C or more.
- Divide your hair into sections. Grab all your hair above your ears and secure it with clips.
- Start curling. Take a section of hair 1 to 3 cm wide from the bottom half. Clamp the flat iron at the roots and twist it half a turn so that you get a U shape in your hair.
- Hold the flat iron in this position and slowly pull it through your hair. The slower you do this, the tighter the curls will become. If you pull it through your hair faster you will get waves sooner.
- Continue with the next pick. If you want even curls, keep turning the flat iron in the same direction. If you prefer it messier, you can alternate directions.
- Detach the top. When the bottom is done, curl the top in the same way.
- If you curl the front, make sure you lift the flat iron off your face off turns, otherwise the curls will fall into your eyes.
- Prefer not to curl your bangs, but grab the sections halfway with the flat iron and brush the hair away from your face.
- Finish the curls. Once all of your hair is curled, shape the curls with your fingers before it cools completely. Then put some hairspray over it.
- If you think the curls have gotten too small, let them settle a bit before applying hairspray.
- A light to medium hairspray is best if you want loose curls or waves. Too strong a hairspray may give curls that are too hard.
Method 4 of 4: With a hair band
- Wash your hair. This method does not use heat, so it is best to start with freshly washed hair. Wash it as you always do and let it dry a bit until it is still slightly damp.
- While it is still damp, add a product to your hair that strengthens curls or use an anti-frizz serum
- The hair band should stay on all night, so it is best to do this in the evening.
- Get a stretchy fabric headband. A thin headband works best, about 1 cm is perfect. Put it around your head - over your hair at the back and not under it. From the front, the band should be about halfway up your forehead.
- Wrap pieces of your hair around the headband. Start at the very front, take a tuft and turn it over a few times and tuck it under the headband.
- Take a second tuft and do the same. Keep doing this until all of your hair is tucked under the headband.
- The tighter you roll up your hair, the tighter your curls will become, and vice versa.
- End at the back. If everything is under the headband on the front and sides, there will be a strand of hair at the back. Turn this upwards and secure with a bobby pin.
- If you want more volume at the front, you can slide the hair band up towards the hairline. This will give you volume and prevent a red stripe on your forehead.
- Let it sit all night. All you have to do now is go to sleep wearing the hair band. If you are worried about lint, put on a shower cap.
- Take out the hair band. In the morning, take out the hairpin at the back and pull the hairband out of your hair.
- Use your fingers to gently pull your hair apart and style it. You now have large curls with a lot of volume.
- Style your hair and touch up some more with the curling iron, if necessary. Spray a coat of hairspray over it so that it stays put.
Tips
- Use products specially formulated to add texture and volume.
Necessities
- Comb
- Curling iron or narrow flat iron
- Hairspray
- Plant spray with water
- Hairdresser's clips
- Bobby pins
- Conditioner
- Mousse, gel, or cream


