Author:
Frank Hunt
Date Of Creation:
17 March 2021
Update Date:
1 July 2024

Content
- To step
- Method 1 of 4: Take cuttings
- Method 2 of 4: Plant the cuttings in soil to grow roots
- Method 3 of 4: Put the cuttings in water to grow roots
- Method 4 of 4: Take care of the cuttings as the roots grow
Ivy is a fertile, full plant that can provide a lot of green in your garden or home. Whether you want ivy for your garden or for your home, growing ivy from cuttings is an easy process that will save you money by eliminating the need to buy new plants. Start by taking cuttings and putting them in soil or water to grow roots. Place the cuttings in a warm spot with indirect sunlight and repot them the following spring. With a little time and effort, you will get a lot of new ivy plants without having to spend any money.
To step
Method 1 of 4: Take cuttings
 Take ivy cuttings in late summer or early fall. During this time of the year, new twigs grow on the plant, which is especially good if you want to take cuttings. The weather is also ideal for growing the cuttings in early autumn. Try to take cuttings before the weather gets colder.
 - If you take cuttings at this time of year, you will be just in time to plant the new plants in the spring if you want them in your garden.
- This is the right time of year to take cuttings from a variety of climbing plants, such as passion flower, clematis and tree strangler.
 In a mature ivy, look for young stems that have just grown. It is best to take cuttings from stems that have grown in the current year. You can identify these new stems by looking for parts of the ivy that appear new and are light green in color. The older pieces, on the other hand, have dark green leaves and thick stems.
 - In this case you take semi-hard cuttings. You take cuttings from stems that have grown in the current year and not from older parts of the plant.
- Do not pick stems that are damaged or have an unusual growth pattern.
 For best results, look for a stem with three or four leaf buds. Hold the stem with one hand just above one of the leaf buds. Find a spot just above the leaf buds or a set of leaves so that the leaves remain on the stem after cutting.
  Use clean garden shears or a utility knife to trim or trim at least six inches. If you use clean garden shears, you are less likely to contaminate the cutting with diseases or pests while cutting. To sterilize your garden shears, wipe the blades completely with isopropyl alcohol or rubbing alcohol. Cut the stem straight with garden shears.
  Wrap the cuttings in a damp paper towel and put them in a plastic bag. Wet a paper towel or cloth and wrap it around the cut ends of the stems. Place the cuttings with the paper towel around them in a plastic bag to help keep them moist.
 - This is especially important if you have to wait an hour or more before you can plant the cuttings in soil.
- Take the cuttings in the morning, if possible. Ivy is very moist in the morning, which can help keep the cuttings moist.
Method 2 of 4: Plant the cuttings in soil to grow roots
 Choose pots that are large enough to plant all the cuttings. If you have taken six or less cuttings, then you can use a regular pot with a diameter of 20 centimeters. If you have taken more than six cuttings, choose a larger pot for several pots.
 - You can put the cuttings in any type of pot, including a terracotta, plastic, or earthenware pot. However, make sure there are drainage holes in the bottom of the pot.
- By putting several cuttings in the same pot, you need less space for the cuttings and you have to water fewer pots. The plants will still be repotted after roots develop, so they can be planted together in a single pot during this period.
 Fill the pots with soil and moisten the soil. Choose universal potting soil or potting soil that has been specially formulated for the propagation of plants. The latter type of potting soil usually contains a lot of perlite or sand. Fill the pots with soil up to an inch below the rim. Then place the pot in the sink or outside and fill it with water until water flows out of the drainage holes in the bottom.
 - By not filling the pot all the way to the brim with soil, you can water the cuttings without water running over the edge.
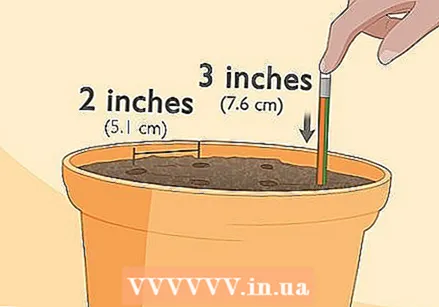 Make holes in the soil along the edge of the pot with a distance of five centimeters between them. Use the back of a pencil to make the holes about three inches deep. This way you can plant the cuttings in the soil without the cutting powder being wiped from the ends of the cuttings.
 - Make as many holes as you have cuttings.
- You can also use a skewer, wooden stick, or other small pointed object to make holes.
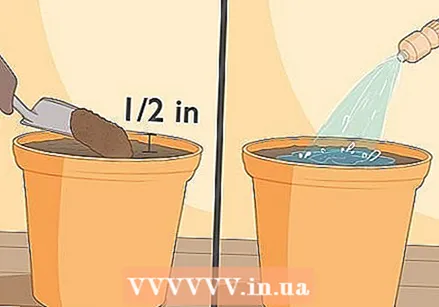
 Cut about an inch from the ends of the cuttings. Then trim away any leaves that are within three inches of the tips of the cuttings. This way you have a clean and fresh end to stick into the soil.
 - This is especially important if you took the cuttings more than an hour ago, as the tips of the cuttings are likely to have dried out.
- Trim or trim the ends with clean garden shears or utility knife.
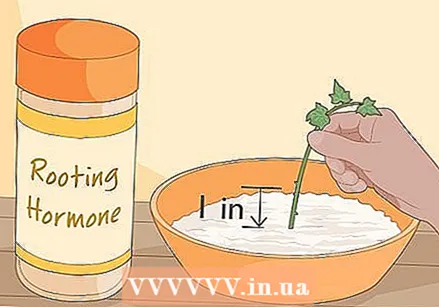 Stick the cut end of each cutting in cutting powder. Open the packaging with cutting powder and take a cutting. Stick the end three to five centimeters into the cutting powder. Lift the cutting to just above the surface of the cutting powder and tap it lightly against the edge to remove the excess cutting powder.
 - Cutting powder is available in powder and gel form. You can buy it at most garden centers, as well as online shops.
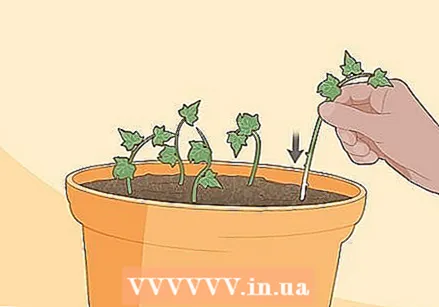 Put a cutting in every hole in the soil and push the soil. Put a cutting in each hole. Stick the end with the root powder on it into a hole until you reach the bottom. Hold the cutting upright with one hand and push the soil around the stem so that the cutting does not fall over.
 - Try to place the cutting exactly in the middle of the hole so that little cutting powder is wiped from the end. However, it is not a problem if some cutting powder is wiped away at the edge of the hole.
- If the cutting is too long or awkward to stand upright in the soil, even if you push the soil in, you may need to use a stick or some other form of support to hold the cutting up. It is important that the bottom part of the cutting stays up while roots are growing at the end.
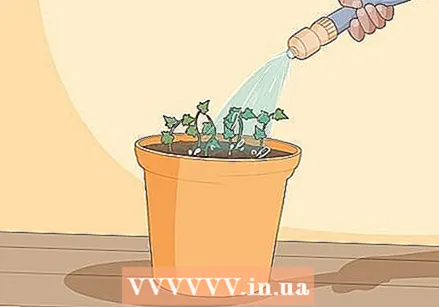 Fill the pot with water again until water runs out from the bottom of the pot. Hold the pot under the tap or wet the soil with a watering can. Run a light stream of water into the pot until water runs out from the bottom of the pot, indicating that the soil is well moist.
 - Be careful not to disturb the cuttings too much during watering. Keep the water jet away from the bottom part of the cuttings so that they remain firmly in the soil.
Method 3 of 4: Put the cuttings in water to grow roots
 Cut the stem just below the lower leaf bud. The leaf buds are the bumps on the stem from which new leaves grow. Use a clean knife or sharp scissors and trim or cut the stem straight. Trim or cut the stem half an inch below the leaf bud.
 - If there are leaves below the lower leaf bud, pluck them or cut them off the stem.
 Place the cutting in a clean glass with water at room temperature. Make sure that the water covers the lower leaf bud on the stem and that there are no leaves below the surface of the water. Pour some water out of the glass if the water level is too high.
  Change the water every three to five days and rinse the roots. Every three to five days, discard the old water and replace it with clean water at room temperature. Also rinse the roots with water at room temperature. You can also gently rub the roots with your fingers while rinsing to remove any residue that may have collected on the roots.
 - Make sure that no leaves fall into the water and remove them immediately if they do.
 Plant the cuttings in soil when the roots are about 13 centimeters long. Keep an eye on the roots as it grows and plant the cutting in a pot with soil when the roots are about 13 inches long. Check the length of the roots by removing the stem from the water and holding a ruler next to the roots. Measure from the bottom bump on the stem to the end of the roots.
Method 4 of 4: Take care of the cuttings as the roots grow
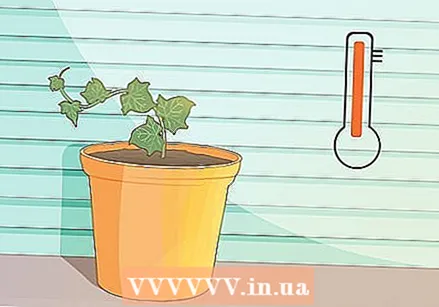 Place the jars or glasses in a light, warm place indoors or outdoors. The jars or glasses should not be in direct sunlight, but they should not get cold and placed in the shade. If the pots are indoors, place them near a window where bright light shines in that does not shine directly on the cuttings. If you put the cuttings outside, put them in a greenhouse or propagator, or cover the pots with plastic bags and place them in a warm, bright place out of direct sunlight.
 - You will need to check the moisture level of the cuttings in the pots often, so place the cuttings where you can easily reach them.
- Consider placing the cuttings where you visit regularly so you don't forget to groom them. For example, you can place them in a room that you visit every day or near a door that you use every day.
 Keep the soil in the pots moist all the time. Spray water on the soil when the surface starts to dry out. How long it takes for the soil to dry out depends on the temperature and humidity where the cuttings are.
 - In many cases, you can use a plant sprayer to keep cuttings outdoors wet and a watering can to water cuttings grown indoors.
- However, make sure not to overwater the cuttings. For example, do not leave water in the pot.
 Remove all discolored and dead cuttings from the soil or water. In most cases, a few cuttings will not survive. If you have a cutting that has turned yellow, withered or fallen over, remove it from the pot. By removing dead and diseased cuttings from the pot or glass, the other cuttings will do better.
 - If you are unsure whether a cutting is dead or dying, err on the side of caution. It is better to have a small amount of healthy plants than a lot of diseased plants.
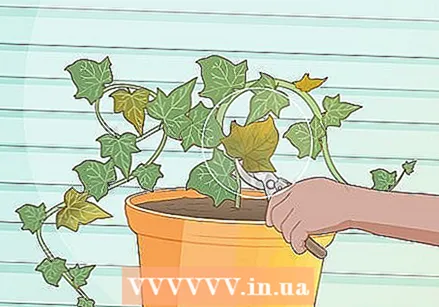
 Repot the cuttings when they have grown or wait until spring. Climbers like ivy usually take root in one to two months if you take good care of them. When you're ready to repot them, do this the same way you would with new plants. Be careful with the roots and use rich soil for the cuttings to thrive.
 - If you plant the cuttings outside, you can plant them in the ground or in a pot. However, keep in mind that you need to water a plant in a pot more often because it dries out faster.
- Let the new plants grow for at least several months before repotting.


