Author:
Robert Simon
Date Of Creation:
24 June 2021
Update Date:
1 July 2024

Content
- To step
- Part 1 of 3: Preparing for piercing
- Part 2 of 3: Piercing your tongue
- Part 3 of 3: Taking care of your tongue piercing
- Tips
- Warnings
- Necessities
With the right precautions and instruments, piercing your own tongue will take no more than a few minutes of guts. In no time you will have been driving your parents crazy. It is absolutely essential that you take the correct safety and hygiene measures. Take the time to gather professional piercing tools, get the job done properly, and take good care of the piercing afterwards. It is always preferable to get pierced by a professional. But if you must, you must. Quickly go to Step 1 to find out more.
To step
Part 1 of 3: Preparing for piercing
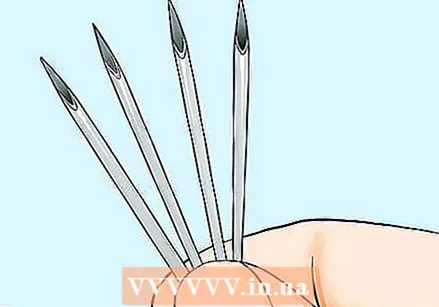 Use the necessary materials and instruments. You can buy complete piercing kits on the internet, or choose to purchase the tools and supplies separately from a piercing studio. A 1.4mm bar is recommended for the tongue. To get the job done the right way you need:
 - 1 sterilized 1.4mm piercing needle or cannula (a hollow needle used for piercing)
- 1 new tongue piercing, preferably a bar, of 1.4 mm
- A medical forceps / clamp
- Sterile latex gloves
- Never attempt to pierce your tongue with anything other than a sterile piercing needle or cannula. Don't put anything in it other than a new bar piercing.
- Piercing kits are sometimes cheaper than having a piercing done in the studio, but you don't have to. Usually it is not worth buying a kit. Once you've found a studio you trust, you can get your tongue pierced by a pro. You will be outside again within twenty minutes.
 Open the packages and sterilize the instruments and materials with alcohol. Make sure to clean everything you will be using with rubbing alcohol. The piercing, forceps, and especially the needle must be thoroughly cleaned and sterilized.
 - While it goes without saying, it doesn't hurt to repeat: Piercing needles are not suitable for repeated use. Also only use needles that have been specially developed for piercing.
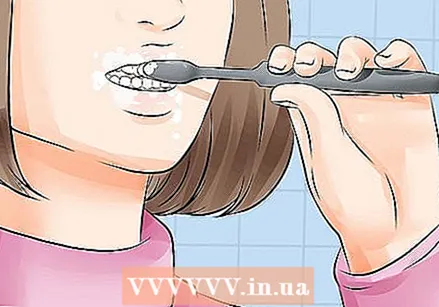 Clean your mouth soil. Before piercing anything, it is important to brush your teeth well and clean the inside of your mouth with antibacterial, alcohol-free mouthwash.
  Wash your hands. Wash your hands with soap and water. Then sterilize them with a disinfectant. Then put on your latex gloves.
  Anticipate the pain. While some people with tongue piercings say that the tongue piercing hurts the least of all, and that it hurts less than biting your tongue, you will feel it. After all, you are ramming a needle through a body part. What do you think? Anticipate the pain so you don't have to stop halfway through.
Part 2 of 3: Piercing your tongue
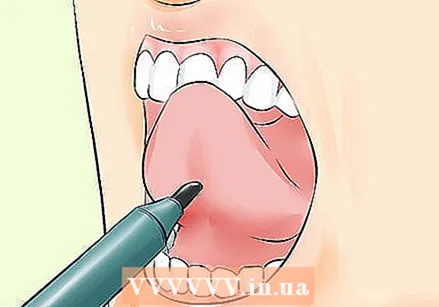 Find the major blood vessels at the bottom of your tongue. There are two significant veins along the bottom of your tongue. Any of these will bleed profusely if you poke them. It can create a dangerous situation, which could put you in the hospital for vascular surgery. You will start to feel this in your wallet, and can even lead to a life-threatening situation.
 - View the bottom of your tongue to map the veins. Consider marking a safe spot between the veins with a marker.
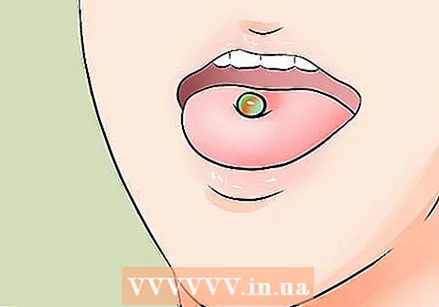
 Place the clamp where you want the piercing. The ideal place for a piercing is in the center of the tongue, far enough away from the taste buds and away from the veins.
 - It is important to minimize the risk of vascular damage by checking, checking, and rechecking the area. You don't want to bleed profusely. If you do, and it persists, go to hospital immediately.
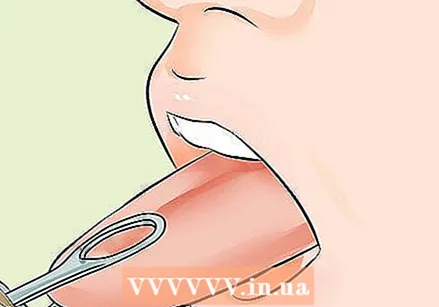
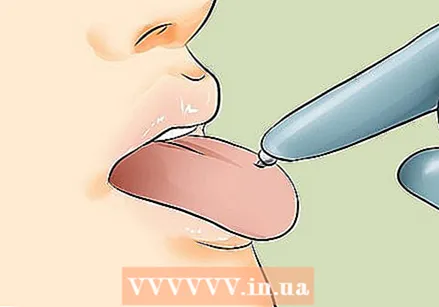
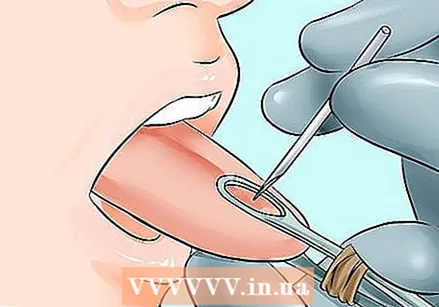 Pierce your tongue. Push the needle straight and firmly through your tongue. Apply enough pressure to insert the needle all the way through your tongue. Do not remove the needle before inserting the swab.
 - With a solid piercing needle most piercers choose to pierce the tongue from top to bottom.
- With a hollow needle most piercers choose to pierce the tongue from the bottom up.
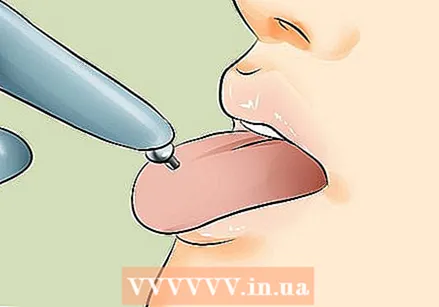 Insert the piercing stick. Before inserting and removing the needle all the way through your tongue, gently pull the needle out of the way and insert the rod into the hole. Hold the bar in place and remove the piercing needle.
  Attach the balls to the stick. Screw the balls onto the piercing. Make sure the piercing is secure and the balls are tight.
 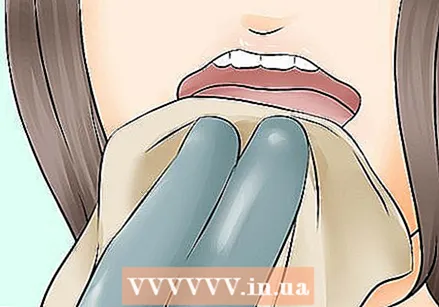 Clean your mouth. Wipe the blood from your tongue and rinse your mouth with mouthwash. The mouthwash may sting a little. It is important to use a mild, alcohol-free product. Most piercing shops sell a certain brand of mouthwash that is recommended for aftercare. Usually this is Biotene, or Tech 2000.
Part 3 of 3: Taking care of your tongue piercing
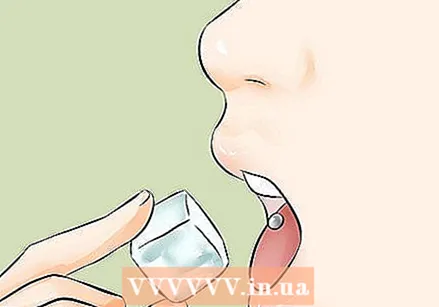 Use ice and ibuprofen to keep the swelling in check. Typically, the tongue will swell a little after piercing. For most people this is hardly noticeable; with others all the more. To control the pain, as well as the swelling, for the next few days, you can take an anti-inflammatory pain reliever like ibuprofen. You can also suck on ice cubes to numb your tongue and contain the swelling.
 - Many people with tongue piercing like to suck on ice cubes immediately after putting them on. This will numb the initial pain. It can also help counteract the swelling right away.
 Leave the piercing in. You don't have to remove and clean the piercing. The piercing will heal best if you don't interfere with it too much. Focus on keeping your mouth clean and stay off the piercing. As tempting as it may be, don't take the piercing out to inspect the repair process. Whenever possible, leave the piercing alone. Let your mouth heal on its own.
 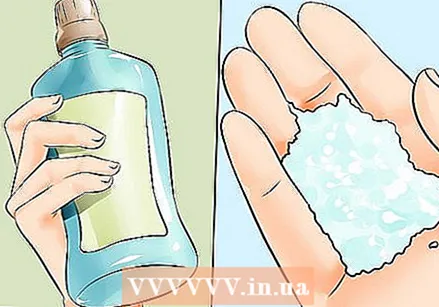 Clean your mouth twice a day with mouthwash and twice a day with a saline solution. Use a mild mouthwash and rinse your mouth regularly to reduce the risk of inflammation. Alternate your mouthwash with a saline solution.
 - Saliva has strong antibacterial properties that keep your mouth clean. However, your mouth is still very susceptible to infection. Make sure you clean your mouth well and keep it. Try to avoid the risk of infection.
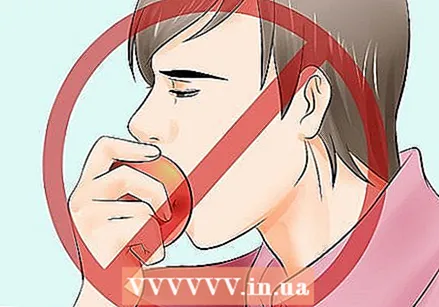 Avoid solid foods for 24-48 hours. If you stick with juices and other liquid foods for two days, you can get through the pain much better. The chance of infection is also much smaller. Listen to your body, but it's generally best if you're trying to avoid chewing. Get used to the stick in your mouth before trying to eat solid foods.
  Abstain from alcohol and smoking materials for at least two weeks. Avoid alcohol and smoking materials while your tongue is healing. These can cause the wound to irritate and hinder the recovery process. To be on the safe side, it is best to avoid them for a while.
  Try to talk normally with the stick in. An unexpectedly daunting task faced by many recently pierced people is speaking without hissing. Or without feeling as if there is a constant acidity in the mouth.
 - The best way to speak right: ignore it. Try not to “hold” the stick as you would with a pickle. Try to leave your piercing alone as much as possible. You will instinctively try to keep the stud in your mouth, but you don't have to. He's not going anywhere.
 Put in a smaller stud when the piercing heals. Full recovery can take up to a month, depending on the person and how the piercing is done. Once it feels comfortable, it makes sense to move to a smaller, finer stud. Exchange the swab for a smaller one after two weeks, once the swelling has subsided.
Tips
- Ice creams to counteract the swelling.
Warnings
- It is always preferable to get pierced by a professional. Getting a piercing yourself carries the risk of hitting a vein. This can cause serious bleeding.
Necessities
- A needle
- A large tongs rod
- A clamp
- Gloves
- Disinfectant for the hands
- Paper towel


