Author:
Robert Simon
Date Of Creation:
24 June 2021
Update Date:
24 June 2024

Content
- To step
- Method 1 of 4: Preparations
- Method 2 of 4: Planting and caring for hops
- Method 3 of 4: Harvesting and drying the hops
- Method 4 of 4: Take care of the plants after harvest
- Tips
Do you brew your own beer at home, and do you want to go one step further by also growing your own hops? Hops are one of the main ingredients of beer, and the plant grows well in any temperate climate. Learn how to plant, care for and harvest hops so that you can enjoy completely homemade beer from now on.
To step
Method 1 of 4: Preparations
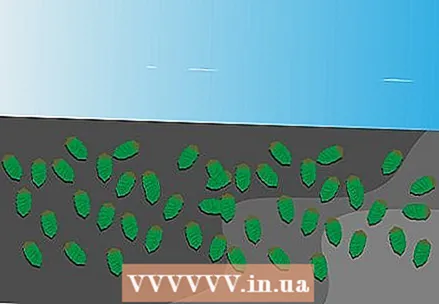
 Buy rhizomes from the hop plant (rhizomes). Hop plants are grown from a rhizome or rhizome. This is a part of the plant that will grow into a new plant. The rhizomes are available in early spring when hop growers dig them up for resale. Order them online or go to a local grower. Do not plant them until late spring, after the last frost.
 - Research carefully which hop variety you want to grow. The type of hops you use influences the taste of the beer. Do you want to brew a light, citrusy beer, or maybe beer with woody or floral flavors? Choose a type that matches the beer you want to brew. It is no problem to order the rhizomes abroad, they will survive the shipment well. While shipping costs may be significant, it will give you more choice. [1]
- When your hop rhizomes are delivered, wrap them in a damp tea towel and keep them in the fridge until ready to plant.
 Choose a place to plant the hops. Choose an area of your yard that has at least 6 to 8 hours of sun every day. In addition to sufficient sun, your plants need the following conditions:
 - Enough space in height. Hop vines can grow up to 8 meters into the air. You can choose a spot near your house so that you can place a large frame or trellis against the roof. If you prefer not to let the vines grow on the roof, you can put a framework against a sturdy post or other sturdy structure in the garden.
- Well drained soil. Choose a spot with good drainage. Places where water remains after heavy rain are not suitable.
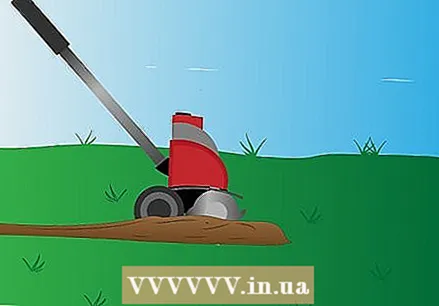 Prepare the planting bed. Determine the size of the planting bed and use a rake, digging fork or cultivator to loosen the soil. The soil must be airy, without large clods or compacted areas. Remove stones or branches and pull out weeds root and all.
 - Fertilize the soil by raking in some fertilizer, bone meal or vegetable slurry. This way you enrich the soil with extra nutrients so that your plants will be strong and healthy.
- Make sure the soil is dug and fertilized to at least 30 cm deep.
Method 2 of 4: Planting and caring for hops
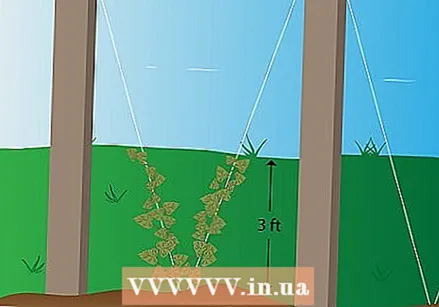
 Make mounds of soil. Make a hill for each rhizome you are going to plant. The hills should be about three feet apart so that the plants have enough room to grow.
 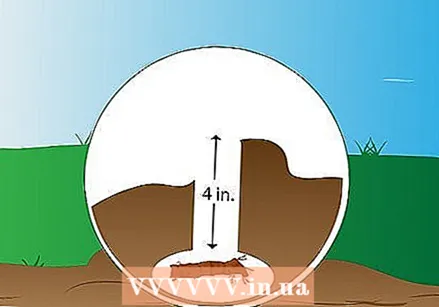 Plant the hop rhizomes. Dig a hole 10 cm deep in each knoll. Place the rhizomes in it horizontally with the roots down. Close the holes again and press the soil lightly. Then cover the soil with mulch to stop weeds from growing. Next, never let the soil dry out until the plants start to grow.
 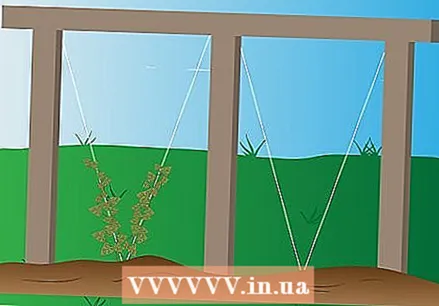 Accompany the hop shoots. When the hop shoots are about 6 inches high, they need to be guided into the trellis to help lift them up. Place the framework next to the plants and gently wrap the shoots around the bottom.
 - Guide the hop shoots to the trellis for a few more days. After a while they will grow independently - clockwise - in the trellis.
- Remove shoots that look damaged or weak so they won't take up space in the trellis. About 4 to 6 healthy tendrils should grow on each rhizome.
 Trim the tendrils. After a few months, remove all leaves from the bottom 10 cm of the plants. This way you ensure that the plant cannot become infected by diseases or fungi from the soil.
 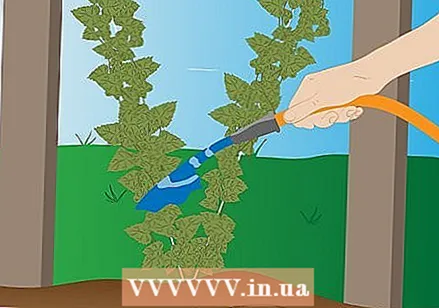 Take care of the plants. When the vines start to grow well, make sure the soil around them remains free of weeds. Water the plants every day so the soil remains moist, but not soggy. You will continue to care for your plants in this way until the end of summer when it is time to harvest.
Method 3 of 4: Harvesting and drying the hops
 Examine the hop cones. At the end of the summer when it is time to harvest the hops, take a good look at the hop cones to see if they are already ripe. Hop cones are ripe when dry and feel like paper. They should also be aromatic and feel elastic. Finally, they are filled with yellow lupulin powder. Break open a hop bubble to see if it already contains powder.
 - Hop cones that are heavy and green are not yet ready for harvest. Be patient, it can take until early fall for your hop cones to ripen.
- Do not let the bubbles hang on the plant until the leaves turn brown.
 Pick the ripe hop cones. Carefully turn them off the tendrils. Some are ready earlier than others, so let the unripe hop cones hang until they are ripe too.
 - You can use a ladder to reach the hop cones that are hanging too high.
- If all the hop cones are ripe at about the same time, and you don't feel like climbing a ladder, you can also cut the tendrils from the ground. Then lay them flat on the ground and pull off all the hop cones.
 Dry the hops. Place the hop cones on a flat surface, but not in the sun. Make sure they are well spread out next to each other in one layer. Turn on a fan and let it blow over it for a few hours. Then turn the hop cones over and let the other side dry in the same way. Continue this until no moisture is visible on the outside.
 - You can also place the hop cones in a paper bag in a cool, dry, dark place for a few weeks to let them dry.
- Search brewing supply websites for specialty containers to help the hops dry even faster.
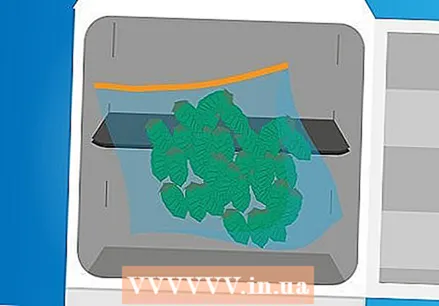 Save the hops. The hops should be stored in airtight bags in the refrigerator. If it takes a while before you start using them, it is best to freeze them.
Method 4 of 4: Take care of the plants after harvest
 Cut back the tendrils. After harvesting, cut the tendrils to within 10 cm. The first frost will cause them to die off completely, after which you can prune them back completely.Then cover them with fleece or mulch to protect them from frost.
  Rejuvenate the hop plants in the spring. Use a shovel to expose the rhizomes and cut back the roots. Fertilize the soil around the rhizomes and make mounds of about 30 cm. Cover them with mulch and keep the soil moist until the plants sprout again.
Tips
- If you plant different hop varieties, keep a space of 1.5 m. If you plant plants of the same species, you can plant them closer together.


