Author:
Charles Brown
Date Of Creation:
6 February 2021
Update Date:
28 June 2024
Content
- To step
- Part 1 of 4: Planting seeds
- Part 2 of 4: Taking care of your crops
- Part 3 of 4: Harvesting hemp fiber
- Part 4 of 4: Harvesting hemp seeds
- Warnings
- Necessities
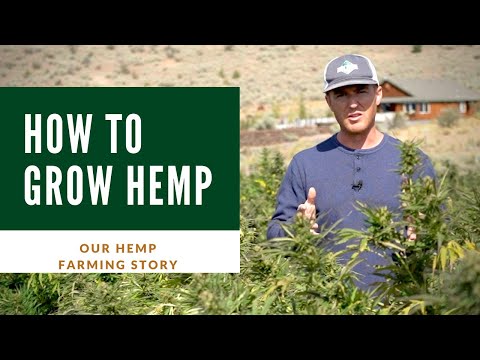
Hemp is a strong plant that is used for textiles, paper, animal feed and much more. Although hemp is usually grown for industrial purposes, you can also grow the plant yourself. After you have planted the seeds in the spring and tended the plant in the summer, you can harvest the fibers and seeds for use. Before planting a field, however, make sure to check with your local to find out if it is legal to grow hemp in your area!
To step
Part 1 of 4: Planting seeds
 Plant hemp seeds in the late spring. Wait until after the last frost before planting the seeds. Check the temperature in the soil at a depth of 1 inch, with an earth thermometer, to see if it is above 10 degrees Celsius. Once the temperature has been consistent for several days, you can plant your seeds.
 - Check the likely last frost days on the Internet, for North America for example at: https://www.almanac.com/gardening/frostdates.
- Hemp grows best when the temperature outside is between 15 and 26 degrees.
 Grow hemp in a field of well-aerated soil that has a has pH values of 6-7.5. Check the soil pH with a probe or paper test strip to determine if the soil provides the correct growing conditions. Break up the soil with a hoe or tiller to aerate it. Although hemp grows in most soil types, poorly draining soil can cause damage to your plants.
 - Test the drainage by digging a 30x30x30 cm hole and filling it with water. Record how long it takes for the water to drain completely, if it takes longer than one hour, find another place.
- It is easier to find a place with good soil than to adapt existing soil.
 Place the seeds two to three inches deep. Use a seed drill on a lawn mower or tractor to evenly distribute your seeds and cover them with soil. Pour the seeds into the seed box and let the machine do the work for you. The machine will also bury the seeds at the correct depth so birds and pests cannot reach them.
 - Keep the seeds closer together when growing the hemp for fiber, as this will make them grow more upward than to the side.
- Plant the seeds further apart if you want to harvest seeds. This encourages the plant to expand sideways and stay shorter.
- Clean the machine after using it.
- Ask local farm machine shops if they offer seed drills for sale or for rent.
Part 2 of 4: Taking care of your crops
 Water your hemp throughout the growing season with 30-40 cm of water. Check the moisture of the soil by sticking your finger into the soil to the first phalanx. If it feels dry and not raining, water the hemp until the soil is moist to a depth of two and a half to five inches. Watering is most important in the first six weeks of growth, when the plant is still young. After that, hemp is drought resistant and can survive without water for several days.
 - Use an irrigation system if you have a large hemp field.
 Spread nitrogen-rich fertilizer between crops. Work on a warm, dry day so the fertilizer doesn't stick to the plants. Only apply the fertilizer immediately after the seeds have sprouted. Place the fertilizer between the rows of hemp, rather than directly on the plants. Water your hemp immediately after applying the fertilizer so that it absorbs into the soil.
 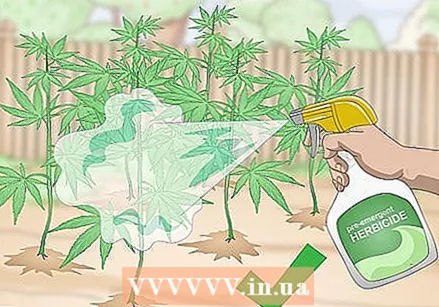 Spray a pre-emergent herbicide on your hemp. While most hemp crops will prevent weeds from growing, still use a spray system filled with pre-emergent herbicide on your hemp once the seeds have sprouted. This helps to protect the plants while they are still growing.
 - As of 2018, there are no herbicides or pesticides that are officially registered for use on hemp.
Part 3 of 4: Harvesting hemp fiber
 Collect the stakes with a sickle as soon as the seeds start to develop. Cut the stakes as close to the ground as possible to get the most fiber. If you have a small field, use a hand sickle and cut back and forth to cut the stakes. For larger fields, consider buying or renting a tractor sickle attachment.
 - Sickles are curved blades that can be purchased at a garden or farm store.
 Leave the stakes in the field for five weeks. Stack the stakes on top of each other so that the outer layer can rot slightly. During this time, microbes and moisture will cause the bonds that hold the stakes together to break. This process can take up to five weeks.
 - Letting the stakes rot is known as 'retting'.
- Retting will not take place at a temperature below 5 degrees and above 40 degrees.
 Dry the stakes in a cool, dry area until they reach a moisture level of 15%. Stand the stakes upright and separate them from each other so they can dry completely. Use a moisture meter to determine how much moisture is left in the stakes. Once the stakes contain less than 15% moisture, the fibers can be harvested.
 - Moisture meters can be purchased on the Internet or at a local garden supply store.
 Use a decortication machine to separate the fibers. A decortication machine is a device with two rollers that break off the outer pieces of the hemp stake. After you turn the machine on, run one to two hemp stakes at a time through the reels. The fibers come out on the other side of the machine, where you can collect them.
 - Ask the local farm machine shop if they have a decorating machine that you can buy or rent.
Part 4 of 4: Harvesting hemp seeds
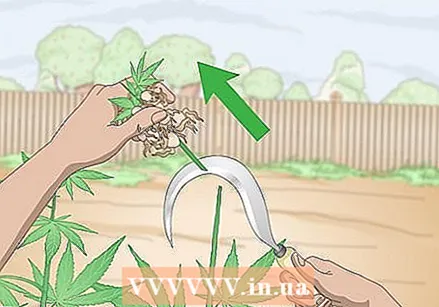 Harvest hemp seeds after 16 weeks with a sickle. Feel the seed pods close to the flowers to determine if they are hard to the touch. At this point most of the leaves will have fallen off the stake. Hold the top of the stake and cut with a sickle just below the lowest seed pod.
 - In many places it is usually possible to harvest in the autumn.
- Leave fallen leaves on the soil as compost for next year.
 Thresh the seed on a tarpaulin. Lay a tarp in a well-ventilated area so that it is completely flat on the ground. Hold the stake in your non-dominant hand, then hit it with a baseball bat or stick to break the seeds above the tarp. When you have threshed all the crops, collect all the seeds in the center of the tarp.
 - If you have a large field, use an industrial threshing machine.
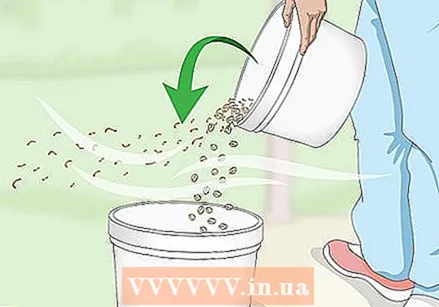 Wan the seeds to remove residue. Transfer the seeds to a 19 liter bucket. Hold the bucket 30 cm above a second, empty bucket and pour the seeds into it. While doing this, residue will be blown off the stake. Pour the seeds back and forth six to ten times to make them completely clean.
 - If there is no breeze, aim a fan at the buckets when you are pouring the seeds.
- Use an industrial fan if you have a large field.
 Store the seeds in an area with a temperature of 0-4 degrees Celsius. Store the seeds in a large container with a lid. Keep these in a large refrigerator or cool area so that the seeds don't germinate. Otherwise they can break open and become infected.
 - You can keep the seeds in a burlap bag if they have a moisture level of less than 12%.
Warnings
- Check with the municipality whether growing hemp is legal in your area.
- Hemp can be used in the U.S. cultivated for commercial and industrial use only, but not for personal use.
Necessities
- Earth thermometer
- pH tester
- Hoe or tiller
- Seed borer
- Fertilizer
- Garden spray bottle
- Herbicide
- Sickle
- Moisture meter
- Decortiser
- Sail
- Bat or stick
- 2 large buckets
- Storage container with lid


