Author:
Robert Simon
Date Of Creation:
15 June 2021
Update Date:
24 June 2024
Content
Making a volcano is an exemplary science experiment, suitable for learning at home or doing a school project or simply an activity for children on a rainy day. Even adults find it fun to use it as a fun activity at a party. This article covers a few different ways to make a volcano - just choose the coolest way or the way that you have the ingredients listed in "Things You Need" to do.
Note: Only pour the lava ingredients where you don't mind getting dirty. It's best to let the volcano erupt in the open air if you don't want to have a lot of cleaning up!
Steps
Method 1 of 3: Conventional volcano
Spread a layer of stencils.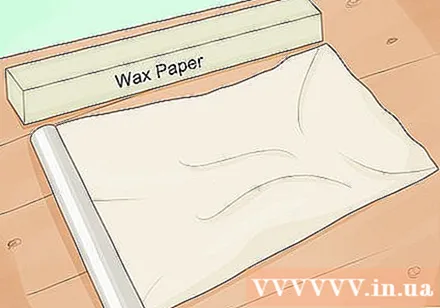

Place a vase in the middle. You can use carbonated water cans, glass jars, plastic bottles as the center of the volcano. This is where you store the lava!
Use clay to make the rest of the volcano. Squeeze the wrapped clay from the bottom to the top of the jar. Try to make the clay rough instead of flat as the real volcano doesn't look like a complete funnel!
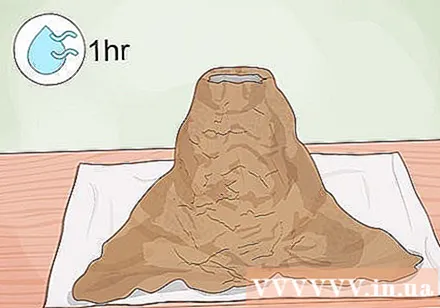
Leave it on for 1 hour or until the clay dries.
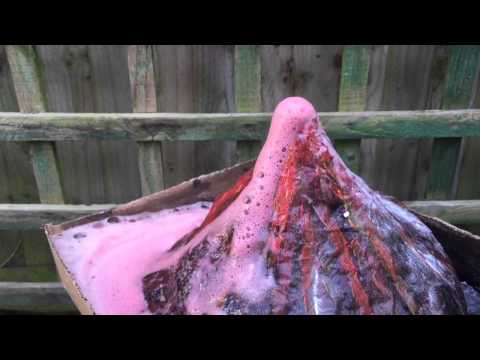
Make vinegar. Add some red food coloring to the vinegar and stir 1 tablespoon of dish soap.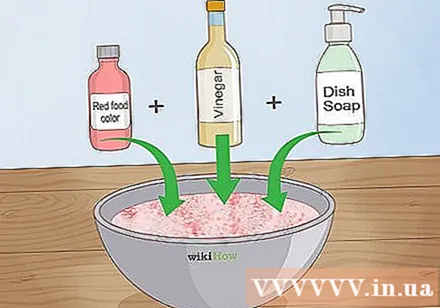
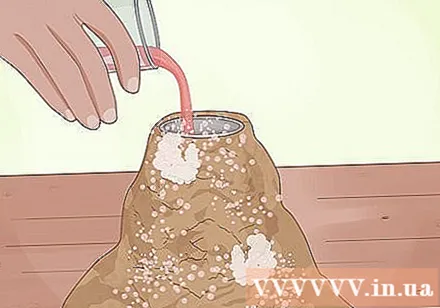
Pour the mixture into the volcano.
Baking soda pack. Pour baking soda onto a square paper towel or toilet paper. Fold the tissue or toilet paper. Tie an extra elastic band to hold it tight.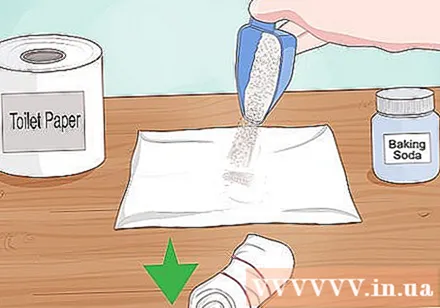
Add the baking soda pack to the vinegar.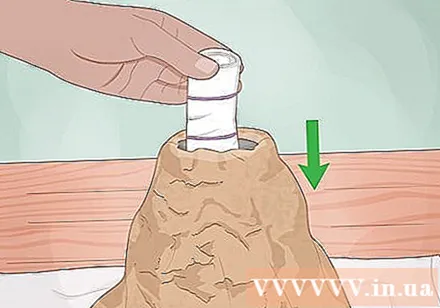
Back away. When the paper dissolves, a volcano will erupt. advertisement
Method 2 of 3: Volcanic eruptions of lava
Prepare a flat surface for the work. You will need a flat surface that doesn't mind getting dirty, as the activity is relatively cluttered.
Get a vase. You will need a relatively large pitcher like a 1 liter soda bottle.
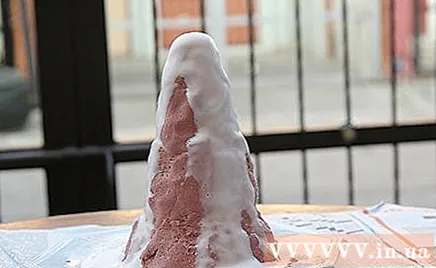
Shape the outer part of the volcano. You can make it from clay, clay, mud, or foil. Next, paint brown and black to make it look more realistic then let it sit until the paint dries.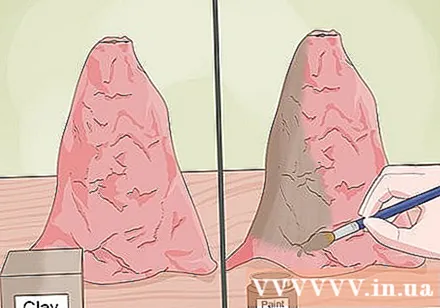
Add more hydrogen peroxide. Buy a bottle of hydrogen peroxide at the cosmetics store. You will need a 6% solution (usually labeled "volume - 20"). Pour half a cup of hydrogen peroxide into the flask in the volcano.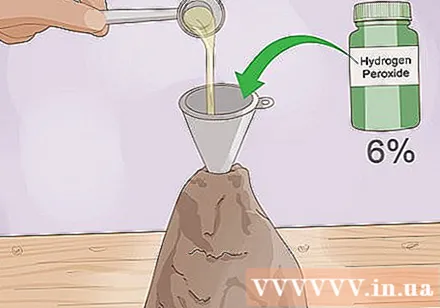
- Be careful when using hydrogen peroxide. You will be injured if you get too much hydrogen peroxide or get in your eyes. Only let adults treat hydrogen peroxide.

- If you want to induce a strong reaction, use a 30% hydrogen peroxide solution. However, this type is very difficult to find.
- Be careful when using hydrogen peroxide. You will be injured if you get too much hydrogen peroxide or get in your eyes. Only let adults treat hydrogen peroxide.
Stir in soap and food coloring. Add at least 6 drops of red food coloring and 2 drops of yellow color. Then, stir in about 2 tablespoons of soapy water.
Mix the yeast. Take 1 tablespoon of dry yeast and mix with 3 tablespoons of water in a small cup.
Pouring yeast. Pour the yeast mixture into the volcano.
- Get away immediately!
- Get away immediately!
Method 3 of 3: The volcano explodes
Performed outdoors. This type of volcano will create a huge explosion so you need to do it outdoors with wide open space. Only adults are allowed to make this kind of volcano but kids will also enjoy watching!
- No kidding, it's a bit dangerous. Careful!
Find some help. This test requires at least two people, the better three people. The test takers must cover the entire body skin and not wear loose clothing.
- This test requires liquid nitrogen, which is uncomfortable with skin. Be careful of you
- Besides, you should wear goggles. If you are lucky enough to be selected as the detonator, wear goggles.
Get a good plastic trash can. Do not use a small bin. Choose a big, hard crate that cleaning staff normally use. Poor quality bins will rupture and ruin the test, so choosing a good one is very important. The plastic should be thick and the seams should be stiff. Place the trash can on a concrete, stone or brick surface.
Fill the tank with water. Pour an amount of water about 80% of the barrel. You can add color to the water if you want. Using Kool Aid pigments will be more effective.
- You can also add some ping-pong balls to the water tank if you want to give the effect of rolling ice and volcanic debris. In this case you need to reduce a little water (about 70-75%).
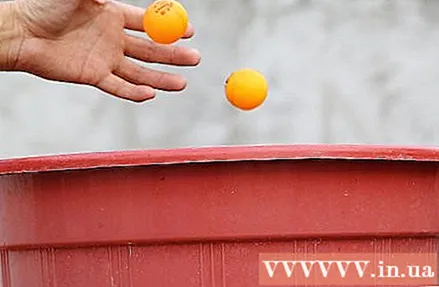
- You can also add some ping-pong balls to the water tank if you want to give the effect of rolling ice and volcanic debris. In this case you need to reduce a little water (about 70-75%).
Prepare a plastic bottle. Take a 1 liter soft drink bottle and use duct tape to stick 2 bricks to the sides of the bottle.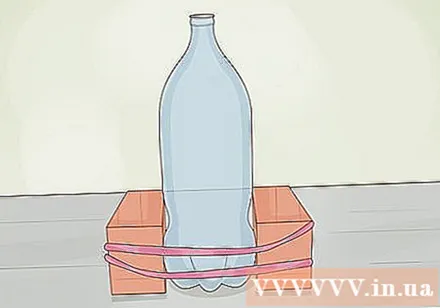
- The bottom of the bottle and the bottom of the brick should be equal.

- The bottom of the bottle and the bottom of the brick should be equal.
Pour liquid nitrogen into the bottle. Place the water bottle on a flat surface and have someone hold the funnel just above the top of the bottle. Ask another person to keep the cap on hand to keep it tightly closed when you've finished pouring the liquid nitrogen. Pour a quantity of liquid nitrogen about 5cm high into the bottle. (The amount is only relative as it doesn't matter much).
Quickly cap the bottle. Bottle cap holders must promptly seal the top of the bottle. You have up to 5 seconds to cap the bottle and fill it with water.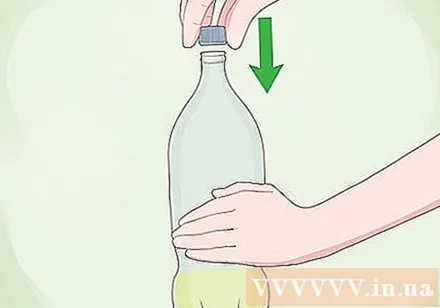
Place the bottle in the center of the water tank. Place the bottle in the center of the barrel and quickly run away. The blast will start in about 15-30 seconds.
Enjoy the blast. Make sure everyone is at least 9m away. Stand as far as possible. The explosion will be very loud. This explosion simulates the Plinian eruption, a special type of volcanic eruption often associated with the ancient Mount Saint Helens or Vesuvius. Water splashed into the air and fell into rain.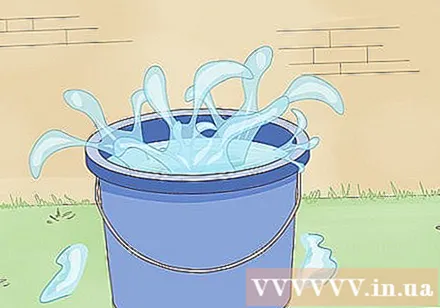
- Wait at least 2 minutes before assuming the test has failed. You should wear protective clothing and proceed carefully to inspect. If the explosion did not occur, it is possible that the cap was not properly covered.
Advice
- It's best to be very careful when pouring the ingredients to avoid an explosion that would mess things up.
- Combine soda and mint candy to add a blast effect.
- You should do this outdoors as it will be very dirty.
- Remember to tie the elastic band tightly.
- You need to stand back away so that the explosion doesn't affect you.
- It is advisable to take the exact amount of ingredients so as not to damage the whole process.
- Children need adult guidance while performing.
- Place volcanoes on newspaper or table to avoid contamination.
- For a big blast, you can add more vinegar and baking soda to the bottle.
- Add some glitter for a sparkle.
- Place the erupting volcano on a hard table top or a cake maker for easy cleaning.
- Don't add too much water because the volcano won't explode as expected.
Warning
- This is a messy test! It is best to do it outdoors or in the kitchen or bathroom with tile flooring. If you use food coloring, you can add color to the floor and furniture.
- Remember to wear gloves and goggles.
- This test can be dangerous if you stand too close. Sparkling ingredients can get into your eyes if you stand too close when a volcano erupts. You should stand about 60cm away.
- Get back away as soon as you pour vinegar because the volcano will erupt immediately.
What you need
Conventional volcano
- Soft drink cans or bottles
- White vinegar
- Baking soda
- Tissue
- Food coloring
- Elastic
- Clay
Volcanic eruptions of lava
- 1 liter soft drink bottle
- Bandage
- Clay
- paint
- Hydrogen peroxide
- Dry yeast
- Clean water
- Dishwashing liquid
- Food coloring - red and yellow
The volcano exploded
- Liquid nitrogen
- Trash - big, hard
- Country
- Kool-aid pigment (optional)
- Ping pong
- Plastic soft drink bottle (with lid)
- 2 bricks


