Author:
Robert Simon
Date Of Creation:
21 June 2021
Update Date:
24 June 2024
Content
There is some caching on Windows that is used for temporary storage of quick access files. When buffers become cumbersome, they can affect performance and connectivity. Read this article and learn about clearing memory, DNS, thumbnails, browser cache.
Steps
Part 1 of 4: Clear the memory cache
Create shortcuts. You may have noticed that the longer your computer is used, the slower the speed is, due to a state of the processor is not working. You may even have to force the computer to restart. You can create a shortcut on the desktop to free up free RAM and speed up your computer without rebooting. You can use this shortcut as soon as the computer starts to run slowly.
- Right-click anywhere on the desktop and select New → Shortcut.

Enter a location. A new window will appear asking you to locate the shortcut you just created. You need to determine whether your current Windows version is 32-bit or 64-bit. Copy and paste one of the following (depending on your Windows version) and click on Next:- 32-bit:% windir% system32 rundll32.exe advapi32.dll, ProcessIdleTasks
- 64-bit:% windir% SysWOW64 rundll32.exe advapi32.dll, ProcessIdleTasks

Name the shortcut. After clicking the Next button, you will see a window asking for a name of the shortcut, you can name it whatever you want.- Once done, click Finish.
Open shortcut. You have successfully created a shortcut, each time the computer performance drops, you just need to open the shortcut to free up unused RAM.
- The shortcut checks for current processes and terminates unused processes to free up memory.
Part 2 of 4: Clear DNS cache
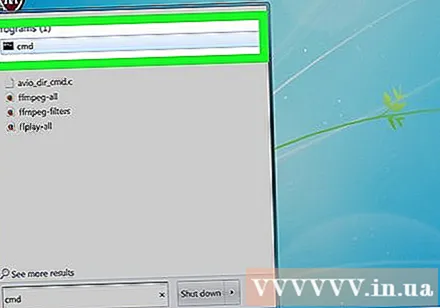
Open Command Prompt. If you're having connection problems, chances are your DNS cache is faulty or out of date. The manual processing is very simple and helps you to solve many connection problems.- Click on Start (the Window icon in the bottom left corner of the screen) and type "command prompt" into the search bar.
- Right-click on Command Prompt and select "Run as Administrator" (Open as administrator). Running Command prompt as administrator is an important step in clearing the cache in the system directory.
Enter the DNS caching command. To clear DNS cache, you enter ipconfig / flushdns and press ↵ Enter
- You will see the message (Successfully resolved DNS cache) if the command is entered correctly. Close Command Prompt.
Try connecting to the network. If you still can't load the web then the problem lies elsewhere. Refer to the articles on troubleshooting network connection errors for more details. advertisement
Part 3 of 4: Clear thumbnail cache with Disk Cleanup
Open Disk Cleanup. Disk Cleanup is a pre-installed system tool on Windows. Disk Cleanup not only helps you clean junk files and junk data from your drives, but also clears the thumbnail cache. The tool allows you to select the drives you want to clear the thumbnail cache.
- Click on Start and look for "Disk Cleanup". A small window appears, displaying an image of the disk cleanup tool calculating unused files to perform the cleanup. Please wait for this process to complete.
- Thumbnail caches are pre-loaded thumbnails of Windows users, like folder previews. If there are many files, the thumbnail cache will take up quite a lot of space.
Select Thumbnails. After scanning, a new window will appear with a list of files that can be deleted. You will see the name and file size in this directory.
- Find the Thumbnails category and check the box.
- You can add Windows Error Report and Temporary Files to free up a lot of space.
Clear the cache. After ticking the file you want to delete, including the thumbnail cache, confirm the process in the next step by clicking OK and then selecting 'Delete Files'.
- Congratulations, you have deleted all your unused files, freeing up disk space and improving your computer's performance.
Regularly repeat the above process. The thumbnail cache and temporary file folders grow rapidly, so clean them up regularly. You should clean at least once a month to maintain computer performance. advertisement
Part 4 of 4: Clear browser cache
Clear Internet Explorer cache. Click the wheel icon in the upper right corner of the screen, hover Safety and select "Delete browsing history". You can press Ctrl+⇧ Shift+Del to open this window.
- Check the "Temporary Internet Files" box. Don't forget to uncheck the data you want to keep.
- Click the Delete button.
Clear Firefox cache. Click the Firefox button in the top left corner of the screen. Hover your mouse over History and select "Clear Recent History". You can press the key Ctrl+⇧ Shift+Del to open this window.
- Expand the Details section and check the Cache dialog box.
- Select "Everything" under "Time range to clear".
- Click the Clear Now button.
Clear the Google Chrome cache. You can clear Chrome cache from the Settings menu. Click Chrome's menu button (☰) in the upper-right corner of the screen and choose Settings. This will open the Settings page in a new tab.
- Click "Show advanced settings" at the bottom of the page.
- Find the Privacy section and click Clear browsing data. You can open this window directly by pressing the key Ctrl+⇧ Shift+Del
- Check the "Empty the cache" box and select Clear browsing data.


