Author:
John Pratt
Date Of Creation:
9 April 2021
Update Date:
1 July 2024

Content
- To step
- Method 1 of 4: Get a nice tan outside
- Method 2 of 4: Tanning on a tanning bed
- Method 3 of 4: Using self-tanners successfully
- Method 4 of 4: Quick tan with a spray tan
- Tips
- Warnings
Summer is coming and you want to look brown in your tank top with shorts? Or maybe it's January but you want to look a little tanned on your wedding day? Whatever the reason, a tan will make you feel good and look vibrant and healthy. But it's also important to tan in the safest possible way - UV rays from natural and artificial light are harmful to our skin and can cause deadly cancer. Here you will learn how to tan outside and on a tanning bed with the eye to reduce damage and how to get that coveted glow - without the risk - by using self-tanners and spray tans.
To step
Method 1 of 4: Get a nice tan outside
 Increase your exposure to the sun gradually. Most of all, when you start out in the sun, don't expose yourself for more than 1-2 hours at a time. Skip a day before lying down again. Melanin, the pigment in your body that colors your skin, is activated when UVA and UVB rays from the sun hit your skin. When this happens, more melanin is produced as a kind of sunscreen or protection from the sun's damage. During this process, your skin darkens and you get a tan. However, the melanin in your body is not unlimited and it takes a few days to make enough to protect you from burning. So if you're developing your base tan, take it easy and don't sunbathe every day.
 - Just one sunburn with blisters in your youth doubles a person's chances of developing melanoma, the deadliest form of skin cancer. And a person's risk of melanoma also doubles by burning more than five times normally in their lifetime.
- Usually everyone achieves stabilization when tanning. They just don't get darker. To maintain your color, continue to sunbathe regularly and follow the steps discussed below.
 Exfoliate regularly when you sunbathe. Exfoliating removes dead skin that blocks the sun's rays. It also reduces the dryness of your skin and dry skin does not absorb the sun well. When exfoliating, use a loofah, sponge or a good exfoliating bar of soap and scrub lightly all over your body when you shower or bathe. Apply moisturizer after drying off.
 - Do not use harsh and abrasive exfoliants or you will rub off some of your tan or stain your body.
- Do not exfoliate after you get out of the sun. If you shower after a swim, for example, exfoliate the next morning when you bathe.
- And don't exfoliate every day. Twice a week is sufficient. Much more often it will strip away natural oils causing your skin to become excessively dry.
 Use sunscreen. Applying sunscreen before laying on your beach towel may sound counterproductive, but with sunscreen you tan more gradually and keep your tan longer. About 20-30 minutes before you go out into the sun, apply a sunscreen with SPF 15-45 when you first start tanning. The SPF factor you use depends on your skin type or how easily you burn.
 - Once you have a base shade you can reduce your SPF factor, but don't take it less than 10.
- If you plan on getting in the water, make sure to use a waterproof sunscreen or put it back on when you go out.
- Sunscreen also has benefits in that it prevents you from burning, which can cause serious damage to your skin (not to mention cancer) and almost always results in peeling and flaking. If this happens you have to start all over again.
- Don't forget to use a lip balm with sunscreen too.
 Protect your eyes. When sunbathing outside, it is important to protect your eyes by wearing a hat or sunglasses with UV protection. Your eyes can also burn, which can cause serious and permanent damage.
  Change position while lying down. Turn from your stomach to your back regularly so that you tan evenly. When you tan your back, put your hands with palms up and vice versa. When summer is just starting and you are just starting to tan, you don't (and should) not spend more than two hours in the sun in the sun. Remember that a slow build-up is a lasting color. So switch sides every 15-30 minutes. You should also occasionally raise your arms above your head to allow the bottoms of your arms and your armpits to tan.
 - When you start to get sleepy, it's time to get out of the sun. Or if that is not possible, look for the shade for a while to avoid sunburn.
 Hydrate at least once a day. Moisturizing your skin is perhaps one of the most important elements of getting your tan and keeping it longer, as it keeps your skin from drying out, which is quicker due to UV rays. Hydrate more than once a day, especially when you go to sleep and after you shower. Use lighter moisturizing cream on most of your body during the day, and slightly thicker moisturizing cream before going to sleep on areas that bend and move a lot, such as your hands, elbows, ankles, knees and feet.
 - Bring a smaller jar with you to often smear on the "problem areas" during the day.
- If you are prone to acne breakouts on your face, use an oil-free moisturizing cream that is "non-comedogenic," which means it won't clog your pores.
 Stay hydrated. You want to prevent your skin from getting too dry so that it can absorb the sun's rays. It also helps your body get rid of toxins so your skin becomes healthier and your tan lasts longer. One way to do this is to stay hydrated from within. Drink plenty of fluids every day and drink more water if you are too thirsty or if your urine is dark yellow.
 - Regular hydration and plenty of drinking kills two birds with one stone when it comes to keeping your skin hydrated and ready to tan.
 Improve your circulation. Finally, another trick to getting a nice tan is to exercise before lying down. Doing so improves your circulation, which then stimulates melanin production. So instead of driving to the pool, run or jog before diving in.
 - There are also "tingle" tanning lotions you can apply before you sunbathe that claim to bring more oxygen to the skin's surface, improving circulation and stimulating melanin to make your tan more tan.
Method 2 of 4: Tanning on a tanning bed
 Choose a good tanning salon. Tanning salons offer different packages, features, prices, products and offer different types of tanning beds, making it difficult to know which one to choose if you have not received a personal recommendation. Here are some things to keep in mind when choosing.
 - Request a detailed breakdown of their prices for offers so you can see if you can afford their services if the offer is no longer on.
- Think about practical factors, such as how close to your home or work it is, whether you need to schedule appointments or whether your gym already has a tanning bed.
- Ask if they use lamps with high efficiency and how often they are changed. Ask to see the tanning beds to see how well maintained they are.
- Look around - is everything spotlessly clean? Do you see employees entering the booths to clean the tanning beds between customers? If the reception is dirty, for example, it's probably not a good sign.
- Talk to the staff. Well-trained professionals should help you determine your skin type, what they use to create a tanning schedule for you so that you tan fairly quickly but without burning.
 Decide how you want to build up your base color. Getting a base color goes through a consistent and incremental increase in tanning sessions, tanning times and levels in tanning beds. This is all determined by the schedule you have set up with the tanning salon you have chosen. As a rule of thumb, at first you only sunbathe for 5-7 minutes every 2-4 days and build it up from there.
 - Don't assume that just because you have fair skin, you just need to sunbathe longer. The likely result of that is that you burn well.
 Consider using special lotions. Tanning salons will try to sell you all kinds of lotions designed to make you tan faster and darker, keep your tan longer and so on. Many of those lotions - accelerators, maximizers, bronzers, intensifiers - are quite expensive and the experiences of how they work have been mixed. Check out what others have to say online.
 - If you've decided to experiment, try one at a time. If you use more than one and you find yourself getting the results you want, you don't know which lotion was responsible for that. Trying one at a time is the less expensive way.
- They can often also be bought much cheaper online than in the tanning salons.
- Wait before taking a shower if you are using a tanning lotion. If you are tanning on a tanning bed, wait 3-4 hours before showering if you are using a tanning lotion that works well. It is also a myth that showering after a tanning bed washes away your color. That will not happen.
 Wear sunscreen. Just like tanning outdoors, tanning beds expose your skin to UV rays. If you decide to use a tanning lotion, see if it has SPF protection and a factor of at least 15. If not, get one and apply it 20-30 minutes before you go to the tanning bed.
  Decide what to wear and what not to wear under the tanning bed. Some people like to get naked, while others want the bathing suit they plan to wear in the summer. Both are fine.
 - However, using different swimsuits will not even out your tan, and may even have a few white stripes across your body.
- You should also put on the glasses they offer to protect your eyes, or buy your own. Closing your eyes or covering them with a towel will not protect them from UV rays, which can cause significant damage to your retinas. You should also move the glasses around your eyes every now and then to prevent eyes like a raccoon.
 Prep your skin before you sunbathe. Just like sunbathing, you should always exfoliate your skin before going on a tanning bed. Also moisturize after exfoliation.
  Move on the bed. Just like you do out in the sun, you have to move your body so that all parts are exposed to the light for about the same amount of time. On a tanning bed, you don't have to turn from your back to your stomach because the lights are both below and above you, and around you to a certain extent. So turn in different directions every now and then.
 - Think of places where your body is bent (such as in the hollow of your arm or at the bottom of your neck) or where your skin is compressed. If you don't adjust your posture often enough, you will get white folds.
 Maintain your base color. Once your base color is achieved, you will likely go back to just tanning 2 days a week. A good tanning salon will not try to convince you that you need more. Also, keep your routine of exfoliating, moisturizing, and drinking a lot full.
Method 3 of 4: Using self-tanners successfully
 Choose a self-tanner. There are several self-tanners in gels, creams, lotions and sprays on the market for you to choose from. You should also choose a self-tanner for its color, which is largely determined by a color additive called DHA (dihydroxyacetone). Choose one and think about your skin tone, not the desired result. If you have a lighter complexion, choose a medium shade. If you have olive skin, choose a darker shade. Here are some more tips.
 - The best way to choose one initially is to read online experiences.
- Self-tanners that contain green pigments help to compensate for the orange effect.
- Lotions are often best for beginners because they take longer to absorb, giving you more time to correct mistakes, while mousses and sprays dry faster and are best used by more experienced people.
- Gels spread easily and work well for people with normal to oily skin.
- First, do a skin test by applying some to your stomach, where it is usually bleach, and letting it dry and soak in overnight. In the morning you check whether the color suits you well.
 Prep your skin, eyebrows and hairline. You must prepare your skin before applying the chosen self-tanner. So shave or wax, exfoliate from head to toe and make sure your skin is completely dry. That last part is important. Also, apply petroleum jelly to your eyebrows and as close to your hairline as possible so that your eyebrows and hair don't discolor if you get self-tanner on either.
 - However, if you are waxing, do it at least 24 hours before applying the self-tanner so that your skin does not irritate. In fact, waxing may be better than shaving because shaving can shorten the life of your tan by sanding it off.
- For the same reason, you limit exfoliation. Self-tanners usually only work for up to a week, so don't exfoliate until right before reapplying. Avoid oil-based exfoliants as they can leave residues that can cause streaks.
 Put on tight disposable latex gloves. These will prevent your hands from getting too orange or dark when you apply the self-tanner.
 - You can also wash your hands thoroughly with soap and water if you have applied the self-tanner to different parts of your body.
 Use a little lotion. Spread some non-oil based lotion on your knees, ankles, elbows, around your nostrils, and other especially dry areas to help the self-tanner penetrate these areas better. Some people apply a layer of lightweight lotion all over their body before applying the self-tanner, but this is not necessary and many advise against it.
  Apply the self-tanner in parts. To avoid the white streaks of bending over, start at your feet before moving to your ankles and legs. Use about 5 ml at a time and rub it in with small, circular movements of your hands. Then do it on your stomach, chest, shoulders, sides, arms and armpits. Take off your gloves and put a little on your hands avoiding your palms. Then use a lotion band, stick or sponge brush to rub your back with self-tanner. Finally, apply it to your face by applying a small coin-sized amount to your cheeks, forehead, nose, and chin while rubbing it outwardly into your skin with your fingertips. Use the remainder along your hairline and jaw.
 - Wash your fingertips thoroughly with soap and water after applying the self-tanner to your face.
- You can buy the gear to use for your back online for a reasonable price. If you don't like using it, you can ask someone to apply the self-tanner to your back.
- If you're using a self-tanning spray, you can spray it on your back in the shower. Step in, look over your shoulder, spray a lot in the air behind you and then step back into the mist. Do this a few times to make sure you get enough on your skin.
 Begin the drying process. To speed up the drying process, take a hairdryer and blow dry all areas where you put the self-tanner on a low setting. You only need to focus the heat on each area for a few seconds. After that it is a matter of waiting. Even if some say dry in 15 to 20 minutes, wait at least an hour before putting on your clothes or going to bed.
 - Before putting on your clothes, use a brush to lightly apply talc-free baby powder to your body. This prevents color from getting on your clothes.
- Since getting wet is the worst thing for your tan right now, don't shower or exercise (sweat) for at least six hours after applying self-tanner.
- The best option is to apply the self-tanner an hour or two before going to bed. It's also best to put on long sleeves and pants, and put some towels on your bed to keep color from getting on your bedding.
 Correct mistakes. If you wake up and see spots, streaks, or uneven distribution, there are a few things you can do to correct these problems: a) Add a little extra self-tanner and rub it in really well (this works best for areas that are lighter) or for stains) and b) rub lemon juice on the area for 1-2 minutes, then blot with a damp towel (this works better if the area has become too dark or streaked).
  Keep track of your color. Different self-tanners last for different lengths of time, although you usually need to reapply once a week. You can help extend that time by moisturizing regularly; wash with mild, non-abrasive cleansers; avoiding acne treatments with retinol; and don't exfoliate more than once between uses.
 - Remember: Even though you may look tan, you should still use sunscreen when you go out in the sun.
Method 4 of 4: Quick tan with a spray tan
 Prep your skin. First wax or shave 24 hours before your spray tan. On the day of your spray tan, use a non-oil based exfoliator to remove dead skin and get a more even color, paying close attention to dry areas and on your neck, chest and face where you are more prone to streaking. to get. Do not use oils or moisturizers when you are done bathing. Before applying your spray tan, wash your face well to remove all makeup.
  Dress appropriately. Although you do have time to let the spray tan dry before getting dressed, it is still recommended to wear dark clothing. You can also go naked under the sunbed or wear a thong or underpants. If you opt for the latter, wear one that doesn't mind that it might discolor permanently.
 - Remember to bring another pair of underwear to wear afterwards.
 Decide how brown you want to get. Just like with a self-tanner, you don't want to overdo it. If you have a fair skin tone, choose a light or medium tan. If you have olive skin, choose medium or dark.
 - Note: Different spray machines have different settings and color options. The main thing is not to overdo it. Subtle changes are more flattering than drastic - looking grilled just doesn't appeal to anyone.
 Apply protective creams. When you are undressed, apply a protective cream or lotion to the areas of your body that you do not want a spray tan on, such as your palms, between your toes and the soles of your feet. The tanning salon usually offers these creams.
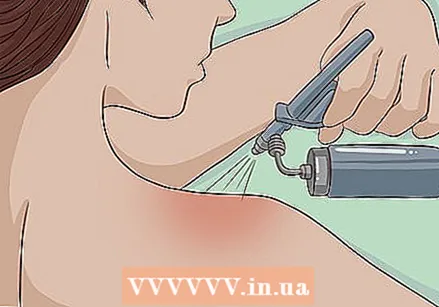
  Prepare to spray. When you go to a tanning salon where a professional sprays, you will usually be asked to adopt different poses, so forget about shyness for a few minutes. Some booths are more like an automatic car wash, where you go in and get instructions on when to turn and so on. And then there are also booths where you have to spray yourself, which are much less expensive, but the degree to which you get streaks and spots is often also greater.
 - During the process, you often receive the tanning spray itself, and then often a moisturizing mist and air dry.
- If you are not being air dried and any leftover spray remains on your skin, in clear or brown droplets, quickly dry them lightly with a towel so that they do not roll down your body and form streaks. Instead of drying yourself from your head down, start at your feet and sweep up your legs. Then you start at your wrists and sweep your arms up to your shoulders. Finally you finish with your face and you dry from your chin to your forehead.
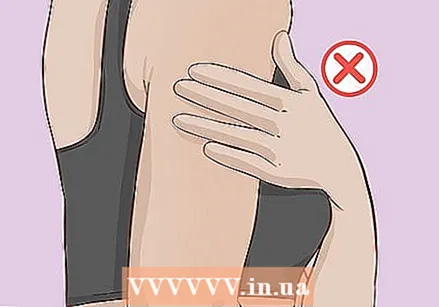 Avoid water, exercise and touching your skin. Your tan will continue to develop for several hours and your skin will feel tacky. If you do touch your skin during this time, wash only the bottom of your hand to wash off the tanning agent. Also avoid contacting your skin with water and do not exercise (again, sweat) in the development phase.
 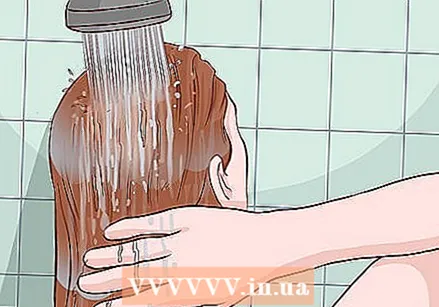 Wait 8-12 hours before showering and washing your face. Doing this will allow your tan to fully develop. When you take your first shower, don't be surprised if some of the color washes off. This is just the bronzer that makes up part of the tanning agent. Your tan will remain intact.
 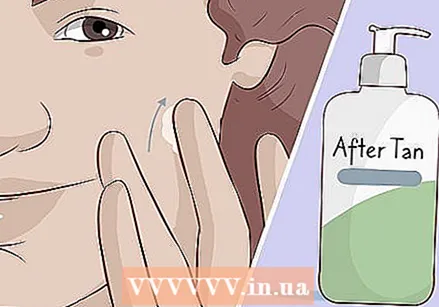 Maintain your spray tan. A spray tan usually lasts for 4-10 days. As with self-tanners, avoid exfoliating between sessions and minimize shaving to extend the life of your color. Hydrate at least once a day, especially before going to bed, but use a water-based remedy to avoid streaks. Here are some more things to avoid that also apply to self-tanners.
 - Acne medications that exfoliate your skin
- Bleaches for body hair
- Face masks
- Facial toners with alcohol
- Make-up removers with oil
- Taking very long hot baths
Tips
- Remember to buy a darker shade of foundation, powder and bronzer to match your newly tanned skin.
- Make sure to remove your makeup before you sunbathe so that your pores can absorb the sun's rays.
- The days when you used baby oil while tanning have been. Do not do it. Using with baby oil you just ask for it to burn.
- When you are on the beach, it often feels less hot due to the breeze, which causes you to lie down too long and burn badly.
- If you do burn, put aloe vera on your skin. You can also try a cool bath with some vinegar or oatmeal.
Warnings
- Type 1 skin types - or those characterized by white, blonde or red hair; freckles; blue eyes; and that almost always burn - should never sunbathe outside or under the tanning bed.
- There are a number of medications and topical solutions called photosensitizers that can cause reactions if the person taking them is exposed to UV light, both indoors and outdoors. If you notice a rash, itching, scaling, inflammation, or unusual swelling, stop tanning and see a doctor.
- Many people claim that indoor tanning booths are safer than outdoor tanning. The American Skin Cancer Foundation says that is not true, and that research shows that people who sunbathe frequently in new, high-energy tanning beds are exposed to 12 times the annual UVA amounts as those who sunbathe outside. They are also 74% more likely to develop melanoma, a deadly type of skin cancer.


