Author:
Judy Howell
Date Of Creation:
6 July 2021
Update Date:
1 July 2024

Content
- To step
- Part 1 of 3: Preparing walnuts for planting
- Part 2 of 3: Planting the walnuts
- Part 3 of 3: Planting and caring for walnut trees
- Tips
- Warnings
- Necessities
While there are different types of walnut, especially the black walnut and the English walnut, the basic care and planting instructions are the same. Still, due to the existence of hundreds of varieties adapted to different climates and disease resistance, it is recommended to plant nuts from relatively close range. Walnut trees can produce flavorful nuts and durable, attractive wood, but hobby gardeners should realize that they often kill nearby plants! You can grow walnut trees from nuts, which are often free to pick but difficult to prepare, or seedlings, which usually have to be bought but often have a higher chance of success.
To step
Part 1 of 3: Preparing walnuts for planting
 Understand the effort involved and the risks to your garden. Preparing walnut seeds can take months, and the chances of success can be low. You can choose to buy a seedling instead and move to that section. Before choosing either method, be aware that walnut trees, especially black walnut, release chemicals into the soil that kill many nearby plants, including pine trees, apple trees, tomato plants, etc., along with their enormous size. and sometimes aggressive spreading of new walnut plants can make them unpopular in cities and suburbs.
  Collect fallen walnuts. In the fall, collect nuts that have fallen from the walnut tree, or gently hit walnut branches with a PVC pipe to release ripe walnuts. Even when ripe and fallen, most nuts will be wrapped in a thick green or brown husk around the nut shell.
 - Warning: Walnut husks can stain and irritate skin and clothing. Waterproof gloves are recommended.
 Alternatively, you can buy walnuts. If you plan to start a walnut orchard to produce nuts or wood, ask a local lumberjack or look online for a species and variety that is especially suited to your climate and purpose. It is best if you buy walnut seed from trees within a 160 km radius of the location where you want to plant, because they are better adapted. Walnuts usually grow in plant growing zones 4-9 or areas with nighttime temperatures between -34 to -1 degrees Celsius, but some varieties do better in the cold than others.
 - The black walnut is very expensive and in demand for its wood, while English walnut (also called Persian walnut) is widely cultivated for both walnut and wood. There are many varieties of both, along with other less widely available ones.
- Grocery walnuts probably don't have the moisture level necessary for germination. Even if they do, the nuts were likely produced by a hybrid tree or tree variety suitable for a different climate, making it less likely that you will be successful in your area.
 Remove the bolsters (optional). Walnuts can also grow without the husks removed, but many people remove the husks to check that the walnuts in them are undamaged and to make it easier to work with. To remove the husk, soak the walnut in a bucket of water until the husk is soft to the touch, it can take up to three days for the toughest nuts. Break and remove the softened bolsters by hand.
 - If the husks are dried out, it can be next to impossible to remove. Try to drive over it by car.
- You can pass a larger amount of walnuts through a pick thresher, or you can swirl them in a cement maker with gravel and water for 30 minutes.
 In the winter, keep the nuts moist for 90 - 120 days. Walnuts, like many plant seeds, need to be in a damp, cold environment before the plant awakens from sleep and emerges from the husk. With walnuts this takes 3 - 4 months, depending on the variety, and must be kept moist. Storing seeds in an environment for this purpose is called stratification, and with walnuts it can be done in one of the following ways:
 - Keep small amounts of walnuts in damp peat moss or sand, in plastic bags in a refrigerator, or any other location between 2 and 5 degrees Celsius.
- For a large amount of nuts, you can dig a well in fast-draining soil, 30 to 60 cm deep. Fill this hole with alternating several layers of nuts and 5 cm layers of sand, leaves or mulch. Cover the pit with a screen to keep rodents out.
Part 2 of 3: Planting the walnuts
 Remove sprouting seeds a week before sprouting, but keep them moist. Once the soil has thawed, and at least 90 days have passed, remove the seeds from their cold environment. Viable seeds should now have a small sprout. Keep the seeds moist for a full week before planting.
  Choose a place to plant. All walnuts require high-quality soil, and this step is especially important if you want to start a walnut orchard. Choose a spot with well-draining, loamy soil to at least three feet deep. Avoid steep slopes, mountain peaks, rocky soil and soil with large amounts of clay. The lower areas of north facing slopes are acceptable in sloping or mountainous terrain.
 - Walnut is quite versatile when it comes to soil pH. Soil with a pH between 6.0 and 6.5 may be best, but anything between 5 and 8 should be acceptable.
 Clear the site. Remove existing vegetation from where you plan to plant, as they will compete for the same nutrients the walnut tree or trees needs. If you want to plant an orchard, cultivating the terrain to aerate the soil is also recommended.
  Plant the walnuts in small holes. Dig small holes about 5 - 7.5 cm deep and lay the walnuts on their sides in the bottom of this, then fill with soil. When planting multiple trees, make the holes 3 to 3.5 meters apart, in a grid shape.
 - Optionally, you can plant two or more nuts in any spot 20 cm apart. Once the seedlings have grown for a year or two, you can remove anything but the healthiest from anywhere.
- Check the tips for an alternative planting method to protect against squirrels and other small animals.
 Take care of the growing seedlings. The following section provides information on how to care for seedlings and growing trees. Skip the steps on planting trees from seedlings.
Part 3 of 3: Planting and caring for walnut trees
 Choose seedlings (if you are not growing them from nuts). Measure the diameter of the seedling 2.5 cm above the root collar, where the roots merge into the trunk. Select seedlings with a minimum diameter of 0.65 cm at that spot and preferably larger. This is the most important measure for predicting quality.
 - Bare seedlings, sold without soil, should be planted early in spring, before buds start to grow, and planted immediately after purchase.
- Potted seedlings can be planted later and can tolerate drier soil, but are generally much more expensive.
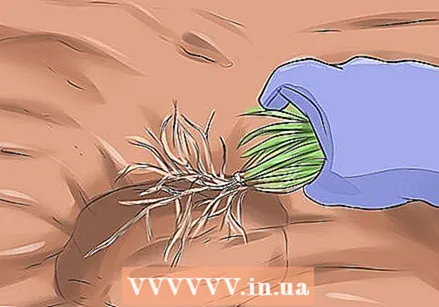
 Plant the seedlings in the spring. Choose well-draining, loamy soil, avoiding steep slopes and hilltops.Place the seedlings in holes twice the diameter of the seedling's roots and just deep enough to cover the roots. For best results, refill it with one part compost on three parts normal soil. Compress the soil and water thoroughly.
 - Keep seedlings 3-5 feet apart to encourage tree growth.
 Do not overwater. For at least the first two years after planting, whether grown from nuts or from seed, the walnut tree will need supplemental water, especially when the weather is dry or warm. Water the plant generously, but do not water again until the soil is almost dry. Regular watering can be bad for the plant.
 - After two or three years, the tree only needs to be watered during the hottest period of the year or during drought, about one to three times a month.
 Deal with weeds. Care for seedlings by keeping the area around them free of sod and weeds, which competes with the growth of small seedlings. Remove grass clumps and weeds by hand or by laying down root cloth. Larger seedlings can be treated with mulch to keep weeds away by spreading 5 to 7.5 cm over the root areas.
 - Do not use mulch on plants that have not yet emerged from the ground, as this can block the seedling from growing. Wait until the seedling is woody and has developed roots.
 Learn about how to prune walnuts. If you are growing the walnut for the wood, it is important to prune early to form a straight trunk, keeping a leading branch on top of the tree, leading it straight and up for the next one or two growing seasons. Saplings grown for nuts can be left alone after thinning, but further pruning is wise for black walnut trees as they are often sold for wood, including nut varieties.
 - If you have not previously pruned trees, especially saplings, it is recommended that you seek out an experienced pruner to help you identify leading branches and major branches.
- If the top of the tree is forked, bend the best leading branch up and secure it to other branches for support, then trim the ends of the support branches to prevent growth.
 Thin out the amount of trees to select the best specimens. Most orchards start with more plants than the area can sustain. Once the trees are big enough for the branches to touch, choose the healthiest trees that show the characteristics you value, usually a straight trunk and fast growth. Remove the rest, but avoid clearing up too much space that will allow weeds or even competing trees to grow.
 - You could use a crown competition formula to help you decide.
 Only use fertilizers when the tree is no longer a sapling. Fertilization is somewhat controversial, at least for black walnuts, as it can help competing weeds more than the tree if the soil is already high in nutrients. Wait for the strain stick thickness, or at least 10 cm in diameter, measured at 1.4 meters above the ground. It would be best to send soil or leaves to a forestry lab to determine the exact nutrient requirement. If this is not possible, apply fertilizer containing 1.3 pounds of nitrogen, 2.25 pounds of superphosphate, and 3.6 pounds of chloride or potassium carbonate to each tree in late spring. Leave a tree unfertilized to compare the effect and repeat every 3-5 years if possible.
 - Test the soil's pH after fertilizing to see if you should return it to normal levels.
 Keep pests under control. Squirrels are a common sight in walnut forests, and can take a full crop of walnuts if not avoided. Cover the trunks with plastic tree guards to protect them from climbing up, and prune any branches less than six feet from the ground if you can do so without creating knots that diminish the value of the wood. Other pests such as caterpillars, aphids and flies vary by region and may not harm your tree if they are active late in the growing season. Seek advice from an area forester or an experienced walnut grower on specific information for your area.
 - Keep livestock away from walnut trees of all sizes, as the damage they cause can make even the wood of mature trees worthless.
Tips
- To protect planted walnuts from small animals, you can plant them in cans. First, let a metal can burn for so long that it will decay in a few years. Remove one end and cut an X-shaped opening in the other end using a chisel. Place 1 to 2 inches of soil in the can, bury the nut, and bury the can with the side with the X up, an inch below the ground. The walnut will be protected and will sprout through the top of the can.
Warnings
- If the harvested nuts are allowed to dry out, or removed before stratification is complete, it may take a full extra year to start growing, or they may stop growing at all.
- Walnut leaves can spread chemicals that kill other plants. Collect them and compost them until they are completely decomposed to make them safe for use as mulch.
Necessities
- Walnuts or black walnut seedlings
- Plastic bag
- Trowel


