Author:
John Pratt
Date Of Creation:
13 April 2021
Update Date:
1 July 2024

Content
- To step
- Part 1 of 3: Buying a fan
- Part 2 of 3: Opening the cupboard
- Part 3 of 3: Configuring the fans
Computers are complex pieces of technology with numerous components that must all work properly. Fans are an essential part of any computer as they provide cool airflow over the components. If your computer overheats, or if you need to replace an existing fan, installing a new fan can help lower the temperature and even make the computer quieter.
To step
Part 1 of 3: Buying a fan
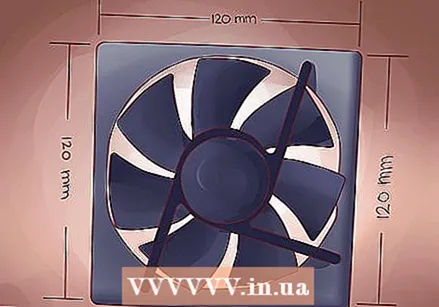 Check the specifications of your computer case. There are 2 sizes most commonly used for computer fans: 80mm and 120mm. Your computer may support multiple sizes, such as 60mm or 140mm. If you are unsure, remove one of the installed fans and take it with you to your computer store.
 - Most modern cabinets have 120mm fans.
 Check out your computer case. Look for empty places where you can install a fan. You can find these on each side of the computer. Each cabinet is constructed differently and has its own maximum for the number of possible fans.
  Choose large fans, if possible. If your cabinet supports multiple sizes of fans, choose a larger size. 120mm fans are significantly quieter and move a lot more air, compared to the less efficient, smaller fans.
 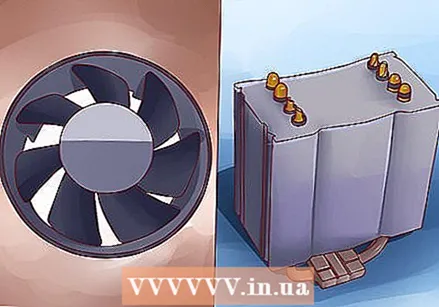 Compare different fans. Read the spec sheets and experiences of others to compare the different fans. Look for fans that are quieter and reliable. Fans are usually very cheap and you may be able to get a discount if you buy several. Some of the more popular manufacturers are:
 - Cooler Master
- Evercool
- Deep Cool
- Corsair
- Thermaltake
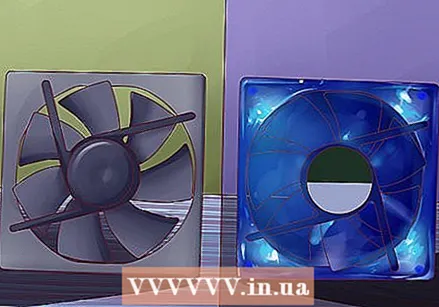 Choose between LED or standard. If you want to add a little flair to your closet, you can purchase LED fans. These ensure that your cabinet lights up in different colors, but they are a bit more expensive.
Part 2 of 3: Opening the cupboard
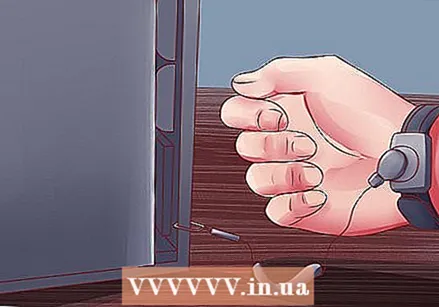
 Remove the side panel. You have to remove the side panel from the computer to access the inside. Use the screws on the back of the computer to remove the side panel. This is the panel opposite the panel that the motherboard is attached to.
 - Make sure the computer is turned off and the power cord is unplugged.
 Ground yourself. You should always ground yourself before working inside a computer. Electrostatic discharge can seriously damage components. You can purchase an electrostatic wrist strap or ground yourself by touching a metal water tap.
 - Keep grounding yourself while working with the computer to make sure no further charge builds up.
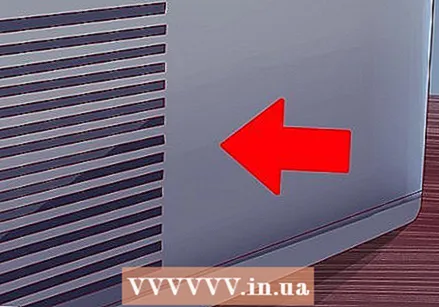 Find all fan openings. There are several openings in the cabinet for installing a fan. You can find these all over the closet, depending on the model.
  Find the connections for the power supply on the motherboard. You can find these everywhere, and there may be just a few. Fan connections are commonly referred to as CHA_FAN # or SYS_FAN #. If you have trouble locating the connectors, see your motherboard's documentation.
 - If you have more fans than connectors, you can use Molex adapters to control additional fans.
Part 3 of 3: Configuring the fans
 Understand how efficient air cooling works. The fans in your computer don't just blow air over your components. This is not the most efficient way to cool your computer. Instead, fans are supposed to move the air through your computer, causing fresh air to constantly flow over the components.
 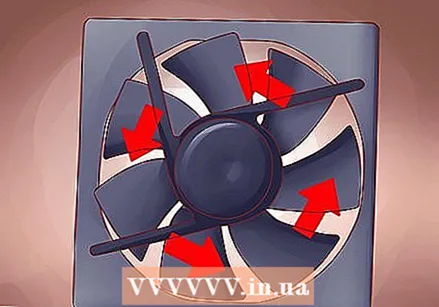 Examine the fan. Fans move air in a specific direction, indicated by an arrow printed on the top of the case. If no arrow is printed, you can examine the label on the fan mechanism. The air usually flows out on the side where the sticker is affixed.
  Place your fans in such a way that a wind tunnel is created. You make the wind tunnel by placing suction and blowing fans. Usually you will want to place more blowing fans than suction fans, because this ensures that a kind of vacuum is created in the cabinet. If so, all the small openings and crevices in the cabinet will also start drawing in cool air.
 - Back - The power supply on the back of a computer has a fan that blows the air out. Place another fan on the back of the case that are also intended to blow air out.
- Front - Install a fan on the front of your computer that draws in air. If necessary, place a double front fan in the slot of the hard disk (if possible).
- Side - Side fans should be set as exhaust. Most enclosures do support a side fan.
- Top - A top fan should be set to draw in air. It may seem logical to place an outlet just at the top, but this usually results in too much air flowing out, without enough air to replace it.
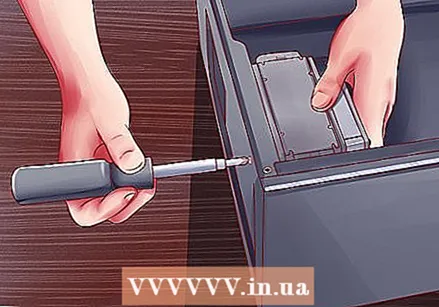 Install the fans. Fasten the fan with the corresponding screws. Make sure it is securely attached, otherwise the fan will make too much noise. Screw the fan on tightly, but don't overdo it as you may want to remove the fan at a later stage.
 - Make sure that the power cables, including those of the fan itself, cannot get caught between the propellers. Use zip ties to keep it out of the way, if necessary.
- If it is difficult to hold the fan in place while screwing it in, use a few pieces of masking tape to secure it until the screws are tight. Make sure you don't mask other components or circuits.
 Connect the fans to your motherboard. If you have too many fans, or the fan cables are not long enough to reach the connectors, use a Molex adapter to connect the fans directly to your power supply.
 - If the fans are connected directly to the power supply, it is not possible to control the speed of the fans in the BIOS; they always run at full speed.
 Close the case of your computer. Make sure the housing of your PC is closed before testing the fans. Cabinets and fans are designed with airflow in mind, and an open cabinet negates this. Open cabinets have a much less efficient air flow than closed cabinets.
  Monitor your fans. If the fans are connected to the motherboard, you can check if they are working properly through the BIOS. You can also control the speed of the fan via the BIOS. Use a program like SpeedFan to control the speed of your fans from Windows.
  Keep an eye on the temperature of your computer. It's nice if your fans run fine, but the goal is of course to keep the components in your PC cool. Download a program to monitor the temperature in your computer (SpeedFan can also do this for you). If your computer is still getting too hot, you may want to relocate or reorient the fans, or consider more extreme cooling methods.


