Author:
Morris Wright
Date Of Creation:
25 April 2021
Update Date:
1 July 2024
Content
- To step
- Method 1 of 3: Using craft cardboard
- Method 2 of 3: Using a balloon
- Method 3 of 3: Using artificial leather
- Warnings
- Necessities
- Use craft cardboard
- Using a balloon
- Using artificial leather
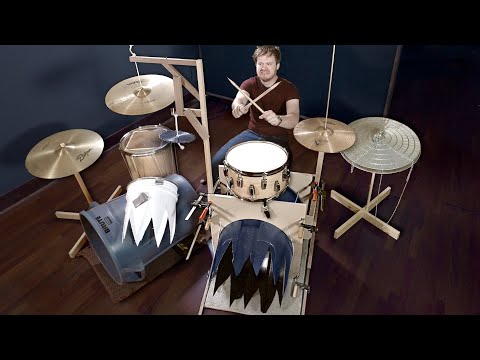
Have you ever wanted to have your own drum to play on, but found it too expensive to buy one? Or maybe you want to buy a new drum for your child, but you don't have a lot of money to spend? Whatever the reason, drums are fun and easy to make using a variety of materials.
To step
Method 1 of 3: Using craft cardboard
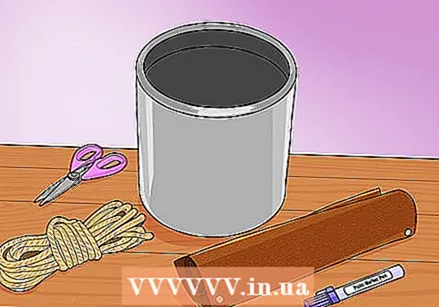
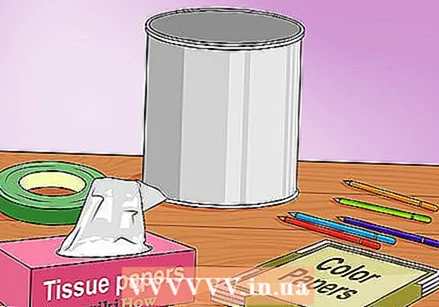 Gather your supplies. This method requires an empty cylindrical container or container, electrical or masking tape, cardboard, wax crayons or colored pencils (optional), two pencils (optional), and tissue paper (optional).
 - You can use a coffee can, a popcorn can, or a canning can. This will be the base of your drum, so find a container or can that is clean and in good condition.
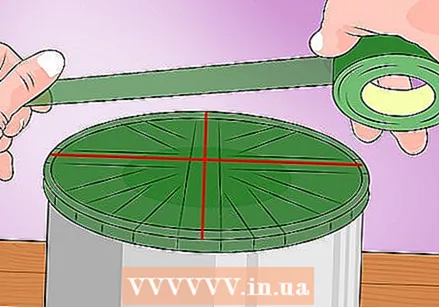 Stick pieces of tape criss-cross over the top of the can until it is completely covered. This will be the top of the drum, and it should be strong and sturdy.
 - Try putting at least one to three layers of tape on the top of the can and crisscrossing the pieces close together to make the drum stronger.
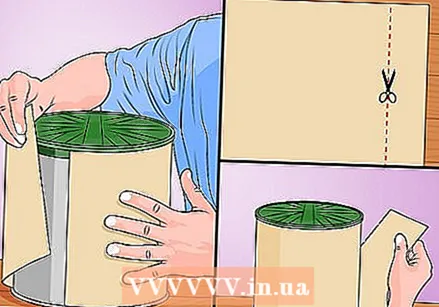 Measure the cardboard by wrapping it around the can. Then cut the craft cardboard so that it fits tightly around the tin. Fix the cardboard with tape and cut away the excess cardboard.
 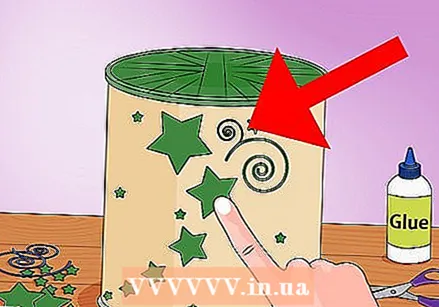 Decorate the drum. You can also let your child decorate the drum with markers, wax crayons or paint.
 - You can also cut shapes from other craft cardstock and glue them to the side of the drum.
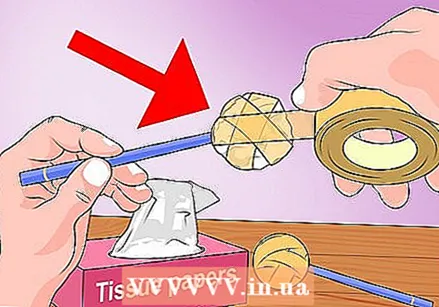 Make two drumsticks. Crumple a piece of tissue paper and put the wad on the end of a pencil. Wrap masking tape or electrical tape around the wad of tissue paper to secure it to the pencil.
 - Repeat this method with the other pencil.
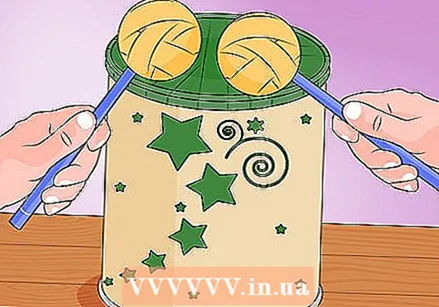 Try the drum. Now is the time to have fun with your drum or let your toddler play with it to see if the drum can withstand a drumming session.
Method 2 of 3: Using a balloon
 Gather your supplies. For this method you will need a clean round container such as a coffee can or a can of milk powder for babies, insulating tape or masking tape and rubber bands (optional).
 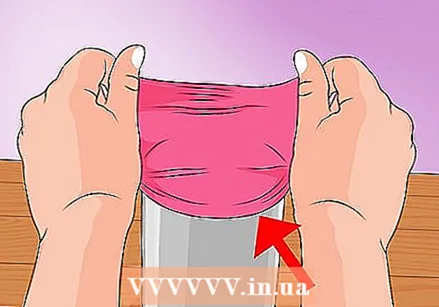 Stretch the balloon around the can. Open the balloon with your fingers and stretch it to fit around the top of the can.
 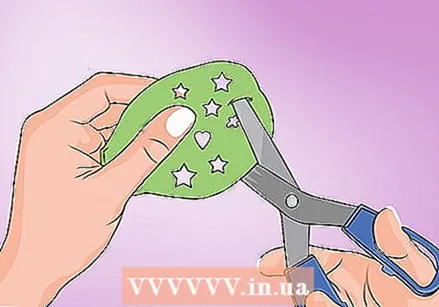 Place another balloon on a hard surface. Don't blow it up because you need a floppy balloon. Cut small holes in the balloon with scissors. The holes do not have to be perfect or the same size as they are intended for decoration.
 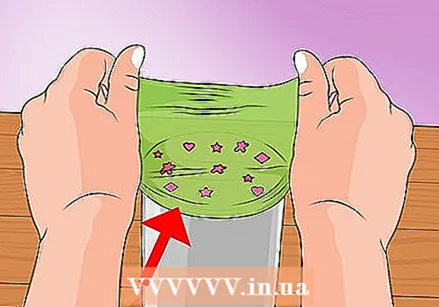 Stretch the balloon you cut over the first balloon around the can. Using two balloons makes the drum stronger. The holes in the top layer provide a nice decoration.
 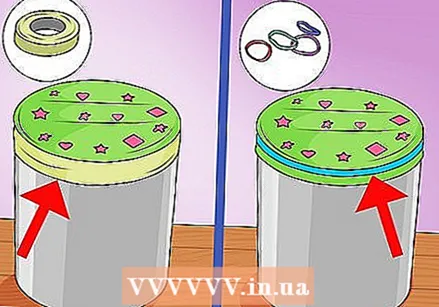 Wrap tape around the tin to secure the balloons. You can also use rubber bands and simply put them around the tin to keep the balloons in place.
 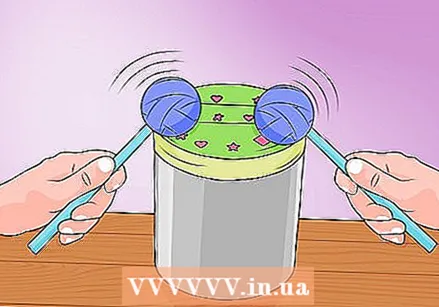 Try out the drum. You can also give the drum to your child and have him or her test the drum.
 - If you want to make the drum heavier, you can add a handful of rice or dry lentils to the can before stretching the balloon over the top of the can.
- Make drumsticks from pencils and tissue paper or just use your hands to drum along with your favorite song.
Method 3 of 3: Using artificial leather
 Gather your supplies. For this method you will need a round tin or tin can, a roll of leatherette, a ball of thin string, a marker and scissors.
 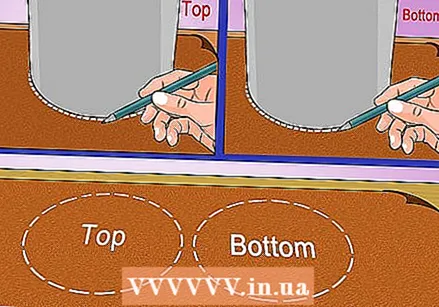 Put the tin on the back of the leather. Draw a circle around the tin with the marker. Move the can and turn it over again.
 - These circles will become the top and bottom of the drum.
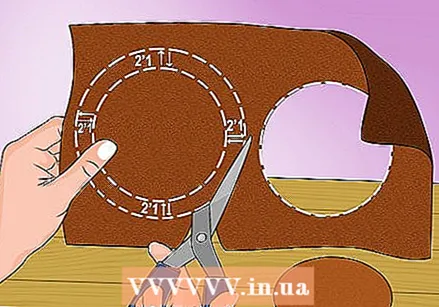 Cut out the circles leaving 5 centimeters between the line you drew and the cut line. This way you have extra leather to get the rope through.
 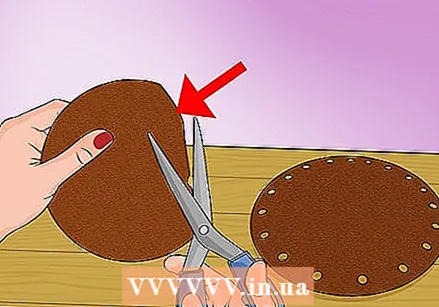 Using scissors, cut small pieces in the extra piece of leather around both circles. You use these holes to thread the rope around the drum.
 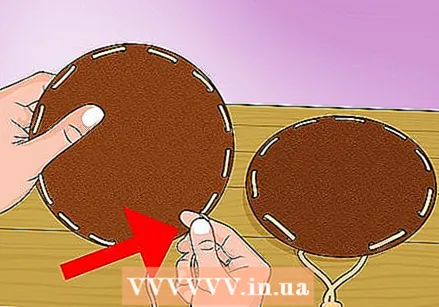 Thread the rope through the holes. When you have passed the rope through the holes on the piece of leather for the top and the piece for the bottom, make a knot in it and cut the excess piece of rope.
 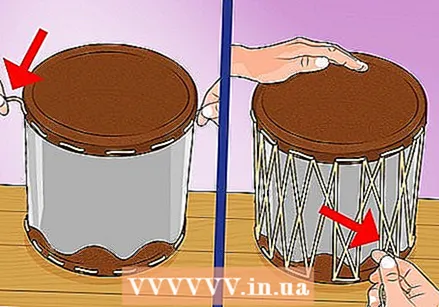 Place the pieces of leather on both ends of the tin. Then use the rope you passed through both circles to tie the pieces from top to bottom. In the meantime, pull everything tight.
 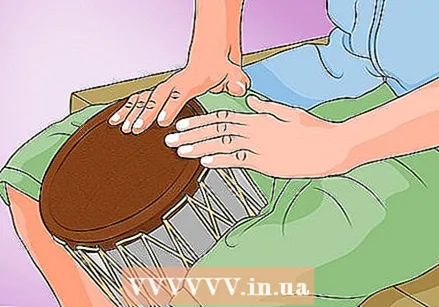 Try the drum. The drum should not only look good, but sound good too.
 - If you want a stronger drum, use eyelet pliers to punch holes in the leather that will allow you to thread the rope through. This will make the drum stronger and likely to last longer.
Warnings
- Avoid getting a cardboard drum wet or exposing it to water, as this can weaken its strength and shorten its life.
Necessities
Use craft cardboard
- Cylindrical container or tin
- Insulating tape or masking tape
- Craft Cardboard
- Wax crayons or crayons (optional)
- 2 pencils (optional)
- Silk paper (optional)
Using a balloon
- Round aluminum tin
- Balloons
- Insulating tape or masking tape
- Rubber bands (optional)
Using artificial leather
- Round tin or canned tin
- Roll of artificial leather
- Thin rope
- Marker
- Scissors


