Author:
Tamara Smith
Date Of Creation:
24 January 2021
Update Date:
1 July 2024
Content
- To step
- Part 1 of 3: Designing the mosaic
- Part 2 of 3: Painting and lacquering the table top
- Part 3 of 3: Applying the mosaic
- Necessities
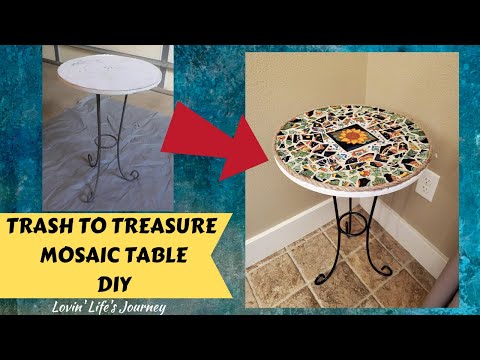
A mosaic table is a fun and creative piece of furniture that can make your home look more beautiful and artistic. However, it can be difficult to find the right mosaic table because they all have different patterns and colors. Fortunately, you can make your own mosaic table from an old table you have around the house. Start by designing the mosaic and preparing the table top. After that, all you have to do is place the pieces of tile on the table top and enjoy the unique mosaic you have just created.
To step
Part 1 of 3: Designing the mosaic
 Place a large sheet of butcher paper on the table top. Secure the paper to the edges of the table with masking tape. If the paper isn't wide enough, tape two pieces together so that the paper covers the entire table.
  Cut the paper to the shape of the table. Cut around the edges of the table with scissors. While cutting, the tape should hold the paper in place. When you are done, remove the pieces of tape and scraps of butcher paper from the table top. The paper should be the same dimensions as your table top.
 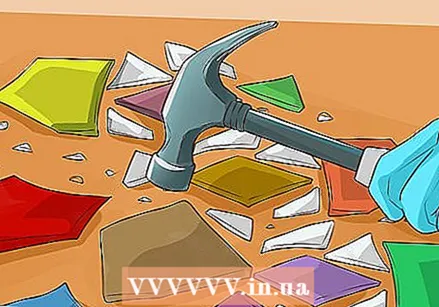 Smash the tiles to get different shapes. If you want to give your table an artistic look, you can make pieces of tiles in different shapes yourself. Lay the tiles flat on the floor and cover with a towel. Then carefully knock the tiles into pieces using a hammer. When you lift the towel, you should have pieces of tile in different shapes and sizes.
 - You can also just buy smaller tiles from the store.
- Consider covering your table top with ready-to-use ceramic tiles, glass tiles, glass gems, or a mirror.
 Place the pieces of tile on the butcher paper. Place the paper on another flat surface, such as the floor. Collect the tiles you want to use for the mosaic and place them on the paper. This will give you an idea of what the mosaic will look like before you apply the pieces of tile to the table top. It also helps to organize the pieces of tile as you make the mosaic.
 - If the pieces of tile you use for your mosaic are all the same size, remember to leave space between the pieces so that you can grout them later.
- Experiment with creating unique designs. If you don't like your design, you can arrange the tiles on the paper in a different way before creating a mosaic on your table top.
Part 2 of 3: Painting and lacquering the table top
 Sand the table top. If the table top is wood, make sure you have a smooth surface to place the tile pieces on. Use a hand sander or a belt sander to smooth down any rough edges and bumps in the wood. If the table top is made of a different material, such as granite or metal, you can skip this step.
 - Use sandpaper with a grit size of 150 on coarse woods such as oak and walnut and sandpaper with a grit size of 180 on fine woods such as cherry and maple.
 Dust the table. Run a feather duster or dry cloth over the surface of the table to wipe off any sanding dust. Make sure you run your hand over the surface of the table to make sure you didn't miss any spots when sanding.
 - If there are places that you skipped when sanding, sand them with the sander anyway.
 Wash and dry the table. Use a damp cloth and regular mild dish soap and treat the surface of the table with it. When the table top is clean you can start making your mosaic.
 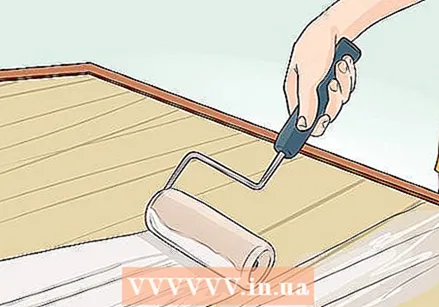 Paint the surface of the table. Use a paint roller or paintbrush to apply a coat of paint to the table top. You can buy special latex paint for furniture at a paint store or hardware store. This is satin paint. The first coat of paint probably won't be dark enough, so you may need to apply several coats of paint. When you have painted the table, let it dry overnight.
 - It is important to paint the table if you want to use clear tiles or stones and you don't want the natural color of the table to show through the mosaic.
 Paint the table top. Make sure to mix the varnish well before applying it to the tabletop. Apply a coat of oil- or water-based polyurethane lacquer with a clean brush. Do not forget to read the directions on the packaging before using lacquer or stain. The paint prevents water damage.
 - Paint the table in a well-ventilated area.
Part 3 of 3: Applying the mosaic
 Glue the tile pieces to the table top. Using the tiles you have on the butcher paper, apply glue to one side of the tiles you want to use and push them hard against the surface of the table. Work from the outside in when you glue your design to the table. When you are done gluing the pieces of tile, let the glue dry overnight.
 - If you want to change the mosaic design, make sure to move the tile pieces before the glue dries completely.
- It is best to use adhesive mortar, mastic or tile adhesive for ceramic tiles and glass tiles. You can get these resources at most hardware stores.
 Mix grout according to package directions. In a bucket, mix the powder with water and use a trowel to mix the grout until it thickens. Make sure to read the directions on the package so you are using the correct amount of water.
 - Remove all lumps from the mortar before using the mortar.
 Spread the mortar over the tiles and in the cracks between the tiles. The goal is to get the mortar into the gaps between the tiles. This gives your mosaic table a better look, flattens the table and ensures that the tiles stay on the table. Use the trowel and apply the mortar to the tiles. As a result, some of the mortar will end up between the tiles.
  Scrape off the excess mortar with a plastic swab. Run a plastic pass over the surface of the tiles. Some mortar will remain on the tiles after scraping, but try to remove as much mortar as possible with the pass.
  Let the mortar dry and clean the table. Let the mortar cure for at least 24 hours before cleaning the table. When the mortar is dry, wash the surface of the tiles with a mixture of warm water and dish soap. If the mortar doesn't come off the tiles, use a sponge to scrub. When the mosaic shines, take it off and dry it with a clean cloth.
  Spray tile joint sealant on the mosaic. Buy a sealant that is suitable for the material you used for your mosaic. Spray the sealant on the surface of the table and do not forget to wipe the tiles with a damp cloth to prevent it from forming on the tiles themselves. When the joints are soaked with the sealant, let everything dry. When the joints are dry, clean the table one more time before using it.
 - If you put the table outside and eat at it, it is important to seal the tile joints to prevent mold. This also prevents the joints from becoming soft when they come into contact with water.
Necessities
- Ceramic or glass tiles
- Large sheet of butcher paper or drawing paper
- Scissors
- Cotton cloth
- Mild dish soap
- Sandpaper
- Polyurethane lacquer on an oil or water basis
- Glue
- Grouting mortar
- Plastic card
- Trowel
- Paint (optional)


