Author:
Roger Morrison
Date Of Creation:
28 September 2021
Update Date:
21 June 2024

Content
- To step
- Method 1 of 3: Organize the project
- Method 2 of 3: Notch the mirror
- Method 3 of 3: Break the mirror
- Necessities
Learning how to cut a mirror yourself has many advantages. You can create any design or shape you want without settling for what's available in the market. You can also save money on expensive mirrors as you can style them yourself. Mirror cutting is actually a misleading term, because you're not actually cutting but doing a controlled fraction. You make grooves or scratches in the surface of the mirror where you want to cut. This creates a weak point in the glass. As soon as you apply a little pressure along the groove, a clean break will occur.
To step
Method 1 of 3: Organize the project
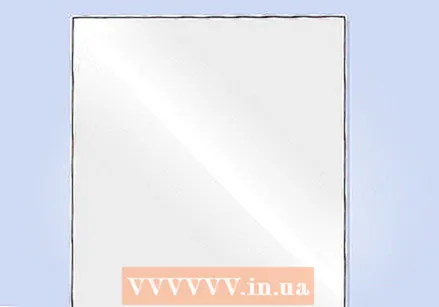 Select a sturdy mirror for your project. If you want to cut a mirror to size, you can use almost all mirrors for this. You may want to buy mirror glass from a hardware store or repurpose a mirror you already have around the house. Do not cut mirrors that are already severely damaged or cracked in multiple places. A mirror in poor condition may not withstand being cut and therefore could shatter while working with it.
 - If you're looking for other places to buy mirrors, look for specialty stores that deal specifically with mirrors and glass.
- It can be helpful to buy some inexpensive mirrors to practice on first. Try single strength window glass, as it is easier to cut, and it is usually the cheapest too.
 Clean and dry the mirror thoroughly. Wipe the surface with glass cleaner or rubbing alcohol and a microfiber cloth. Clean it thoroughly - it should be as spotless as possible, as even the tiniest speck of dirt or dust can cause interruptions while scoring. This can cause the glass to shatter or break.
 - Use another microfiber cloth to wipe the surface again to make sure the mirror is completely dry before you start.
 Wear protective clothing. Small shards of glass are released during the carving and breaking. These can potentially get in your eyes. It is very important to wear eye protection or goggles when working with glass. Do not rub or touch your eyes while you work. Wear protective gloves, especially when handling freshly cut glass - the edges are very sharp.
 - Do not wear open-toed shoes or sandals.
- If you're dealing with a glass splinter, try to remove it by putting a sticky piece of tape over it and then quickly rip it off. If that doesn't work, use tweezers.
Method 2 of 3: Notch the mirror
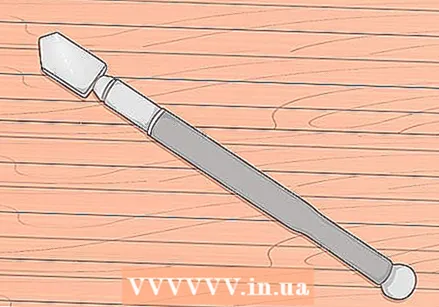 Choose a high-quality glass cutter that meets your needs. Most glass cutters have a carbide cutting wheel on the end that cuts the glass and attaches to some sort of handle. These tools are sometimes referred to as wheel cutters. The wheels have different diameters, with the smallest being the best for detailed work. Wheel cutters are relatively inexpensive so it's worth buying one of a higher quality.
 - Look for sturdy glass cutters with a real carbide wheel. The cheaper tools can cost from as little as 5 euros. Those of higher quality are usually closer to 20 euros.
- You can buy glass cutters at hobby and hardware stores. Hardware stores usually sell the more expensive and sturdy models.
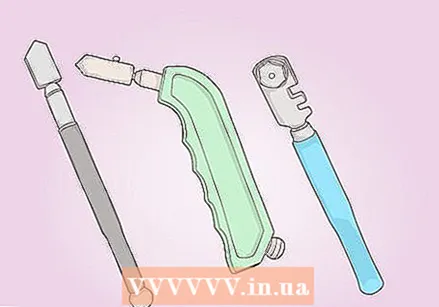 Select a glass cutter that best suits your design. Some glass cutters are for carving straight lines and other curved lines. Select the tool based on the design you have in mind for your mirror. The different handle shapes provide a variety of grips. Choose what you feel most comfortable holding.
 - If you have a very small job to do, find a steel disc cutter. They work just as well as the carbide wheels and are even cheaper.
- If you want to cut a lot of mirrors, invest in a self-oiled glass cutter. This one lasts longer than other cutters and is usually easier to use.
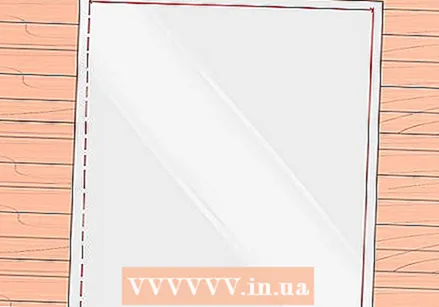
 Measure and mark the fractions with a straight edge. To make a neat break, the measurements and break lines must be as accurate as possible. Use a straight edge to mark the break lines on the mirror. Mark the break line with a sharp point or white chalk. The fracture line is your guide, so you can run the glass cutter accurately across it in one uninterrupted movement.
 - The cleanest fracture lines are created when you carve with one continuous movement of the tool.
- Always mark the break lines starting at one edge of the glass and ending at the other.
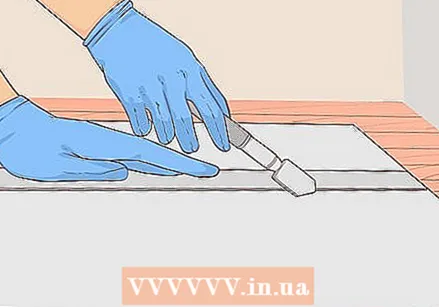 Place the glass cutter at the beginning of the first break line. Place the mirror on a hard, flat surface that is free of dirt. Hold the glass cutter vertically in your hand and align the wheel at the start of the first fracture line. Place the straight edge to the right of the line so you can carve right next to it. This will give you the straightest and most accurate results.
 - You can run the glass cutter along the line towards you or away from you. Try both ways to find out what you like best.
- If you are concerned that the ruler might wobble as you carve, hold it firmly in place with a clamp.
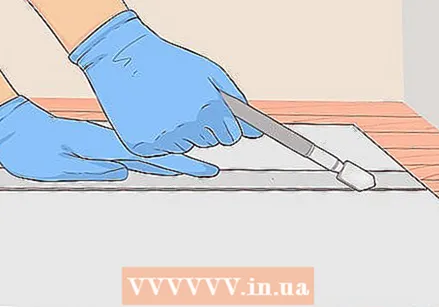 Apply light downward pressure as you roll the tool along the line. With most mirrors you should hear a screeching noise if you do it right. If you don't hear that sound, you probably aren't pushing it hard enough. When you press too hard, you will see small chips collect around the groove. These can get under the wheel and damage or blunt the cutter, so wipe them off immediately when you see them.
 - Always try to apply the same amount of pressure while carving.
- Do not lift the tool during the process so that you can carve the line in one continuous motion.
 Score the remaining fault lines. Continue carving the mirror until you have completely done the intended design. Every so often, stop to brush away glass splinters that have accumulated on the mirror and on your work surface. Leaving glass chips lying around while carving can interrupt the accuracy of the fracture lines and damage the carbide wheel on the glass cutter.
 - For best results, try to keep your workspace as clean as possible throughout the process.
Method 3 of 3: Break the mirror
 Break a small mirror with your hands along the score line. There are a number of ways to cleanly break the mirror. One of the easiest ways is with your hands, although this is not always the most ideal way, especially when working with a full-length mirror. If the mirror is small enough to hold it, grasp it firmly with both hands and put one thumb on each side of the first breakline. Press down with both thumbs at the same time, making sure to do this with equal pressure.
 - Make a quick snapping motion with your wrists and the mirror should break sharply along the fracture line.
- Always wear protective gloves when your glass breaks. The fracture lines make the glass unstable and sometimes it can break in ways you don't expect at all.
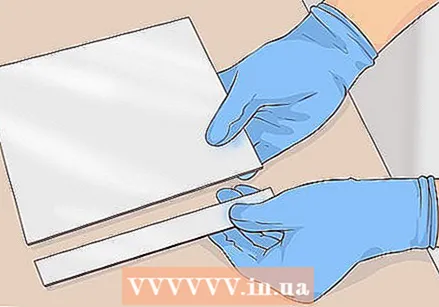
 Break larger fractures by applying pressure to a flat surface. Place the mirror with the notched side down on a soft, flat surface. Use your hands to press the non-notched side down and to apply pressure along the breakline. The glass should break cleanly. You can also place the mirror on the edge of a flat surface, making sure the break line is aligned with the edge. Press down with your hand on the side of the glass that is over the rim until you see the glass break.
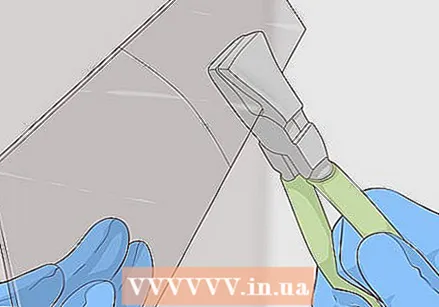
  Break the glass along the score line with a pair of pliers. If you'd rather not break the mirror with your hands, or if the piece of glass is too big to do it that way, use pliers. Position it so that the lower jaw touches the score line on the transom. The upper beak should touch the transom about 1.5 cm on either side of the fracture line. Squeeze the pliers, which will separate them, and the pressure will widen the fracture line. This widening causes the groove to crack along the rest of the line in a very controlled break.
 - If you break a long break line, you can gently apply the pliers to one end until you hear a very soft clicking sound. Then flip the mirror over and do the same on the other end of the line. This will finish the break neatly at the edges.
 Use pliers and a resilient surface to break curved fracture lines. For fractures with multiple curves, turn the mirror upside down on a springy surface, such as a piece of foam or cardboard. If the curvature is not very pronounced, press on the fracture line with your thumb, creating the fracture. However, breakers are best to use on curves and semicircles. If you're cutting a mirror with a lot of curves, invest in a pair of pliers and the breaking work will go much smoother.
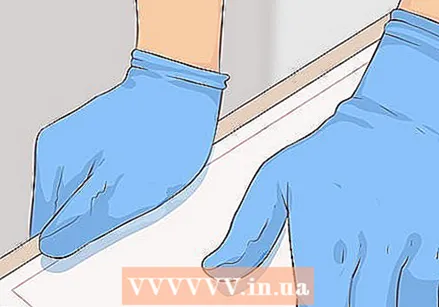
 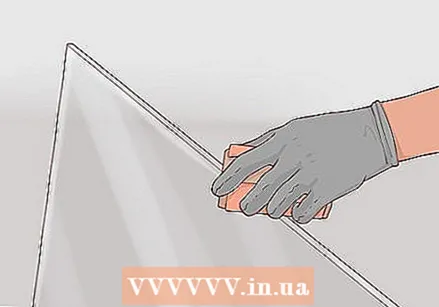 Sand and seal the edges of the freshly cut mirror (optional). If you're framing the mirror so that the raw edges don't show, this probably isn't necessary (although you can do it anyway if you want). Sand the edges with sandpaper and then apply mirror edging caulk or some other hermetic coating to the edges. These materials can be found at all hardware stores. You can also use clear nail polish and get similar results.
Necessities
- Mirror glass
- Self-lubricating glass cutter
- Breaking pliers
- Mirror edge sealant, hermetic coating or clear nail polish
- Foam rubber or cardboard (optional)


