Author:
John Pratt
Date Of Creation:
14 April 2021
Update Date:
26 June 2024

Content
- To step
- Method 1 of 3: Using the keyboard in Windows 8 and 10
- Method 3 of 3: Using the Snipping Tool
This wikiHow teaches you how to take a screenshot of the screen of your HP computer. Since all HP computers use Windows by default, use Windows methods for this.
To step
Method 1 of 3: Using the keyboard in Windows 8 and 10
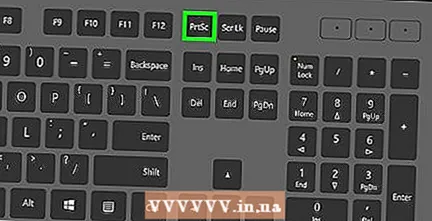 Find the "Print Screen" key. The "Print Screen" key is located in the top right corner of the keyboard next to the Delete-test.
 - If your keyboard has a numeric keypad on the right, you'll find the Prt Sckey to the left of the top row of keys in the numeric keypad.
- Note whether or not the "Prt Sc" (or similar) text is at the top of the key or at the bottom of the key. If it is at the bottom of the key under a different text option, you may need to add the Fnbutton.
 Find the "Windows" key ⊞ Win. This key (with the Windows logo) is usually located in the lower right part of the keyboard.
  If necessary, search for the test Fn. If the text "Prt Sc" is at the bottom of the test and below other text, then you must enter the Fn- use the key to force your computer to recognize the "Print Screen" function.
 - Usually you will find the Fnkey at the bottom left of the keyboard.
 Make sure your screen shows what should be on the screenshot. Go to the page or program you want to take a screenshot of.
  Hold the Windows key ⊞ Win pressed. Make sure to do this in the next step as well.
 - If the text "Prt Sc" is under any other text on the appropriate key, make sure to also hold down the "Fn" key.
 Keep ⎙ PrtScr pressed. You should only have to do this for about a second.
 - Make sure you have the ⊞ Winbutton while doing this.
 Release all keys when the screen dims briefly. This indicates that Windows has taken a screenshot of the contents of your screen.
 - If the screen does not dim, try releasing the keys and pressing the again Prt Scbutton. If this doesn't work either, keep the Fnkey (if you haven't already done so), or release the Fnbutton and try again if you used it.
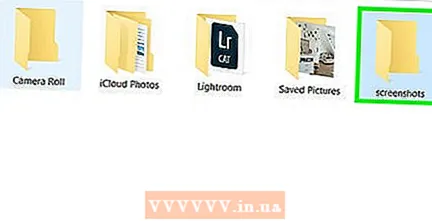 View your screenshots. You can view your captured screenshots from the "Pictures" folder by doing the following:
 - Open "Explorer"
 Find the "Print Screen" key ⎙ PrtScr. The "Print Screen" key is located in the top right corner of the keyboard next to the Delete-test.
 - If your keyboard has a numeric keypad on the right, you'll find the Prt Sckey to the left of the top row of keys in the numeric keypad.
- Make a note of whether or not the text "Prt Sc" (or similar) is at the top of the key or at the bottom of the key. If it is located at the bottom of the key under different text, you may need to add the Fnbutton.
 If necessary, search for the test Fn. If the text "Prt Sc" is at the bottom of the test and below text instead of at the top of the test, then you must Fn to force your computer to recognize the "Print Screen" feature.
 - Usually you will find the Fnkey at the bottom left of the keyboard.
 Make sure your screen shows what you want to take a screenshot of. Go to the page or program you want to take a screenshot of.
  Press on the button ⎙ PrtScr. A screenshot will be taken and saved to your computer's clipboard.
 - You will not get a visual indication that a screenshot has been taken.
- If the text "Prt Sc" is under a different text on the relevant test, make sure that you also have the Fn key.
 Open Start
  Open Paint. Type paint and click on Paint at the top of the Start menu.
  Paste your screenshot. Press Ctrl+V. to do this. The screenshot appears in the Paint window.
 - You can also click on the clipboard-shaped To stickicon in the top left corner of the paint window, to paste into the screenshot.
- If your screenshot has not been pasted, then you may need to go back and take a screenshot while editing the Fnbutton (or, if you press the Fn button, do not hold it down now).
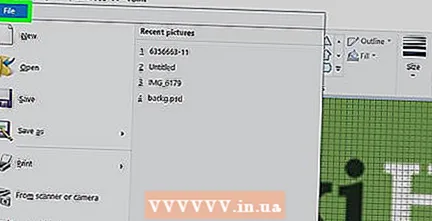 click on File. This option is in the top left of the screen. When you click on it, a drop-down menu will appear.
  Press Save as. This is stated in the File-menu. A slideout menu will appear.
 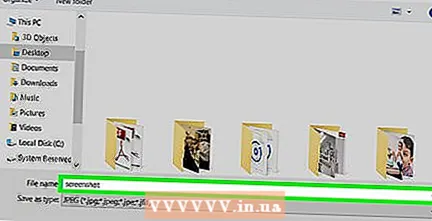 Choose an image format. click on PNG or JPEG in the slideout menu. An Explorer window will open.
 - It is best to PNG because PNG files are not inferior in quality to the original (unlike JPEG files). However, JPEG files take up much less space on your hard drive.
 Enter a file name. Enter a name for the screenshot in the "File name" field at the bottom of the window.
  Choose a storage location. Click the folder on the left side of the window where you want to save the file.
  click on Save. This button is at the bottom of the window. Your screenshot will now be saved in the selected folder.
- Open "Explorer"
Method 3 of 3: Using the Snipping Tool
 Open Start
  Open the Snipping Tool. Type snipping tool in the search bar, then click Snipping Tool at the top of the Start menu.
  Set the mode to "Rectangular Cutout". click on Mode at the top of the Snipping Tool window, then click Rectangular cutout in the drop-down menu that appears. This sets the Snipping Tool to use the "Rectangular Snip" feature so that a screenshot of the screen can be taken.
 - After this, the program will default to "Rectangular Cutout" and you just have to click New on the left side of the "Snipping Tool" window to create a new snip.
 Click and drag the mouse over any part of the screen. A red frame should appear around the part of the screen you highlight.
 - If you want to take a screenshot of the entire screen, click on the top left corner of the screen and drag your mouse down to the bottom right corner.
 Release the mouse button. As soon as you release the left mouse button, your screenshot will be taken. You should see the screenshot appear in the Snipping Tool.
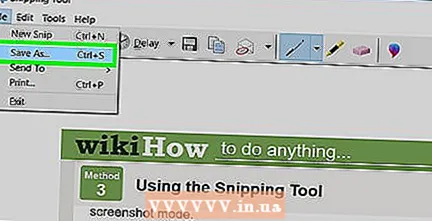
  Save your screenshot. You can save the screenshot as a photo file on your computer by doing the following:
 - Click the floppy "Save" icon at the top of the Snipping Tool.
- Type a file name in the "File name" text field.
- Select a folder on the left side of the window where you want to save the screenshot.
- click on Save.
 Try to use other clippings. If you're on Mode At the top of the Snipping Tool window, a drop-down menu appears with the following options, each of which can be used to take a different kind of screenshot:
 - Free-form cutting - Allows you to select a part of your screen by clicking and dragging your mouse.If you release the mouse after connecting the end of your selection to the beginning of the selection, a screenshot will be taken.
- Window cutout - Allows you to take a screenshot of only an active window (for example, your browser window). Clicking on a window takes the screenshot.


