Author:
Eugene Taylor
Date Of Creation:
11 August 2021
Update Date:
22 June 2024

Content
- To step
- Part 1 of 2: Hide photos from collections and memories
- Part 2 of 2: Using Photo Vault
- Tips
- Warnings
This wikiHow teaches you how to hide your iPhone photos from Collections and Memories in the Photos app. It also teaches you how to download and set up Photo Vault, an app that hides photos and protects them with a password.
To step
Part 1 of 2: Hide photos from collections and memories
 Open the photos app on your iPhone. The icon is the multicolored pinwheel on a white background.
  Tap Albums. This is located in the bottom right corner of the screen.
 - When Photos opens with a photo, double tap the back button in the top left corner of the screen.
 Tap an album. This album should contain the photos you want to hide.
  Tap Select. This is at the top right of the screen.
 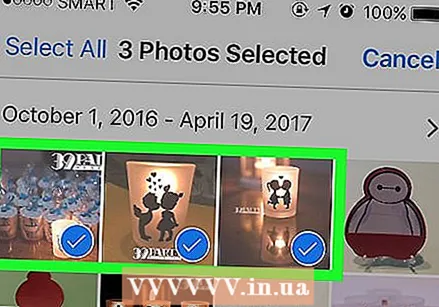 Tap any photo you want to make private. You should see a white check mark on a blue background appear in the bottom right corner of your selected photos.
  Tap the Share button. It's the box with an upward pointing arrow in the lower left corner of the screen.
  Tap Hide. You see here Hide to the right of the bottom row of options.
  Tap Hide X Photos when prompted. The "X" will be the number of photos you have selected. Tapping this will hide the selected photos from "Memories", "Years", and "Collections".
 - You can view all the photos you mark as "hidden" by clicking the album Hidden from the Albums page.
Part 2 of 2: Using Photo Vault
 Open the Photo Vault app. This is the picture of a key that locks a folder.
 - You will need to download the Photo Vault app if you haven't already.
 Tap Start.
 Tap Set password. This will bring up a keyboard.
  Enter a four-digit passcode twice. This process ensures that you type the passcode correctly.
 - You can also add a backup email address here when prompted.
 Tap Next.
 Tap I agree.
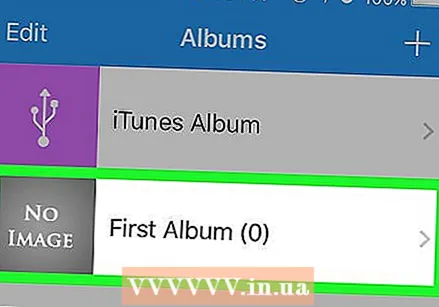 Tap First album. This is under it iTunes album.
  Tap +. It's in the bottom right corner of the screen.
 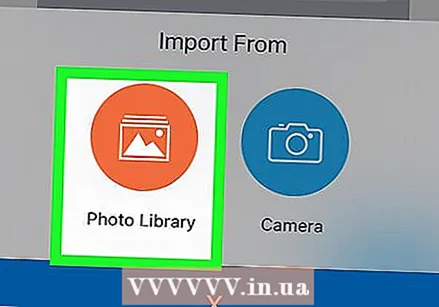 Tap Photo Gallery. This option is located in the center of the screen.
  Tap Ok. This will give Photo Vault access to your camera roll.
  Tap an album. If you don't know which album to choose, you can All pictures at the top of the screen.
  Tap any photo you want to hide. This will place a white check mark in the thumbnails of the photos.
  Tap Done. This option is located in the top right corner of the screen. After you press Ready the selected photos are imported into Photo Vault.
 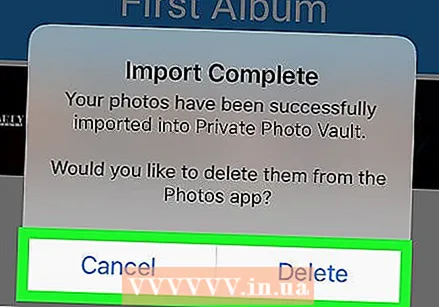 Tap Delete or Cancel. If you're on remove the selected photos will be removed from your Camera Roll while Cancel will keep them there, in addition to in your Photo Vault.
  Close Photo Vault. The next time you open it, you will need to enter your passcode to access the photos.
 - Photo Vault will lock itself even if you double tap the Home button.
Tips
- You can still share "hidden" photos in Messages and other apps.
Warnings
- Deleting Photo Vault will also delete any photos stored in it.


