Author:
Roger Morrison
Date Of Creation:
8 September 2021
Update Date:
1 July 2024

Content
- To step
- Method 1 of 3: Impossible bottle number one: card game in a bottle
- Method 2 of 3: Impossible bottle number 2: tennis ball in a bottle
- Method 3 of 3: Impossible bottle number three: Rubik's cube in a bottle
- Tips
Impossible bottles are literally the incredible result of focus, patience, a steady hand, and a fair amount of lateral thinking. This article will show you how to place certain items in an "impossible bottle".
To step
Method 1 of 3: Impossible bottle number one: card game in a bottle
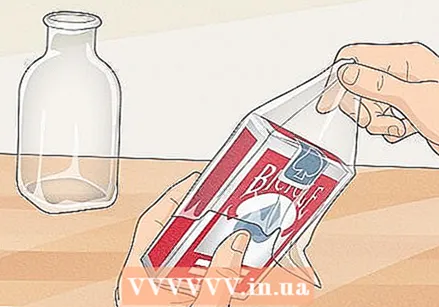 Remove the pack of cards from the plastic wrapping and discard the wrapping.
 Take the cards out of the box.
 Heat the patch with a hairdryer. It will come off easily and without tearing anything.
 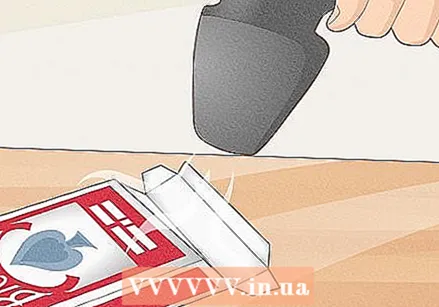 Use the hairdryer again, or use a sharp utility knife to cut the bottom seam of the box open so that the box can be pressed flat.
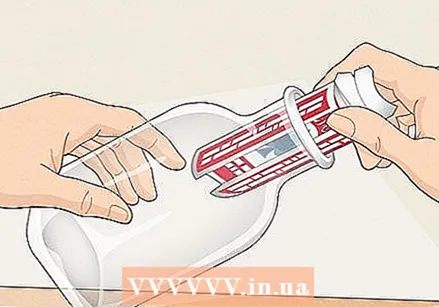 Put the squashed and rolled-up box in the bottle and return the box to its old shape. Use a bent piece of wire or something suitable to re-glue the bottom seam. Strong glue dries too quickly for the seam to be set properly. Therefore, use hobby glue and be patient.
 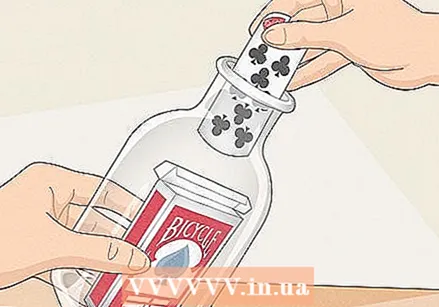 Insert one card at a time.
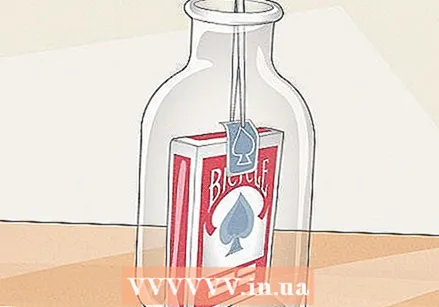 Close the box and heat the sticker to make it sticky so that you can stick the box again with it. Use some extra glue if the patch doesn't get tacky enough.
Method 2 of 3: Impossible bottle number 2: tennis ball in a bottle
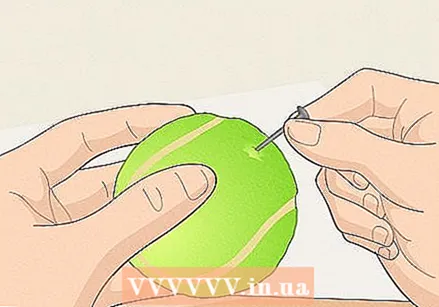 Make a small hole in the fluffy part of the ball (pull the down apart to prevent making the hole from pulling too much of the down loose; you will iron it over the hole later).
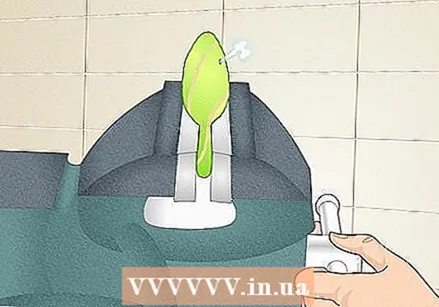 Place the ball in a vise and squeeze out all the air.
 Seal the hole with a ball needle.
 Fold the ball (or roll it up) and push it into the bottle.
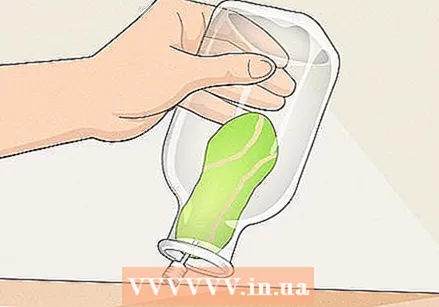 Turn the bottle upside down so that the needle extends through the bottle neck. Screw a flexible hose (for inflating bicycle tires) onto the end and screw the hose to a bicycle pump.
 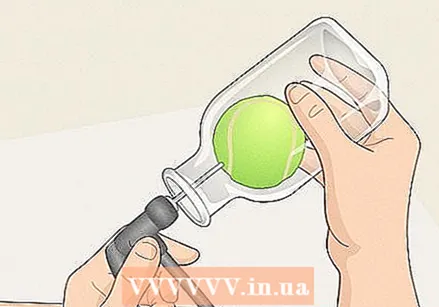 Pump up the ball again and then pull out the needle.
 Hide the hole by brushing the down over it and / or putting one or two drops of glue on the hole. Note that you can seal the hole in the ball with a strong adhesive if the ball will self-inflate, then, once the ball is in the bottle, make a hole in it again with a skewer.
Method 3 of 3: Impossible bottle number three: Rubik's cube in a bottle
The Rubik's cube in a bottle is a project for the advanced maker of impossible bottles. Only start if you have complete confidence in your abilities - it is a very time consuming and difficult project and the end result may be that it has been nothing but a waste of time for you.
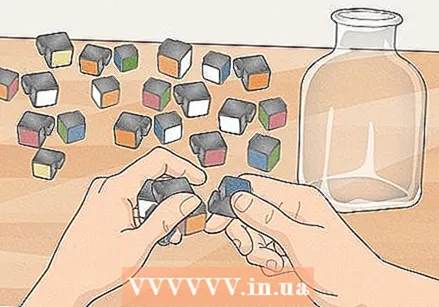 Completely disassemble the Rubik's cube so that you have 27 loose pieces.
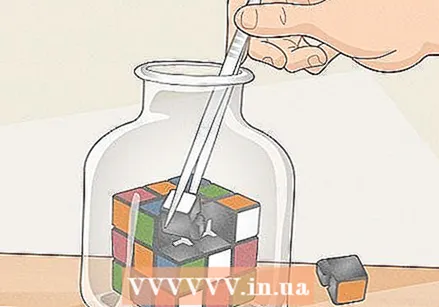 Reassemble the cube inside the bottle. Note that the bottle, on the inside, must be eight and a quarter centimeters in diameter to assemble the Rubik's cube completely. You will have to push and poke each cube in place, and tweezers with long handles and the like are useful for applying more force.
Tips
- Try this first with a large, sturdy bottle. This makes it easier to put the items in or out of the bottle without worrying about breaking the glass.
- You can try this with other items too - bottled ships are the most popular form of impossible bottle, but have become a bit trite. Try to put something unexpected in the bottle.


