Author:
Tamara Smith
Date Of Creation:
28 January 2021
Update Date:
1 July 2024

Content
- To step
- Part 1 of 3: Cutting the front
- Part 2 of 3: Making a classic mullet
- Part 3 of 3: Styling your mullet
- Tips
A mullet is a well-known and perhaps notorious hairstyle. Many celebrities, including Billy Ray Cyrus, Kurt Russell and David Bowie, have managed to wear a mullet with flair. Getting a mullet done is just a matter of growing out your hair, cutting the top short and keeping the back long. Cutting your mullet yourself may be difficult if you've never cut your own hair, but a hairdresser could style it for you too.
To step
Part 1 of 3: Cutting the front
 Let your hair grow out. In order to cut your hair into a mullet, it must first have some length. You decide how long you want your mullet.
 - Try to grow your hair between 5 and 15 cm long. The longer your hair, the more defined your mullet will be.
- A good guideline for a mullet is to try to keep the back about four inches longer than the front.
 Divide your hair. Divide the top of your hair into three sections using hair clips. Make a section on the top of your head from the front hairline to about the center of your crown, where your head starts to bend down. Divide the sides at the front of the hairline, from the top section on both sides and down to the ears.
 - Pull back the hair that you want to keep long with a hair clip.
 Cut your pony. First, start with the top section in the middle and comb your hair over your forehead. Cut your bangs to the desired length. You can cut your bangs as short or as long as you want. Cut the bangs straight or at an angle. There are many ways to style your bangs.
 - When cutting your bangs, work in sections. Even if you plan to cut your bangs to one length, don't do it all at once.
- Pick a side to start with and get a piece of bangs. Hold the hair between your fingers and work from the center to the outer edge of your hair. Be careful when cutting. You can always cut more if you want it shorter.
- For bangs that fall to the side, keep the scissors at an angle as you cut.
 Trim the sides. Pick one side and comb your hair forward. Using the length of your bangs as a guide, cut the sides of your hair at an upward angle. The hair should be longest at the top and tapered to a shorter length over the ears. Comb your hair down to cut above your ears.
 - When you are busy with the hair near your ears, you take a little off each time. Comb the hair back and forth, taking off about half an inch at a time. Cut vertically to create layers.
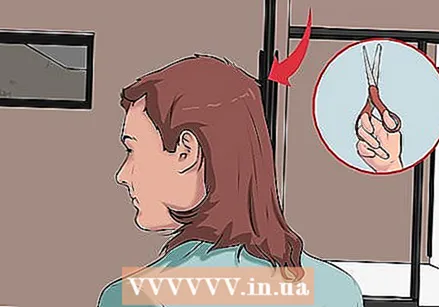
 Cut the top. Comb the top of your hair up from both sides. Hold the hair in the middle. Using your bangs as a guide, cut the top of your hair to get it flush with the length of the bangs.
 - Take your time and make sure you cut nicely and evenly. Work from front to back until you reach the crown.
 Connect the sides. Comb out small sections of your hair where the top and sides meet.Pull the hair up and out and cut out any ends you see sticking out.
 - Your goal is to connect the sides of your hair upwards. Don't make sharp lines where the top and sides meet. The cuts should be smooth and tapered in layers.
- Comb through your hair and make sure you like it. If you feel it is too long, go through it again and cut a little more off the top.
Part 2 of 3: Making a classic mullet
 Comb your hair from the back. Remove the hair clip from your hair and comb it straight down. Comb it smooth to make cutting easier.
  Start trimming the back. Working in narrow sections, comb the back of your hair up and down from your head. Use the hair in the top section as a guide to cut the back.
 - Hold the hair on the back of your head along with some of the hair in the back of the top section to make cutting this section easier.
- Continue cutting until you have cut all of the hair at the back. This way of cutting gives you a length in layers at the back.
- Comb out the back of your hair making sure the length is to your liking.
 Connect the sides. Check for sticking out points by combing where the sides of your hair meet the back. If you see points sticking out, cut them away until you have a smooth and tapered look.
Part 3 of 3: Styling your mullet
 Shave the sides of your head. For an updated version of the classic mullet, you need to shave the sides of your head. Keep the top of your hair long and let the back of your hair grow longer than you would with a classic mullet.
 - When shaving the sides of your head, leave a strip of hair on the top of your head. Join the hair strip on top with the long hair in the back and shave the sides of the back of your head as well so that the hair strip reaches down and back. This mullet should resemble a mohawk, with the top strand of hair merging into the long hair in the back. You can style the top of the hair in a traditional mohawk, if you like, or you can smooth it back.
 Grow a pompadour crest. This requires quite a bit of length on top as you will need a lot of hair to get the pompadour style right. Start near the back of your head and straighten your hair forward. Connect the hair on the back of your head to the long side hair.
 - Work your way to the front and keep everything smooth back. Once at the front of your hair, use a comb to pull your hair up. Run the comb back over your hair a few times and create a wave in your hair. This should be the highest part of your hair.
- The back of your hair can be as long as you want with this style.
 Keep your mullet short. Cut your hair into spikes at the top of your head, but leave the back of your hair long. This is especially good with curly hair.
 - You could keep the back of your hair just a little longer so that it is nice and taut, or you can let it grow out long. Try out different things and find a length that you like.
Tips
- If you don't feel comfortable cutting your own hair, you can always go to the hairdresser.
- There are many different variations of the mullet, experiment with it until you get the mullet that suits you best!


