Author:
Morris Wright
Date Of Creation:
1 April 2021
Update Date:
1 July 2024
Content
- To step
- Part 1 of 3: Taking out the old laptop screen
- Part 2 of 3: Setting up the new screen
- Part 3 of 3: Confirming that the laptop screen is stuck
- Necessities
A broken or cracked laptop screen can render your laptop useless, which can be frustrating when you need your computer to write a paper or finish a project. Replacing a laptop screen can be done with a few tools and steps, saving you money on expensive repairs at a computer store. Start by taking the laptop apart and replacing the screen properly. Once the new screen is in place, make sure the screen is working properly so you can type and surf on your repaired laptop.
To step
Part 1 of 3: Taking out the old laptop screen
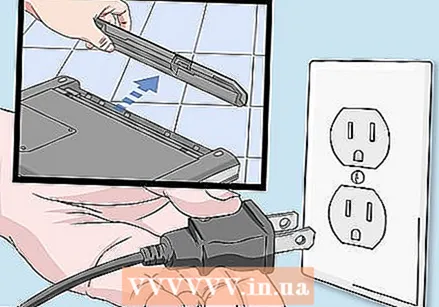 Unplug the laptop and remove the battery. Make sure that no power is going to the laptop, because you don't want to work with live wires or electricity. Slide the battery out so that the computer is not on or receiving power.
 - Keep the battery in a safe place as you will put it back in later.
 Remove the rubber screw caps on the screen. Most laptops have small rubber screw caps around the screen to protect the screws. Use the tip of a screwdriver or safety pin to pry off the rubber screw caps so you can see the screws on the bezel.
 - Place the rubber screw caps in a small plastic bag or bowl so you don't lose them.
 Remove the bezel screws with a screwdriver. On the front of the display frame, look for the screws on the bezel. Some laptop models have the screws along the side of the screen. Remove the screws one by one with the screwdriver. Usually there are four to six screws on the bezel.
 - Put the screws in the same plastic bag or come with the rubber screw caps so that all the parts are together in a safe place.
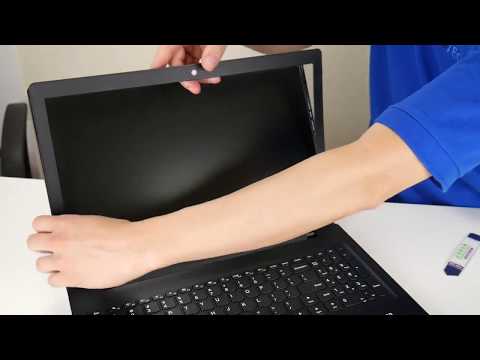
 Detach the bezel from the screen. Place your fingers at the bottom center of the laptop screen. Gently slide your fingers between the bezel and the screen. Pull the bezel with your fingers, which should snap loose.If not, try pulling it gently in different directions until it comes off. Work your fingers around the bezel until it separates from the screen.
 - If the bezel doesn't pop open or slip off with a little pulling, you may have missed a screw. Check the screen to confirm that you have removed all screws from the bezel so that it can slide off.
 Disconnect the cables connected to the display. Find the video cable. This is a long ribbon cable that is attached to the back of the screen with adhesive tape. Peel off the adhesive tape and detach the connector from the back of the display. You also need to disconnect the power cable from the back of the screen.
 - Depending on your laptop model, you may also have to remove screws from the side of the display that secure it to the metal frame. Do this with a screwdriver. Keep the screws in a safe place.
 Remove the laptop screen. With the bezel and cables removed, the screen should sit loose in a metal frame. Tilt the screen forward and carefully remove it from the frame.
 - Place the screen on a flat surface so that you can examine it later.
- When removing the screen, be careful of any broken glass or plastic.
Part 2 of 3: Setting up the new screen
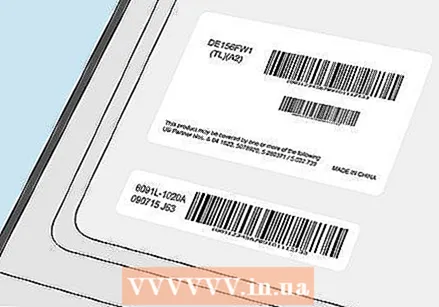 Check the manufacturer's label and model number on the screen. The side or back of the display should have a barcode label, the manufacturer's label and the computer model number. The model number is usually a series of letters and numbers. Use the manufacturer's label and model number to order a replacement screen for the laptop.
 - For example, if your manufacturer is Dell and the model number is DE156FW1, you can look up this information to find the correct display.
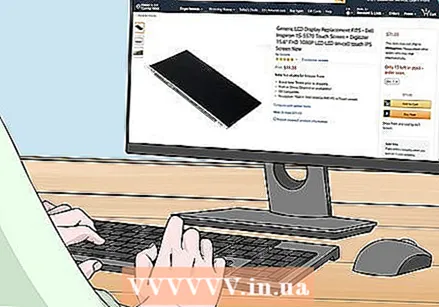 Purchase a replacement screen online or at a computer parts store. Search online stores such as eBay and Bol.com for a replacement screen. Make sure the new screen is from the same manufacturer and model number so that it fits properly in your laptop.
 - You can also buy a replacement screen from a computer parts store, but it can be more expensive than buying it online.
- The cost of the screen depends on the brand and type of the laptop. Replacement screens can range in price from 100 to 300 euros.
 Place the screen in the metal frame on the laptop. When you have the replacement screen, put it in place in the metal frame. Make sure it faces right and slides easily into the frame.
 - Keep the bezel screws and rubber screw caps handy in a small bag or bowl so you can place them on the new screen.
 Reconnect the cables to the new display. Gently attach the video cable and power cable to the back of the new display. Check that the cables are secure and fit properly on the new screen.
 - If you have the correct manufacturer and model number, then the cables should fit properly.
Part 3 of 3: Confirming that the laptop screen is stuck
 Put the battery back into the laptop and plug it in. Before screwing in the screen, check if it works. Connect the laptop to a power source so you can test it.
  Check if the screen is working properly. Watch the laptop screen while clicking on your desktop and opening a browser. Check for blurred lines, cracks or distorted images on the screen. The screen should be clear and function like new.
  Insert the bezel and screws to secure the new screen. Attach the bezel by clicking it on the screen. Then insert the bezel screws and tighten them with a screwdriver to hold the display in place.
 - Top it off by attaching the rubber screw caps to the bezel screws so that the screws are secure and protected.
Necessities
- Screwdriver
- Safety pin
- Replacement screen
- Plastic bag or bowl


