Author:
Robert Simon
Date Of Creation:
23 June 2021
Update Date:
1 July 2024
Content
You can format your drives using the disk utility included with Ubuntu. If this disk utility gives errors or a partition is damaged, you can also use GParted to format the disk. You can also use GParted to resize existing partitions so that you can create a second partition from your disk's free space.
To step
Method 1 of 2: Quick format
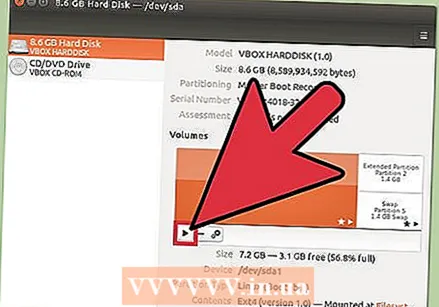
 Open the Disks program. You can find this quickly by opening the Dashboard and disks typing. An overview of all connected drives is displayed on the left side of the screen.
 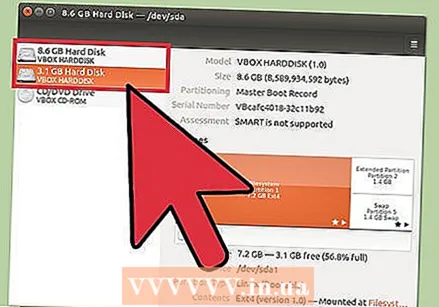 Select the drive you want to format. All your disks are now listed in the left frame. Be careful which drive you select as everything on that partition will be erased when you format it.
 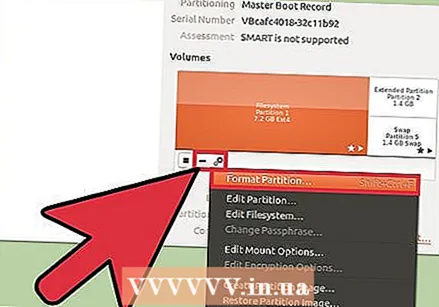 Click on the gear and select "Format partition ". This will open a new window for configuring the file system.
  Select the file system you want to use. Click the "Type" menu and select the file system you want to use.
 - If you want to use the drive to transfer files between Linux, Mac and Windows computers, as well as most devices that support USB storage, select "FAT".
- If you only want to use the drive on your Linux computer, select "Ext4".
- If you only want to use the drive in Windows, select "NTFS".
 Name the disk volume. You can enter a name for the formatted volume in the empty field. This makes it easier to distinguish the connected drives.
 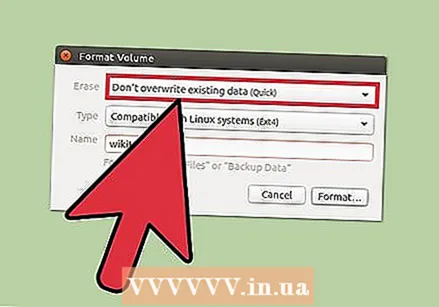 Indicate whether or not you want to securely erase the drive. By default, the data on the drive will be erased by formatting, but not overwritten. If you want to securely erase the content, select "Overwrite existing data with zeroes" from the "Erase" menu. Formatting will be slower but more thorough as a result.
  Click the "Format" button to start formatting. You will be asked for confirmation before you can continue. Formatting will take a little longer on larger drives, and if you have chosen the safe option.
 - If you encounter problems formatting the drive, try GParted as explained in the next section.
 Mount (mount) the formatted disk. Once the drive has been formatted, click the "Mount" button that appears at the bottom of the Volumes table. This will mount the partition so that the file system allows you to store data there. Click the link that appears to open the drive in your file explorer, or open the Files program and look for the drive in the left frame.
Method 2 of 2: Using GParted
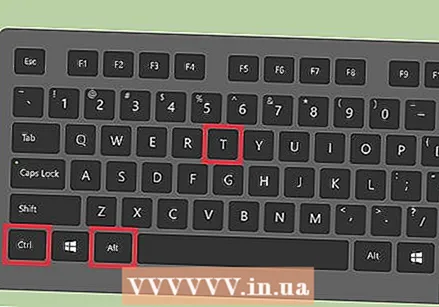 Open the Terminal. You can open the Terminal from the Dashboard, or by pressing Ctrl+Alt+T..
  Install GParted. Enter the following command to install GParted. You will be asked for a password, which will not be visible as you type it:
 - sudo apt-get install gparted
- Press Y when asked to continue.
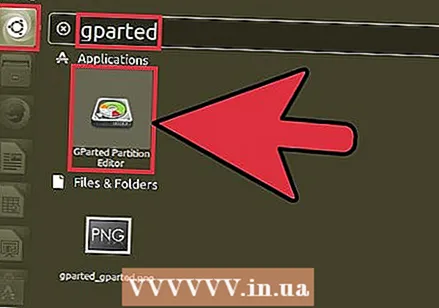 Start GParted from the Dashboard. Open the Dashboard and type "gparted" to find the "GParted Partition Editor". You will see a bar that should represent the current partitions on the disk and indicate the free space on each.
  Select the drive you want to format. Click the drop-down menu in the top right corner to choose the drive you want to format. If you're not sure which one to choose, use the size of the drive as a guide.
 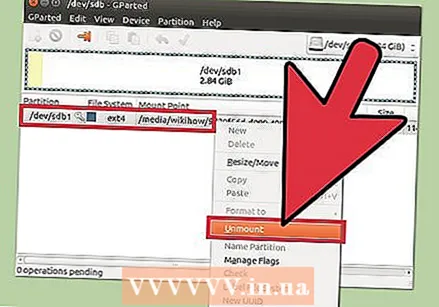 Unmount (unmount) the partition you want to change or delete. Before you can make changes with GParted, you will need to unmount the partition. Right-click on the partition from the list or table and select "Unmount".
 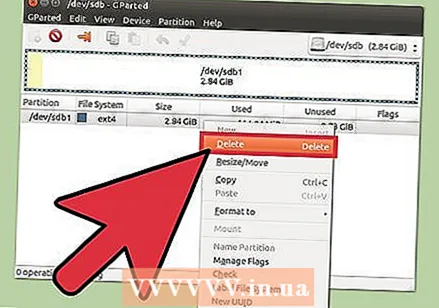 Delete the existing partition. This will delete the partition and make it unallocated space. Then you can create a new partition from that space and format it with a file system.
 - Right-click on the partition you want to delete and click "Delete".
 Create a new partition. After removing the partition, right click on the unallocated space and select "New". This will start the process of creating a new partition.
 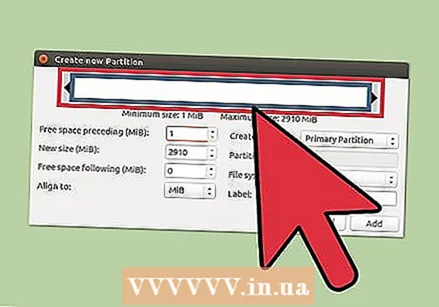 Select the size of the partition. While creating a new partition, you can use the slider to indicate which portion of the free space you want to use for it.
 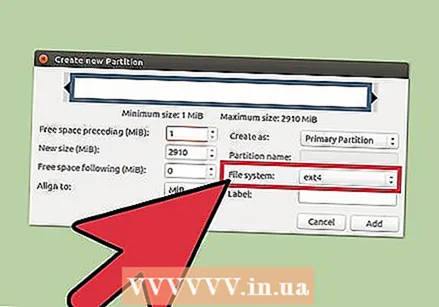 Select the file system of the partition. Use the "File system" menu to choose the format for the partition. If you want to use the drive for multiple operating systems and devices, select "fat32". If you only want to use the drive in Linux, choose "ext4".
 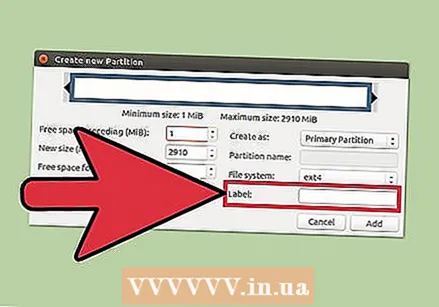 Name the partition. That makes it easier to identify the partition on your system.
 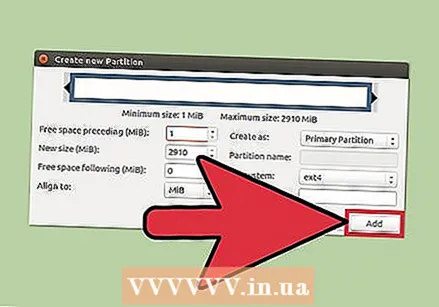 Click "Add" when you have finished configuring the partition. The partition is added to the edit row at the bottom of the screen.
  Resize a partition (optional). One of the features of Gparted is the ability to shrink or enlarge partitions. You can resize a partition so that a new partition can be formed from the resulting free space. Basically you can split a single disc into several pieces with this. This has no effect on any data on the disk.
 - Right click on the partition you want to resize and select "Resize / Move (Resize / Move)".
- Drag the edges of the partition to create free space before or after it.
- Click on "Resize / Move" to confirm your changes. You are going to create new partitions from the resulting free space following the instructions above.
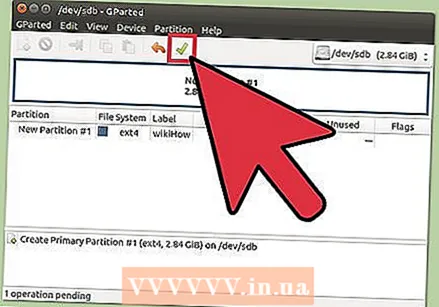 Click the green check mark to make your changes. None of your changes will be applied to the disk until you click this button. Once you clicked it, any partitions you specified will be deleted, and you will lose all data on them. Make sure you have entered the correct settings before continuing.
 - It may take a while to complete all operations, especially if you are running several or it is a large disk.
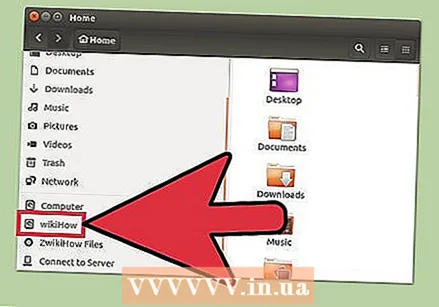 Find your newly formatted drive. When the formatting process is complete, you can close GParted and find your drive. It appears in the list of disks in the Files program.

")

