Author:
Judy Howell
Date Of Creation:
26 July 2021
Update Date:
1 July 2024
![Find Network Vulnerabilities with Nmap Scripts [Tutorial]](https://i.ytimg.com/vi/3U1pJ-eJrAU/hqdefault.jpg)
Content
Are you concerned about the security of your network or that of someone else? Securing your router against unwanted intruders is one of the foundations of a secure network. One of the basic tools for this task is Nmap or Network Mapper. This program scans a target and reports which ports are open and which are closed. Security specialists use this program to test the security of a network.
To step
Method 1 of 2: With Zenmap
 Download the Nmap installer. You can download this for free from the developer's website. It is highly recommended that you download it directly from the developer to avoid viruses or fake files. Nmap's installation package includes Zenmap, the graphical interface for Nmap that makes it easier for newbies to run scans without having to learn commands.
 - The Zenmap program is available for Windows, Linux and Mac OS X. You can find installation files for all operating systems on the Nmap website.
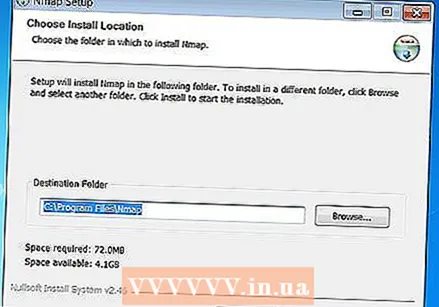
 Install Nmap. Once the download is complete, run the installer. You will be asked which components you want to install. To take full advantage of Nmap, you need to keep them all checked. Nmap will not install any adware or spyware.
  Run the Nmap GUI program Zenmap. If you left the settings at default during installation, you should see an icon for it on your desktop. If not, check the Start menu. Opening Zenmap will start the program.
  Enter the target for the scan. The Zenmap program makes scanning a fairly simple process. The first step in performing a scan is to choose your target audience. You can enter a domain (example.com), an IP address (127.0.0.1), a network address (192.168.1.0/24) or a combination thereof.
 - Depending on the intensity and purpose of the scan, performing an Nmap scan may be against your ISP's terms and conditions and may appear suspicious. Always check the legislation in your country and your ISP contract before performing an Nmap scan for targets other than your own network.
 Choose your profile. Profiles are preset groups of modifiers that change what is scanned. The profiles allow you to quickly select different types of scans without having to type the parameters on the command line. Choose the profile that best suits your needs:
 - Intense scan - An extensive scan. Includes OS detection, version detection, script scanning, trace route, and aggressive scan timing. This is considered an "intrusive scan".
- Ping scan - This scan detects if the targets are online without scanning ports.
- Quick scan - This is faster than a regular scan due to aggressive timing and because only selected ports are scanned.
- Regular scan - This is the standard Nmap scan without any parameters. It will return a ping and show open ports from the target.
 Click scan to start scanning. The active results of the scan are shown in the Output tab of Nmap. The scan duration depends on the scan profile you choose, the physical distance to the target, and the target's network configuration.
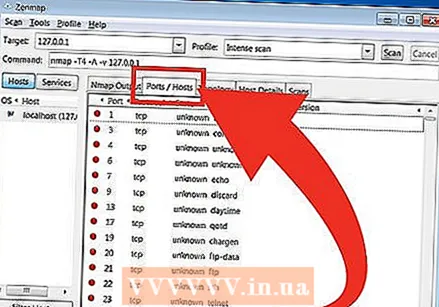
  Read your results. Once the scan is complete, you will see the message "Nmap done" at the bottom of the Nmap Output tab. Now you can view the results depending on the type of scan you have performed. All results are shown in the main Output tab of Nmap, but you can use the other tabs for more info on specific data.
 - Ports / Hosts - This tab shows the results of your port scan, including the services of those ports.
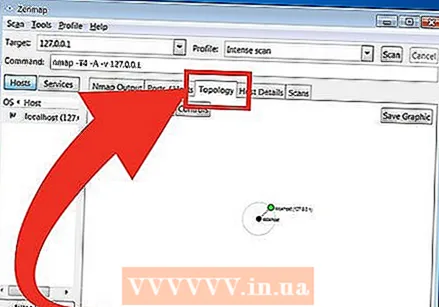
- Topology - This shows the traceroute for the scan you have performed. Here you can see how many hops your data passes to reach the goal.
- Host Details - This contains an overview of your goal, obtained through scans, such as the number of ports, IP addresses, host names, operating systems, etc.

- Scans - This tab saves the jobs of your previously run scans. This allows you to quickly rescan with a specific set of parameters.

- Ports / Hosts - This tab shows the results of your port scan, including the services of those ports.
Method 2 of 2: Using the command line
- Install Nmap. Before you start using Nmap, you need to install the software so that you can run it from the command line of your operating system. Nmap is small and available at no cost from the developer. Follow the instructions below for your operating system:
- Linux - Download and install Nmap from your repository. Nmap is available for most Linux repositories. Run the command below depending on your distribution:
- Red Hat, Fedora, SUSE
rpm -vhU http://nmap.org/dist/nmap-6.40-1.i386.rpm (32-bit) OR
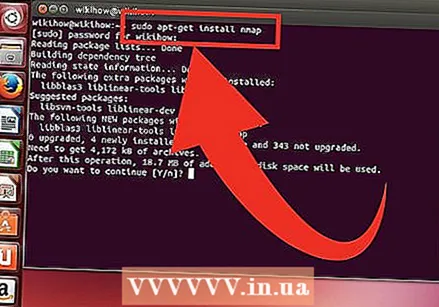
rpm -vhU http://nmap.org/dist/nmap-6.40-1.x86_64.rpm (64-bit) - Debian, Ubuntu
sudo apt-get install nmap
- Red Hat, Fedora, SUSE
- Windows - Download the installer from Nmap. You can download this for free from the developer's website. It is strongly recommended that you download directly from the developer to avoid possible viruses or fake files. The installer allows you to quickly install Nmap's command line tools without extracting them to the correct folder.
- If you don't want the Zenmap graphical user interface, you can uncheck it during the installation process.
- Mac OS X - Download the disk image file Nmap. This can be downloaded for free from the developer's website. It is strongly recommended that you download directly from the developer to avoid possible viruses or fake files. Use the included installer to install Nmap on your system. Nmap requires OS X 10.6 or higher.

- Linux - Download and install Nmap from your repository. Nmap is available for most Linux repositories. Run the command below depending on your distribution:
- Open the command line. You start Nmap commands from the command line, and the results are displayed below the command. You can use variables to change the scan. You can run the scan from any directory on the command line.
- Linux - Open the terminal if you are using a GUI for your Linux distribution. The location of the terminal differs per distribution.
- Windows - This can be accessed by pressing Windows key + R and typing "cmd" in the run field. In Windows 8, press Windows key + X and select command prompt from the menu. You can run an Nmap scan from another folder.

- Mac OS X - Open the Terminal application in the Utility subfolder of the Applications folder.

- Linux - Open the terminal if you are using a GUI for your Linux distribution. The location of the terminal differs per distribution.
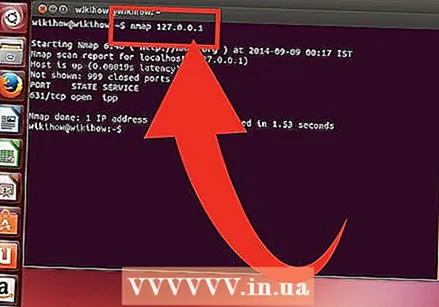
 Scan the gates of your target group. To do a standard scan, type nmap target>. This will ping the target and scan the ports. This is a scan that can be easily detected. The results are displayed on the screen. You may have to scroll up again to see all the results.
 - Depending on the intensity and purpose of the scan, running an Nmap scan may go against your ISP's terms and conditions and may appear suspicious. Always check the laws in your country and your ISP contract before running Nmap scans on targets other than your home network.
 Run a custom scan. You can use variables on the command line to change the parameters of the scan, resulting in more detailed or less detailed results. Changing the scan variables will change the depth of the scan. You can add multiple variables, separated by a space. Place variables in front of the target: nmap variable> variable> target>
 - -sS - This is a SYN stealth scan. It is less noticeable than a standard scan, but can take longer. Many modern firewalls can detect an –sS scan.
- -sn - This is a ping scan. This disables port scanning and only checks if the host is online.
- -O - This is a scan of the operating system. The scan will attempt to determine the target operating system.
- -A - This variable uses some of the most commonly used scans: OS detection, version detection, script scanning, and traceroute.
- -F - This activates fast mode and reduces the number of ports being scanned.
- -v - This displays more information in your results, making them easier to read.
 Run the scan to an XML file. You can output your scan results to an XML file for easy reading in any web browser. To do this, you need the variable -oX as well as giving a filename to the new XML file. A complete command might look like nmap –oX Scan Results.xml target>.
 - The XML file will be saved in your current work location.
Tips
- Target not responding? Place the parameter "-P0" after the scan. This will force Nmap to start scanning even if the program thinks the target does not exist. This is useful if the computer is blocked by a firewall.
- Wondering how the scan goes? While the scan is in progress, press the spacebar or any key to view the progress of Nmap.
- If your scanning seems to take forever (twenty minutes or more), add the parameter "-F" to the command so that Nmap only scans the most used ports.
Warnings
If you often run Nmap scans, keep in mind that your ISP (Internet Service Provider) may ask questions. Some ISPs regularly scan for Nmap traffic, and Nmap isn't exactly the most unobtrusive tool. Nmap is a very well-known tool used by hackers, so you may have to explain.
- Make sure you are authorized to scan the target! Scanning www.whitehouse.gov is just asking for trouble. If you want to scan a target, try scanme.nmap.org. This is a test computer, set up by the author of Nmap, which is free to scan without any trouble.


