Author:
Charles Brown
Date Of Creation:
4 February 2021
Update Date:
1 July 2024
Content
Has Windows been bombarding you with errors lately? Some of your essential system files may have been damaged. This can have several causes, but Repair Installation can solve many problems. Restore installation will restore vital system files without affecting your personal files. Read on below to learn how.
To step
 Back up your data. While Restore Installation should not affect your data, it is always a good idea to err on the side of caution in case something goes wrong. Make a copy of your essential files on an external drive, CD / DVD, or other storage medium.
 - Make sure to collect files from all possible locations, including My Documents, Desktop, and other folders you may have created and placed files in.
- Also look for your Windows Product Key in case you end up needing to reinstall Windows from scratch. You can usually find your Product Key on the box of the drive that Windows came in or a sticker on your computer.
 Place your Windows XP setup disk in the computer. If you bought a computer from a manufacturer like Dell, it may be that a recovery disk is included or a Windows XP CD / DVD. Close the autorun program that starts up when you insert the disc.
 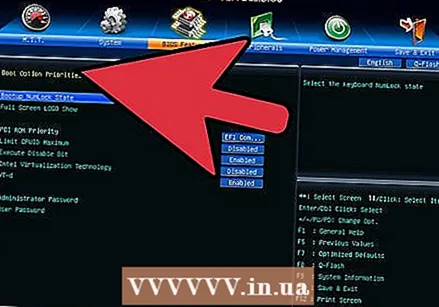 Restart the computer and enter the BIOS. With the disc inserted, restart the computer. During startup, press the Setup key to enter the BIOS. This key varies per system and is located under the manufacturer's logo. Well-known keys are: F2, F10, F12 and Delete.
 - When Windows starts to load, the Setup key was not pressed in time and you will have to try again.
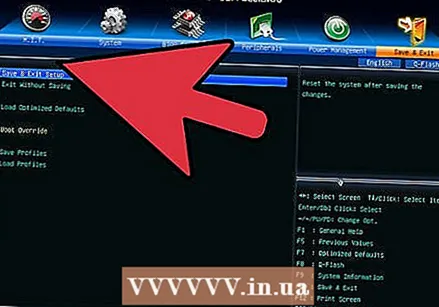 Change the boot order. If you are in the BIOS, go to the BOOT menu. This may have a slightly different name depending on your type of BIOS. You will need to change the boot order so that your CD / DVD boots first, followed by the hard drive.
 - Normally, the hard drive is the primary boot device. This means that the system will first try to boot from the hard drive and then Windows will load. You want to change this so that the Windows drive boots first before trying the hard drive.
- If you have changed the boot order, save it and restart the computer.
 Start the installation. After your computer has restarted, you will get the message Press any key to boot from CD ... to see. Press any key on the keyboard to start Windows setup.
 - Setup will load the files necessary to install Windows. This may take a while.
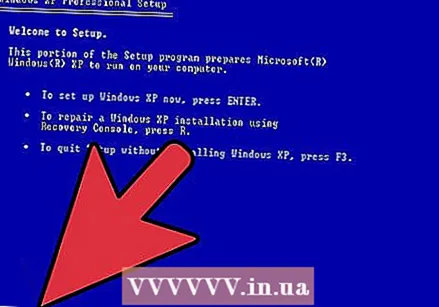 Navigate to the Restore installation option. When the setup program loads for the first time, you will receive a welcome message. At the bottom of the screen you will see the keys that you can use to navigate through the options. DO NOT PRESS the Reset key; press Enter to continue.
 - Press F8 to agree to the Windows license agreement.
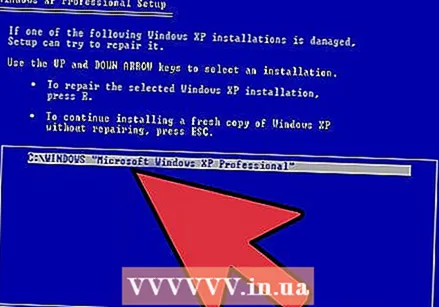 Select your copy of Windows. After the license agreement you will see a list of your stations. One of those drives should be labeled "Windows" and will usually be selected automatically. The only time you will have to choose this manually is if you have multiple operating systems installed.
 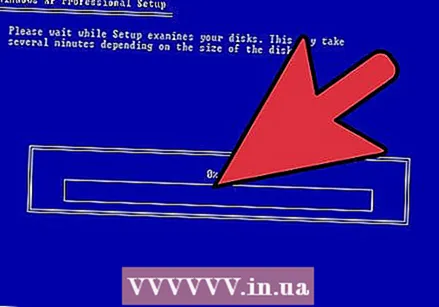 Begin the repair. Once you have selected the correct version, press R to start the repair. Windows will start to delete the system files. After this, a new copy will be installed.
 - No personal files should be deleted during the repair.
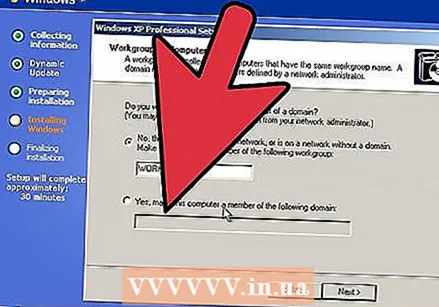 Set your preferences. During the reinstallation you will have to choose Region and Country Settings. You will also have to enter the network settings. Most users choose the first option, "No, this computer is not on a network, or is on a network without a domain."
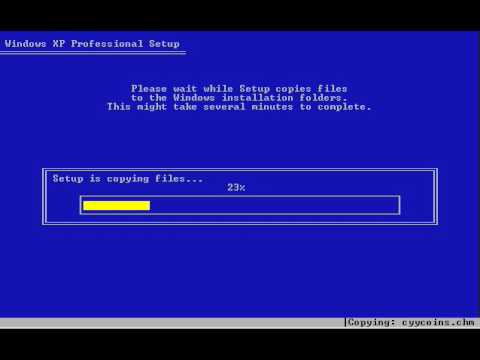
 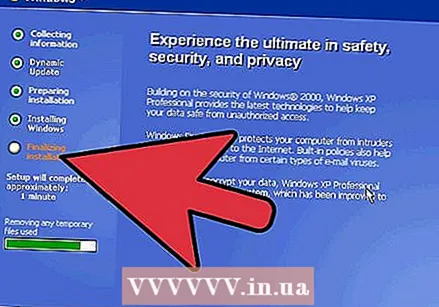 Wait for the setup to finish. Once you have set your preferences, you will have to wait a few minutes for Windows to finish copying the necessary files. Your computer should reboot a few times during the process.
 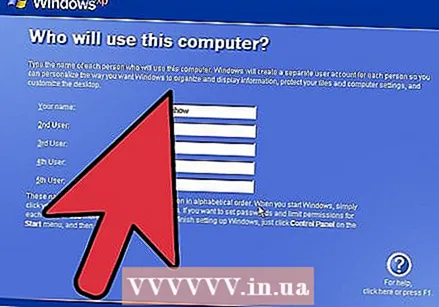 Create the usernames. After the installation is complete and your computer restarts, you will be prompted to register with Microsoft. This is not the same as activation and is optional. You will then be asked to create a username for yourself and others who will be using the PC. You can add and remove users at a later stage if you wish.
 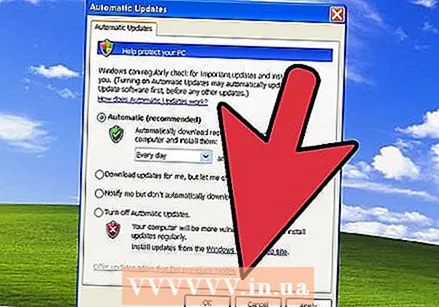 Update Windows. After the setup is complete, you will see the desktop. The repair installation has reverted Windows to the beginning, which means that all updates, patches, and service packs installed over time have now been removed. You will need to update your computer as soon as possible to ensure that you are protected from outside threats.
  Continue troubleshooting. If your problem is resolved, your repair installation has probably worked. If you find that you are still having problems, you may need to go ahead and do a complete clean fresh installation. This means that all data will be deleted from the hard drive and you have to start all over again. See the following guide for detailed instructions on how to perform a clean installation.
 - Now that Microsoft has canceled all support for Windows XP in April 2014, it may be time for an upgrade. Check out wikiHow for articles on upgrading to Windows 7 and Windows 8.
Tips
- Download and install all Windows Updates after Restore Installation.
Warnings
- Restore installation should in principle have no effect on your personal files, but make a backup anyway just in case.
- Repair installation will fix problems caused by a virus in the system files, but it will not remove the virus itself. This means that those files can become infected again if the virus is not removed.


