Author:
Christy White
Date Of Creation:
12 May 2021
Update Date:
1 July 2024

Content
Cutting the back of your own hair can be a daunting process. Make sure you have two mirrors, a wall mirror and a hand mirror, to see the hair on the back of your head. When using clippers, first make a guideline and shave it upward. If you have longer hair and are using scissors, pull your hair forward and brush it out first. Whether you're using clippers or scissors, shave or trim small sections carefully to keep your cut hair looking good.
To step
Part 1 of 2: Using clippers
 Stand with your back to a wall mirror. To cut the back of your hair, make sure your face is in the opposite direction of the largest mirror. A bathroom mirror is well suited for this.
 - If you don't have a wall mirror, a mirror on a dresser is fine too.
 Ask someone to hold a mirror so you can see the back of your head. A hand mirror or small make-up mirror works best for this. You have to experiment a bit to find the best angle so that you can see the back of your head. Ask a friend or family member to help you and have them adjust the mirror until you can see the back of your head.
 - A smaller vanity mirror that mounts to the wall and adjusts easily to different angles would be a great alternative when there's no one to help you.
- Hold your head at a downward angle to make it easier to draw a straight line down your neck.
 Place the clippers with the blade side up. The teeth of the knife should point towards your neck. The knife is parallel to the floor.
 - Change the hand you hold the clippers with throughout the process. For example, if you're shaving the right side of your neck, hold the clippers in your right hand and switch hands as you move across your neck.
- You will also need to switch the mirror when you change the hand you hold the clippers with. If possible, have a friend or family member hold the mirror for you.
 Shave a horizontal guideline across your neck. Look for your natural hairline and shave it along your hairline. This is likely where the outline of your previous haircut is.
 - Keep looking in the mirror while shaving the back of your neck. Keep the line as neat and straight as possible.
- Stay as close to your natural hairline as possible to get the best results.
 Turn the clippers over. It should be in the opposite direction of how you held it before. Make sure the teeth are now facing up.
 - You do this so that you can shave your hair upwards, towards the guideline you just made.
 Shave up from the bottom of your neck to the guideline. Make small vertical strokes going from the bottom of your hair down your neck and ending at the guideline you shaved. Continue shaving vertical sections up to the guideline until there is no hair left below the guideline.
 - Just make sure you only shave below the guideline and not above it. Pin the hair that you don't want to shave out of the way.
- This will remove all the messy hair on your neck and ensure a neat shave.
- Shave this section as slowly and evenly as you can to avoid over-shaving.
 Trim the corners of your neck if you prefer a rounder cut. Make a small round guideline on the edges of your hair on your neck. Then remove the small pieces of hair that are outside the guideline as you did in the previous step.
 - While you're rounding the corners, you can also check for stray hairs behind your ears.
Part 2 of 2: Using scissors
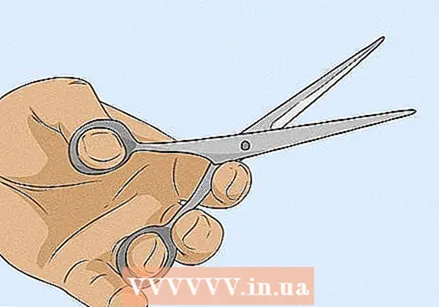 Invest in trimming scissors. Cutting shears are available at most department stores and are specially designed for cutting hair. These scissors cut hair neatly and neatly and help prevent split ends.
 - Never use paper, craft, or kitchen scissors to cut your hair.
 Bring your hair forward and comb through. Make sure your head hangs lower than your neck so that all your hair hangs forward from your neck to the floor. Brush or comb it all forward and make sure there are no tangles.
 - Your hair can be wet or dry for this. If your hair is wet, remember that wet hair will shrink a bit as it dries and bounces.
- It is also easier to see the existing layers if your hair is hanging upside down.
 Trim the ends of the back of your hair while your hair is still hanging forward. The hair coming from the back is now at the top of your head. Trim the ends gently to remove damaged hair or split ends.
 - Cut small sections each time and check your hair regularly in the mirror to keep an eye on the length. You don't have to turn your hair over to view it in the mirror, as turning your head slightly to the side is enough.
 Trim your hair to the desired length with only small cuts. While it can be tempting to do it quickly, keep cutting it down to avoid mistakes. Do not cut more than an inch at a time.
 - If you accidentally cut more hair than desired, you will eventually have to cut the rest of your hair to that length. On the other hand, if you cut too little hair, you can always trim even more.
 Flip your hair back and see what it looks like in the mirror. Stand with your back to a wall mirror, such as a bathroom mirror, and hold a small mirror toward your face. Find the angle that allows you to control the back of your hair.
 - If the back of your hair looks a bit uneven in the mirror, you can always tilt your hair back forward and adjust it.
Warnings
- If you make a noticeable mistake cutting the back of your hair, don't try to fix it yourself as this will likely make it worse. Go to the hairdresser and try again when your hair has grown out.
Necessities
- Wall mirror
- Hand mirror
- Make-up mirror
- Clippers
- Cutting shears
- Comb
- Brush
- Hairpins


