Author:
Bobbie Johnson
Date Of Creation:
5 April 2021
Update Date:
24 June 2024
Content
- Method 2 of 4: Prepare the strip
- Method 3 of 4: Assembling the skirt
- Method 4 of 4: Shaping the skirt
- Tips
- What do you need
- You must calculate the area where you want the skirt to sit. Place the skirt directly at the waist - if you want the skirt to sit higher or lower, the correct measurement is higher or lower.
 2 Cut off the elastic. Add 1 inch (2.5 cm) to your waist measurement. Measure and cut the elastic.
 - The extra inch (2.5 cm) will allow you to pull the elastic over the edge as you sew it into the belt.
 3 Determine the desired length. Figure out how far you want the hem of your skirt to be, then measure from your waist to that point. Hold your tape measure perpendicular to the floor and write down this measurement.
 - Keep in mind that the belt will add another 1 inch (2.5 cm) to your skirt length. When measuring your gathered skirt, subtract 1 inch (2.5 cm) from the desired length before calculating the ruffle width.
4 Determine the size of the ruffles. Ask yourself how many ruffles you want, divide the required length by that amount. This will figure out how wide your finished frills should be. 5 Measure the joints and parts of the ruffles. Calculate the length of your connecting strips by multiplying your upper waist by 1.5. Calculate the length of your ruffles by multiplying the connecting strips by 2. The width of the connecting strips of connecting stripes and ruffles will be the same and can be calculated if you add 1 inch (2.5 cm) to the desired width of your finished ruffles. - If you want the ruffles to be even fuller, make the ruffle stripes 2.5 times the length of the connecting stripes.
Method 2 of 4: Prepare the strip
- 1 Cut out your fabric. You will need one piece for each ruffle. Cut out strips of material according to your measurements.
- If your fabric is not wide enough to cut a full piece or make a whole strip, you will need to sew two separate, shorter strips together to form one full strip. When the lengths of both strips are folded, the total length is plus 1/2 inch (1.25 cm). Sew together the strips from the short ends with a 1/4 ”(6 mm) seam allowance.
- 2 Smooth the hem. To keep the connecting strip and frill strip from fanning, you will need to hem the long side of each strip with a 1/2 ”(1.25 cm) seam allowance. Fold fabric 1/4 inch (6 mm) and iron with iron. Fold the fabric again 1/4 inch (6 mm) over the previous edge, then iron it again.
- If you have an overlock, you can overlay raw edges instead of hemming them. This will make the skirt lighter.
- Smoothing will make sewing easier as the floors will stay in place without the need for sewing pins.
- 3 Sew the edges. Use a straight stitch when sewing each hem. Sew back again for safety.
- The hem will make the stitching easier as the fabric becomes straight and flat at this point.
- 4 Collect the frills. Sew each strip of ruffles with a loose loop right along the top long side of the strip. You can do this with a sewing machine or by hand. Pull out the end of the thread at the end of the strip to gather the fabric, creating ruffles. Continue gathering the ruffles until the stripes have shrunk down to the size of your connecting stripes.
- The top edge of each strip is opposite the hemmed edge.
- You may need to shuffle the folds after reducing the stripes to align them along the thread.
- To sew a gathered stitch by hand, simply sew a free stitch right across the top edge of the fabric with a stitch about 1/2 inch (1.25 cm) long or something. Leave a long ponytail at the end of the work for trimming the material.
- To sew a gathered stitch using the sewing machine, set the stitch length to the longest position and the elasticity as high as possible. Leave a long ponytail, and then create folds by pulling on the bobbin thread.
Method 3 of 4: Assembling the skirt
- 1 Sew the bottom tier together. Place the first ruffle under the first connecting strip, right sides together, and tape over the top seam. Pin together, then sew them right over the top edge. Use a 1/2 inch (1.25 cm) long seam.
- Due to the nature of the frills, using more pins is better than using multiple pins. Extra pins will help the ruffles stay in place or not be folded in an unwanted way.
- Check the seam when finished sewing the pieces together to make sure there is no wrong gathering or wrinkles.
- You can overlay the joining seam if you wish, but this is not required.
- 2 Unfold the tier. Open the connected strips so that the right sides are visible. Smooth out the seam.
- Lay the tier with the connecting strip facing up.
- 3 Add a second frill. Place the next strip of ruffle on the connecting strip of your bottom tier with the right side out. Lay the next strip on the top of the connecting strip with the right side.Line everything along the top edge, pin together, then sew over the top edge with 1/2 inch (1.25 cm) seam allowances.
- As before, you should use a lot of pins to keep the ruffles from shifting while sewing.
- 4 Lift up the top connecting strip. Fold the connecting strip of your second tier so you can see the right side of the material. Smooth down the newly created seam.
- This connecting strip should now lie above the rest of the skirt.
- 5 Add the rest of the frills in the same way. The rest of your ruffles should be sewn to the top of the skirt in the same way as your second tier.
- Insert the frills between the connecting strips of your previous tier and the new connecting strip. The skirt and frills must be turned out, but the new connecting strips must always be inside.
- Pin the layers together before sewing along the top edge with a 1/2 ”(1.25 cm) seam allowance.
- Lift up the top joining strip and iron a new seam before moving on to a new layer.
- Repeat as many times as necessary until all of your ruffles and joining stripes have been added.
Method 4 of 4: Shaping the skirt
- 1 Sew the sides. After all your tiers are sewn together, fold the material in half across from the right side together and the wrong side out. Pin, then sew along the edge with a 1/2 '' (1.25 cm) seam allowance.
- Sew the edges from bottom to top, stopping a short distance to the end. Do not sew the ends of the upper connecting strip.
- 2 Create a waist pocket. With the skirt inside out, lay the top connecting strip towards you. Make the waist pocket slightly larger than the width of your elastic. Pin and sew this pocket together.
- Sew the open edges of the pocket with the smallest seam allowance. Do not sew the short ends of the pocket.
- Note that you do not need to hide the open edge under the pocket. If you followed the instructions carefully, this end is already folded over, so this edge is already finished.
- Iron the waist pocket to make stitching easier.
- 3 Pull the elastic through the waist pocket. Pin a small pin to one end of your elastic band and a large pin to the other end. Insert the small pin and end of the elastic into the waist pocket, then use your fingers to push the pin through the entire pocket and out the other side.
- A small pin makes it easier to pull the elastic through the pocket, while a large pin prevents the other end of the elastic from going through.
- 4 Sew the elastic together. Overlap the ends of the elastic by 1/2 inch (1.25 cm). Pinch, then sew them together with a needle and thread.
- 5 Sew the belt. Fold the ends of the elastic into the waist pocket, and then join the raw edges of the pocket together. Sew with a 1/2 inch (1.25 cm) seam allowance.
 6 Try on a skirt. Turn the skirt to the right side, put it on and look at yourself in the mirror. The skirt should come down to the desired length and the elastic should keep it tight at the waist.
 - This step completes the process.
Tips
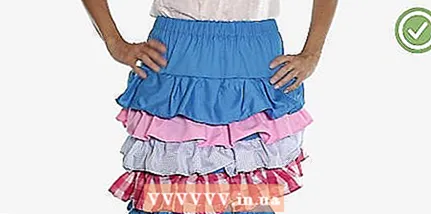
- For quick sewing on a ruffled skirt, use gathered materials and sew any basic skirt silhouette, such as a circle skirt or a pencil skirt. You can also sew a single ruffle to the bottom hem of almost any skirt.
What do you need
- Lightweight fabric (cotton, linen, jersey, satin, etc.)
- Elastic 1/2 "to 1" (1.25 to 2.5 cm) wide
- Sewing thread
- Roulette
- Sewing machine
- Sewing pins
- Sewing needle
- Scissors
- Iron
- Ironing board
- Small pin
- Big pin


