Author:
Bobbie Johnson
Date Of Creation:
5 April 2021
Update Date:
1 July 2024
Content
One or two subwoofers can dramatically change the way music sounds in your car. It is very important to compare the RMS values (the power at which equipment can operate for one hour with a real music signal without physical damage) of your subwoofers and your amplifier. The amplifier must be more powerful than the subwoofer to avoid clipping. Clip (exceeding the permissible power value) is one of the most common causes of subwoofer breakdown.
Steps
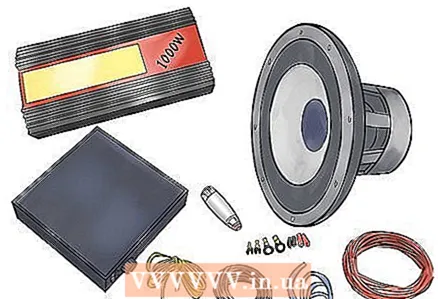 1 Collect your equipment (amplifier, subs, speakers and wires). You can find wiring kits in most stores, for 1400 rubles you can buy 4 gauge wires (5.189 mm) and a line fuse. You will not need wires larger than the 4th one.
 - If you are using a non-original car radio, go to an electronics store, find the radio department and ask for a set of wires for your car to a non-original car radio. Example: If you have a Chevrolet car and a Sony car radio, tell me that you need wires in the Chevrolet for your Sony car radio. You will be asked the year of manufacture of your car and will be given the necessary set of wires from the shelf, as a rule, they are located behind the counter. After you have gotten everything you need, unwind the old car radio that you have installed now, disconnect it and connect the new wires to the new radio. When buying new cables, make sure they are the same shape / size as your radio.
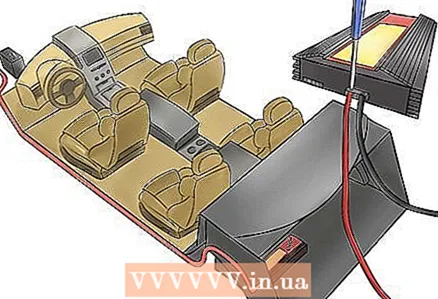 2 Route the wires from your amplifier (power, ground). Decide where you are going to place the amplifier, put the end of the power wire (red) there with a margin of about 30 cm, and then run the power wire under the hood. Some vehicles may already have holes with plastic / rubber inserts. Pass the power wire through the firewall. If you need to drill a hole in the firewall, be careful not to hit anything on the other side, and make sure that drilling the hole will not damage the power line. The insulating tape in the place where the wire passes will additionally protect the wire. Make sure there are no moving parts in the wire.
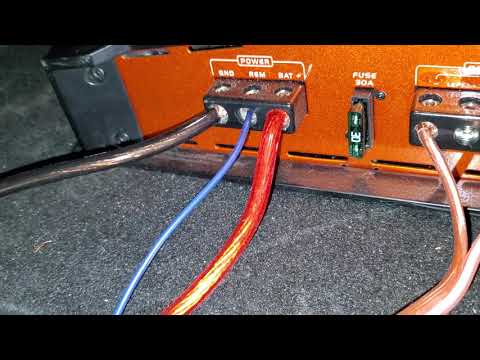
 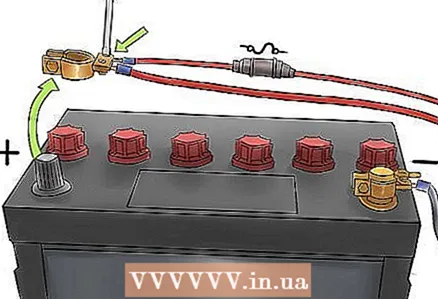 3 Disconnect the power cable from the battery and connect your amplifier's power cable to your car's power cable; leave the cable unconnected. If you bought a kit, it should have a line fuse, if not, you need to purchase one. Cut off the power cable, insert the fuse and connect the cable. The amperage of the fuse must match the size of the cable.
 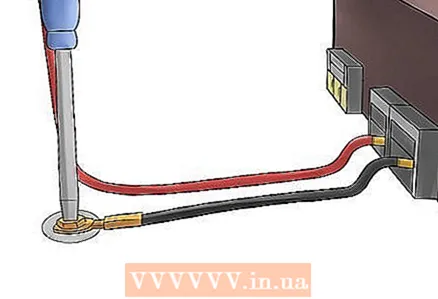 4 Place the amplifier in the desired location, then connect the ground wire (black or brown) to the amplifier. Connect the ground to a piece of bare metal (unpainted). Most people remove the bolt from the seat, attach the wire, and tighten the bolt. Lightly sand the contact area to clean the metal before connecting the ground.
  5 Now it's up to the composite (RCA) connectors, if you are using a non-original car radio, there should be 2 RCA sockets on the back. Simply route the wires from there to the "input" (IN) on your amplifier, avoiding touching the side power line to minimize hum.
 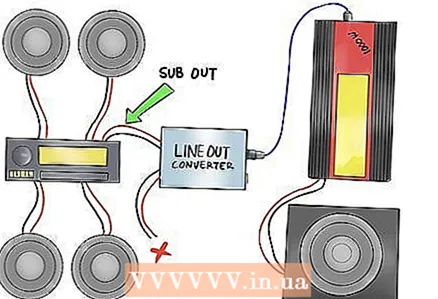 6 If you are going to use an original car radio and connect an amplifier to it, you will have to buy an audio output converter for 680 rubles. A small box with two RCA outputs and 4 speaker wires acts as a converter. To connect, you need to pull out the door speaker and run two of the four wires to it. Note the positive (+) and negative (-) terminals. You don't need the other 2 speaker wires, so remove them from view and route the RCA wires to the amplifier, plug them into the IN jack.
 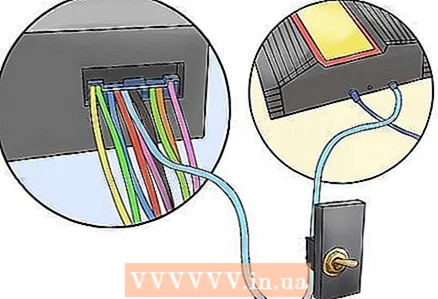 7 Now about the remote power supply (blue wire). If you are using a non-original car radio, there will be a blue wire coming from the back of the radio, in most cases it is just tied. Just cut it off, unwind the old end, and route your remote power cable to the amplifier. If you are using an original car radio, you need to purchase a switch (according to your taste), find a convenient or hidden place to place it, where you will need to run the wire from the amplifier. Run the wire up to the switch, cut it, attach it to one terminal, and then attach the end you just cut to the second terminal.Then run the wire back to the amplifier and cut it off, leaving a margin of about 30 cm. You will need this later.
 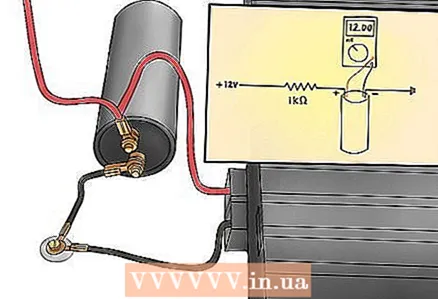 8 Use a capacitor to prevent the voltage drops caused by deep bass, that is, the lights blinking at the same time as the rhythm beats. Place the capacitor as close to the amplifier as possible and use the same ground as for the amplifier. Check your power wire and determine where the capacitor will be, cut the wire and attach the battery cable to the battery. But you can't just connect it, first you need to charge it with a resistor. Use 1K resistors because they don't get very hot. It only takes a few seconds, but don't do it with your bare hands. Then you need to ground the capacitor. Take a voltmeter and connect it to the capacitor. Take a resistor, connect it to the powered side of the capacitor by attaching the power cable to the other side of the resistor. The voltmeter should read about 12 volts, which means your capacitor is charged.
 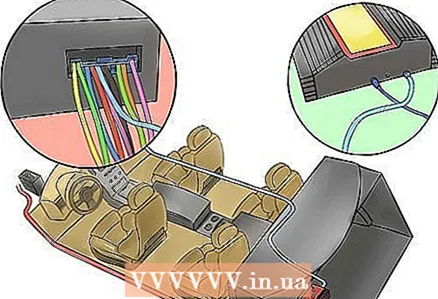 9 Route the power wire to your amplifier. If you have an original radio and have a remote power cable, you will need to wind up the remote power cable with the power cable before inserting it into the amplifier's power slot. Connecting a remote power cable allows the amplifier to turn on when needed. If you do not have a switch wire from a non-original radio, to turn on the amplifier when you turn on the radio, you will have to turn on the amplifier manually. Make sure you always turn off your amplifier when you leave your vehicle so that it does not overheat and drain your battery.
 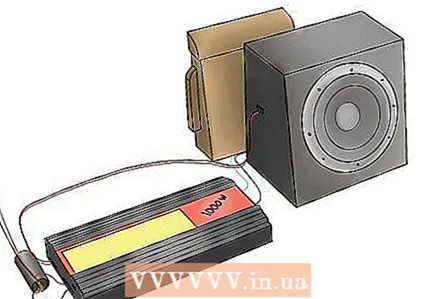 10 Connect the wires to the amplifier.
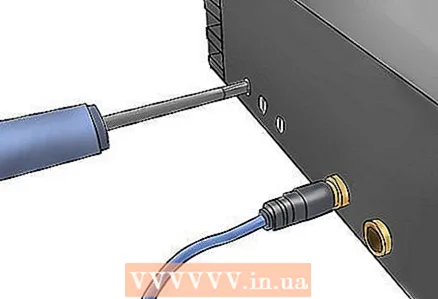 11 Turn the volume down to zero, turn on the music and turn it up to a familiar level where the mids are heard well. Adjust the volume until the subwoofers sound good.
 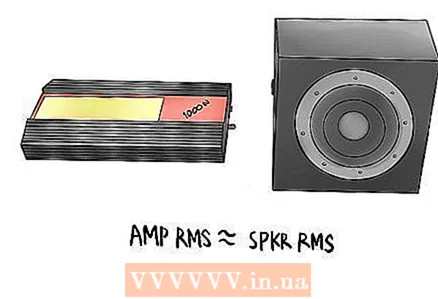 12 It is very important to compare the RMS of the subwoofers and the amplifier, yes, a lack of power will cause the subs to clip, but over-supplying power can lead to overheating of the voice coils. The wattage of the subwoofers and amplifiers should be approximately equal for optimal performance and durability.
Tips
- Remember to test your remote power cord before using it. The last thing you need is a dead battery.
- When connecting the line-out connector to the original radio, it is advisable to use both sets of speakers to maintain the stereo effect.
- If your amp won't turn on, check the amp fuses.
- Make sure you are using cables with the correct impedance (or impedance) for your equipment. A bridged amplifier operates with excellent impedance than an amplifier in non-bridged mode. If you do this incorrectly, the cables may overheat or even burn out the amplifier, so make sure you select the correct cables for this equipment. Typically, cable values are 2, 4, or 8 ohms, so prepare ahead of time.
- Always remember to turn off your amplifier if you have installed a manual switch.
- Solder 12V power and ground to the wires to reduce circuit resistance and improve power (which improves sound).
Warnings
- Always disconnect the negative terminal from the battery before doing anything with the electricity in the car.
- Always be careful when working with electricity.
What do you need
- Car radio
- Amplifier
- Subwoofers
- Wires
- Screwdriver and / or hexagonal set
- Socket set


