Author:
Charles Brown
Date Of Creation:
4 February 2021
Update Date:
1 July 2024
Content
- To step
- Method 1 of 2: Install Chromium OS on a computer with CloudReady
- Method 2 of 2: Run Chromium OS in live mode from a USB drive
- Tips
- Warnings
- Necessities
This article will show you how to install Chromium OS. Chromium OS is the open-source version of Google's closed-source Chrome OS, available only on Chromebooks. You can download it on any computer, but it is not compatible with all computers and software problems may arise. This article is for people who are familiar with installing an operating system and have advanced computer skills.
To step
Method 1 of 2: Install Chromium OS on a computer with CloudReady
 Download and install CloudReady on https://www.neverware.com/freedownload/. CloudReady is the easiest method to install Chromium OS on your computer. The download links are in step 2. You must download the correct version for the operating system you are currently using.
 - For example, if you are using Windows 10, then you need to click the "Download USB Maker" button.
- If you are using a Mac, click either the 32-bit or 64-bit download button, then go to https://guide.neverware.com/build-installer/working-mac-os/#download-cloudready and follow the instructions to install CloudReady.
- If you are having trouble downloading CloudReady, you may need to update your computer's BIOS, format your hard drive, or disable fast boot and secure boot on your Linux.
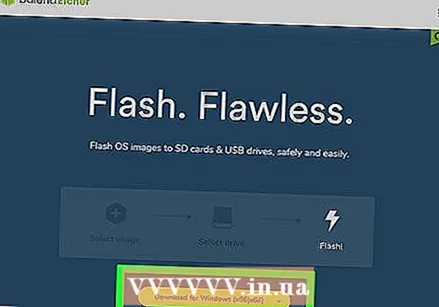 Download Etcher at https://www.balena.io/etcher/. Click the green download button to download another version if necessary.
 - Etcher comes in handy for flashing OS images to SD cards and USB drives.
- Once downloaded, install Etcher by running the installation wizard. Then either follow the prompts on the screen (Windows) or drag the program icon to the Applications folder (Mac).
 Flash CloudReady to the USB drive. USB drive. Etcher is in your Start menu or in the Applications folder.
 - Select "Select Image" and choose the downloaded file from CloudReady.
- Select "Select Disk" and choose the formatted USB drive.
- Select "Flash!" And the procedure will begin. It may take up to 10 minutes to flash CloudReady to the USB, but make sure Etcher reports that it is 100% complete before exiting the program.
 Restart your computer from the USB drive. You can usually do this using commands on your keyboard such as "F12" (Windows) or "Option" (Mac) while the computer is restarting.
 - If you're on Windows and fail to boot from the USB drive, check out this wikiHow to learn how to check (and change) the boot order.
 Log in as a guest. Even when asked to log in with your Google account, you will find the option to log in as a guest in the bottom left corner of your screen.
  Press Ctrl+Alt+F2 (Windows) or Ctrl+⌘ Cmd+F2 (Mac). A Terminal / command line will open.
  Enter sudo / usr / sbin / chromeos-install --dst / dev / sda in. This command will install Chrome OS on your computer's hard drive.
 - This command will erase everything on your hard drive and install Chromium OS.
- When prompted to enter a username and password, use "chronos" as the login and "chrome" as the password.
 Enable Proprietary Services for Netflix. By default, CloudReady does not support Flash or DRM protection schemes such as Wildvine. To install these, you need to open Settings and go to Plugins. Press "Install" next to the Wildvine Content Decryption Module, Adobe Flash and Proprietary Media Elements.
 - If you're having trouble, you can always go to CloudReady's troubleshooting page when looking for answers.
Method 2 of 2: Run Chromium OS in live mode from a USB drive
 Download Chromium OS build at http://chromium.arnoldthebat.co.uk. Download the latest Chromium daily build. The builds are usually ordered by most recent, so the first in the list is the one to download.
  Extract the zipped image. The file was downloaded as an .img.7z, so you will need to download an unzipper such as 7-Zip (Windows) or Keka (Mac). These programs are both free.
  Format the USB drive to FAT32. If you see "MS-DOS FAT" instead, it is the same as FAT32.
 - In Windows, you can format the drive by going to your USB drive in File Explorer, clicking "Manage" and then selecting "Format". In the window that appears, select "FAT32" from the drop-down list in "File System" and then click "Start" and "Ok". All information on the disk will be erased during formatting.
- On Macs, find the Utilities folder in Finder and then select Disk Utility. Then select your USB drive and click the "Erase" tab. Make sure the window says "MS-DOS (FAT)" next to "Format" before clicking "Erase".
 Download Etcher at https://www.balena.io/etcher/. Click the green download button to choose a different version to download if needed.
 - Etcher comes in handy for transferring OS images to SD cards and USB drives.
- Once downloaded, install Etcher by running the installation wizard. Then either follow the prompts on the screen (Windows) or drag the program icon to the Applications folder (Mac).
 Flash the installed images from your computer to the USB. Etcher is located in your Start menu in the Applications folder.
 - Click "Select Image" and select the image file from Chromium OS.
- Click on "Select Disk" and choose the USB drive you have formatted.
- Click "Flash" to begin the process of flashing the image to your USB drive. Once the flash is complete, Etcher will begin validating the final product.
- Do not close the program unless you see 100% complete.
 Restart your computer from the USB drive. You can usually do this using commands on your keyboard such as "F12" (Windows) or "Option" (Mac) while the computer is restarting.
 - If you're on Windows and fail to boot from the USB drive, check out this wikiHow to learn how to check (and change) the boot order.
- Make sure the computer boots from the USB drive to boot to Chromium OS.
- Once Chromium OS is running, make sure you are connected to a Wi-Fi network so that you can log in to your guest or Google account to access all the features available for this web-based operating system.
Tips
- It is possible to run Chromium OS from the USB drive; this is called the live mode. In live mode, any changes you make are not kept.
Warnings
- Everything on the computer's hard drive will be erased (documents, photos, files, videos) if you decide to install Chromium OS on your computer. If you wish to keep your data, it is recommended to use a backup computer so that you can test.
Necessities
- USB drive of 4GB or larger
- Computer
- Backup computer (optional)
- Internet connection (CloudReady does not work without Internet)


