Author:
Frank Hunt
Date Of Creation:
17 March 2021
Update Date:
1 July 2024

Content
- To step
- Method 1 of 3: Apply relief paint to regular socks
- Method 2 of 3: Making felt soles for homemade socks
- Method 3 of 3: Try other materials
- Tips
- Necessities
- Apply relief paint to regular socks
- Making felt soles for homemade socks
- Try other materials
Socks keep your feet nice and warm, but can also get slippery, especially on hardwood or tile floors. Although you can buy non-slip socks, you may not be able to find them in the color and pattern you want. Fortunately, it is easy to make anti-slip socks yourself. You can even apply some techniques to homemade socks and slippers!
To step
Method 1 of 3: Apply relief paint to regular socks
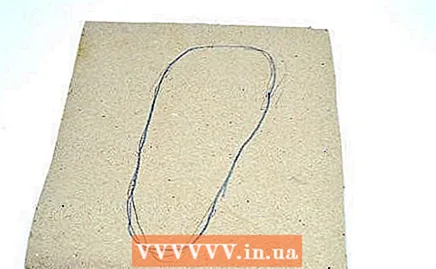 Draw the outline of your feet on cardboard. You are going to insert these cardboard shapes into your socks, causing them to stretch to the shape of your foot. If you don't, the paint may crack when you put the socks on. You can also do this with flip flops, as long as they fit your feet perfectly.
 - This method works best on purchased socks. It is not recommended for knit or crochet socks as the fabric is large.
- Keep your feet apart when you draw the outline so that you get two separate foot shapes.
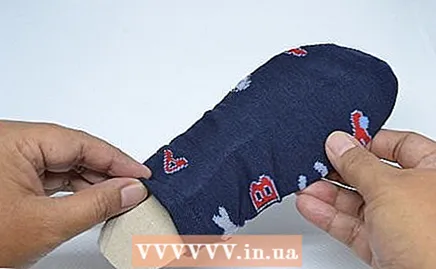 Cut out the cardboard feet and slide them into your socks. Make sure the seam of the toes on your socks is stretched over the toes of the cardboard feet. The top of the sock should be on one side of the cardboard and the bottom (sole) of the sock on the other side.
  Draw dots or lines with relief paint on solid socks. Turn the sock over so that the bottom (sole) is facing you. Grab a bottle of relief paint and open the cap. Using the nozzle, spray simple dots or lines on the bottom (sole) of the sock. Make sure the dots or lines are 1.5 to 2.5 cm apart.
 - Cover the sole evenly. You can match the relief paint with the sock or use a contrasting color.
- Arrange the dots as in a grid instead of randomly. Make straight or squiggly horizontal lines.
- Whether you use dots or lines is up to you. The difference is purely aesthetic.
- Skip this step if the sock already has a pattern or if you want something a little more fun.
 Draw pictures on solid colored socks if you want something a little more fun. Use a marker to draw a simple design on the bottom of your sock, such as a Christmas tree. Make it just a bit smaller than the length and width of your sock. Trace the shape with relief paint and then fill it in with it. Let it dry and then add details.
 - For example, if you drew a green Christmas tree, add a brown trunk, red baubles and yellow garlands.
- You can also combine smaller images, such as three hearts or a flurry of snowflakes.
- If you don't know how to draw, use a stencil or cookie cutter - this will only work if they are nearly the same size as the sock.
- Do not do this in addition to the dots and lines. Choose one of those two.
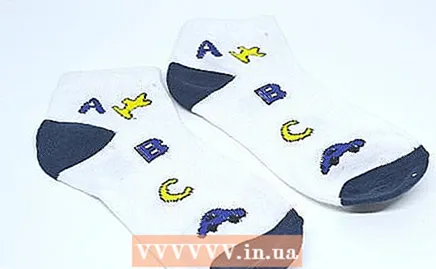
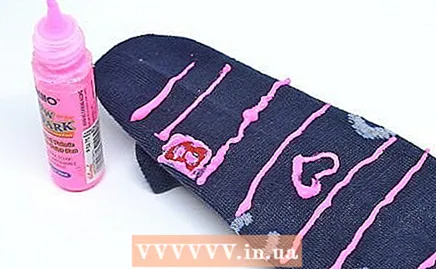 Instead, follow the existing patterns if your sock has them. Not all socks are solid colored. Some have fun patterns, such as big dots, thick stripes, hearts or stars. In this case, you need to outline the patterns with the relief paint, but don't fill them in!
 - Match the color to the pattern or use a different color. For example, you can outline blue stars with yellow glow-in-the-dark relief paint.
- If there are thin stripes on your socks, draw over every other stripe - or over every two stripes.
- If there are small dots on your socks, you can just make the dots over them. However, if the dots are bigger than a pea, then just outline them.
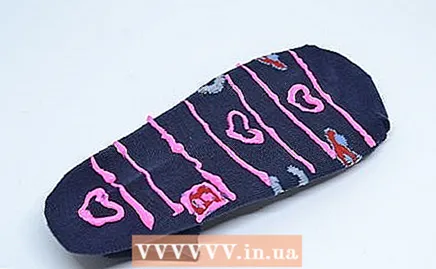 Let the socks dry for up to 24 hours and then take out the cardboard. Relief paint is a great tool to work with, but it takes a long time to dry. This can take anywhere from a few hours to a whole day. Once the relief paint has dried, you can take out the cardboard inserts.
 - As relief paint dries, it flattens out a bit and darkens by a shade.
- You can speed up the drying process with a hair dryer.
- Embossed paint has some stretch once dry, but the designs can still crack if you stretch the socks too much.
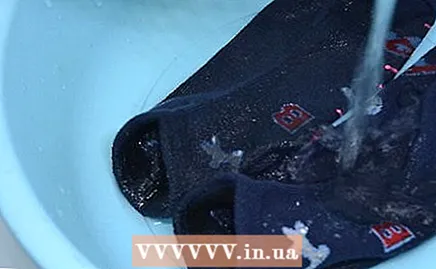 Wait 72 hours before washing the socks. Once the relief paint has dried, you can treat the socks like any other socks. You do have to wait 72 hours before washing them. Make sure to turn them inside out first if you are going to wash them.
 - For best results, use a program on cold water. Do not use a dryer as this can cause the relief paint to crack and crumble.
Method 2 of 3: Making felt soles for homemade socks
 Have a pair of crocheted socks or slippers made. This method works best on crocheted slippers, but can also work on crocheted socks. You can also try it on knitted socks or knitted slippers.
 - If you made the socks yourself, keep some of the used yarn on hand to attach the soles later.
- If you did not make the socks yourself or no longer have the yarn, you will need to buy more yarn of a similar color and weight or thickness.
 Draw the outline of your foot on a piece of paper to create a template. You can also use a flip-flop, but it must fit exactly on your foot. If this is for crochet slippers that already have a defined sole, then you can just draw the outline of one of the soles.
 - You only need one foot shape. You use the same template to make two identical felt soles.
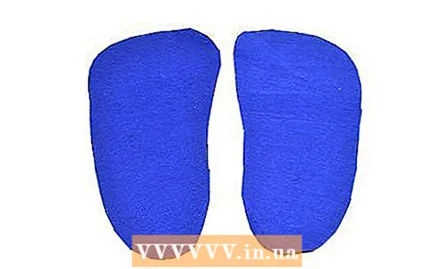 Cut out the template and use it to cut two wool felt soles. First cut out the template and then pin it to a three millimeter sheet of wool felt. Trace around the template with a highlighter and cut it out. Repeat this step to make the second sole.
 - Cut just inside the marking line, otherwise the sole may become too wide.
- Don't use the thin craft felt that you can buy in the kids section of a craft store. It's too thin.
- Match the color to the socks or use a contrasting color. Don't use white though, as it gets dirty quickly.
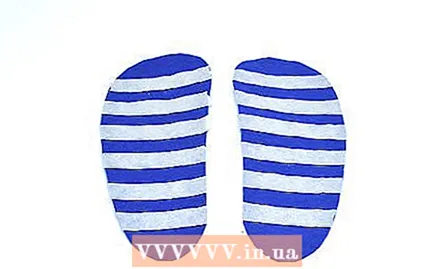 Place strips of masking tape on the soles. Arrange the felt soles so that you have a left sole and a right sole. Place strips of masking tape on each sole to make horizontal stripes. The stripes should correspond to the width of the adhesive tape - from about 2.5 cm.
 - For a nice effect, lay the strips of tape diagonally instead of horizontally.
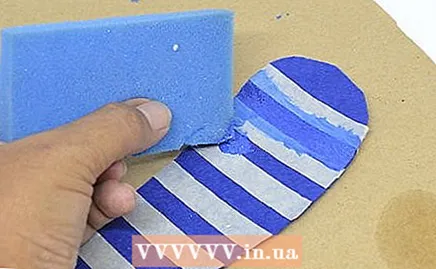 Paint the exposed felt with four coats of dimensional fabric paint. Squeeze dimensional fabric paint onto a palette, such as a paper plate or plastic lid. Apply the paint with a foam brush to the felt between the strips of masking tape. Let each coat of paint dry for a few minutes before applying the next. Let the paint dry completely before proceeding.
 - The paint can be the same color as the felt or a contrasting color.
- You need the four coats of paint. You don't get a good grip with less.
- Dimensional fabric paint takes a long time to dry. It can take up to 24 hours.
- Do not apply the paint straight from the bottle as it will be too clumpy. The paint should soak into the felt.
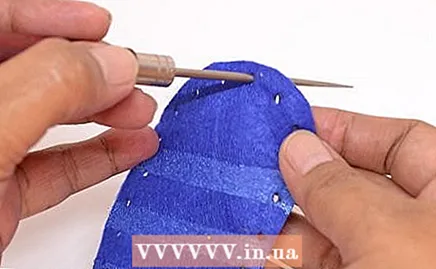 Remove the masking tape and make holes around the perimeter of each sole. Make the holes about 0.5 cm from the outer edge and about 1.5 cm apart. First mark them with a pen and then hammer them in with an awl or leather perforator.
 - Pull the tape off and then make the holes.
- The holes make it easier to sew on the soles.
 Sew the soles to the socks with a darning needle and yarn. First secure the soles with safety pins at the bottom of each sock. Thread a darning needle with the yarn and sew the soles to the socks. Remove the safety pins when you are done.
 - You can match the color of the yarn to the socks, the felt or the paint.
- Make sure to sew up and down through the holes, like with a straight stitch. Do not wrap the yarn around the edges of the soles like you would with a whip stitch.
- Sew around the sole twice to fill all the gaps between the holes. You can also use a backstitch instead.
Method 3 of 3: Try other materials
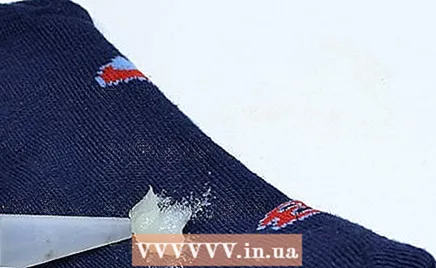
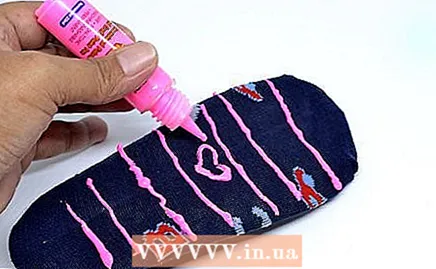
 Draw lines or dots with hot glue if you are in a hurry. Make cardboard inserts for the socks just like you would for embossed paint soles. Squeeze lines of hot glue across the bottom of the socks, or make dots instead. Wait a few minutes for the glue to dry, then remove the cardboard inserts.
 - Hot glue hardens when it dries, so it's best to use this method on thicker socks. On thinner socks you have to make thin dots or lines with this.
- Make the lines horizontal so that they run from left to right. They can be straight or squiggly. If you made dots, arrange them in a grid pattern.
- Do not cover the entire bottom of the sock with a solid layer of hot glue. It will not be comfortable to walk at all.
 Sew suede circles on the heels and toes if you have more time. Cut a circle and an oval from suede. Use a leather hole punch to make holes around the perimeter of each shape, about an inch apart. Using a darning needle, sew the circle to the heel of the sock and the oval to the toe. Repeat this step with the other sock.
 - This works best on crocheted or knit socks and slippers, but you can also apply it to purchased socks in a jiffy.
- Use the same yarn to sew on the shapes that you used to make your socks. If you used thick yarn, choose a thinner yarn in the same color.
- You can also do this with plank lining. Do not use artificial suede or leatherette, it is too smooth.
 Use silicone sealant if you want the socks to be waterproof. Make cardboard inserts for your socks just like you would for embossed paint soles. Apply a little silicone sealant to the bottom of each sock. Using your hand or a craft stick, divide the kit into a thin and even layer. Wait 24 hours before removing the cardboard and wearing the socks.
 - This method makes the socks stiff. It is recommended for handmade socks or slippers instead of thin socks that you can buy.
- If you are working with your hand, it is best to wear vinyl gloves.
- Silicone sealant comes in white and transparent.
- You can also use a brushable underlay or a rubber compound (eg Plasti Dip)
 Ready!
Tips
- Relief paint is often sold as "3d paint" or "dimensional fabric paint".
- You can find relief paint in art and fabric stores alongside other fabric paints and dyes.
Necessities
Apply relief paint to regular socks
- Socks
- Cardboard
- Pen, pencil or highlighter
- Scissors
- Relief paint
Making felt soles for homemade socks
- Knitted or crocheted socks
- Matching yarn
- Paper
- Pen or highlighter
- Wool felt of 3 mm
- Scissors
- Leather perforator or awl
- Darning needle
- Dimensional textile paint
- Foam brush
Try other materials
- Plain or handmade socks
- Hot glue gun
- Silicone sealant
- Suede
- Scissors
- Leather perforator or awl
- Darning needle
- Matching yarn

")

