Author:
Florence Bailey
Date Of Creation:
21 March 2021
Update Date:
1 July 2024

Content
This article will show you how to perform a disk check using the Chkdsk utility in Windows XP.
Steps
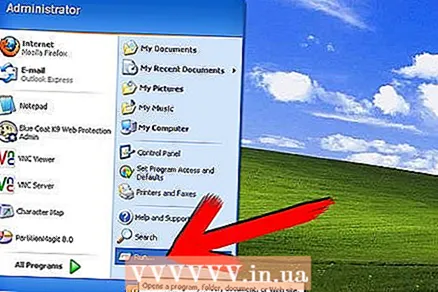 1 Click "Start" - "Run".
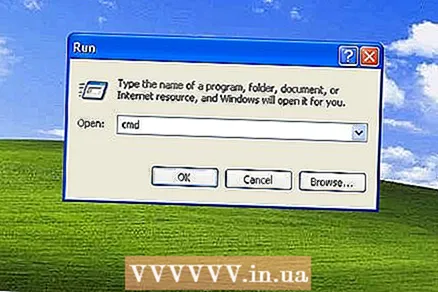 2 Enter CMD.
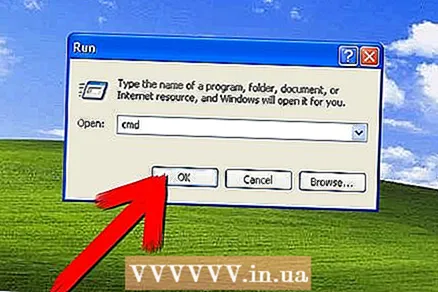 3 Click OK.
- 4At the command prompt, enter the letter (followed by a colon) of the drive you want to check and press Enter.
 5 For example, to check drive D, type D: and press Enter.
 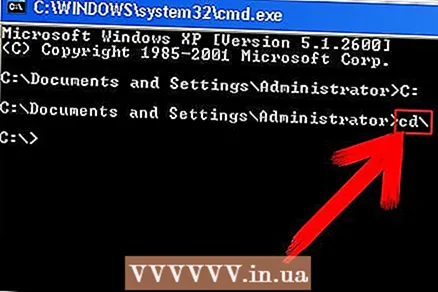 6 Go to the root directory of the drive. To do this, type CD and press Enter.
 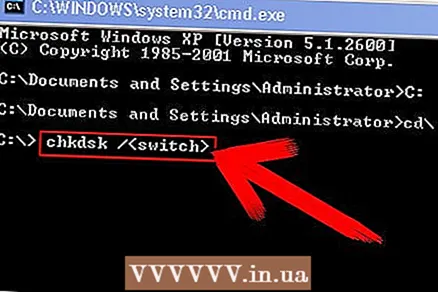 7 Enter chkdsk with one of the following options:
- / f - Automatically repair file system errors (chkdsk / f).

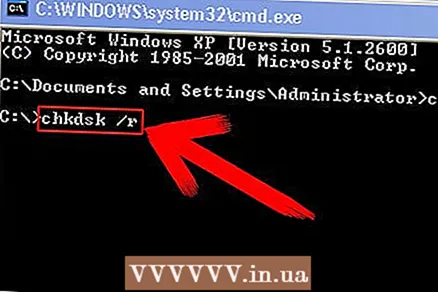
- / r - fix file system errors and scan and repair bad sectors (chkdsk / r).
- If you do not specify options, errors will not be corrected.
- / f - Automatically repair file system errors (chkdsk / f).
 8 If you are prompted to run a disk check the next time you restart your computer, press Y.
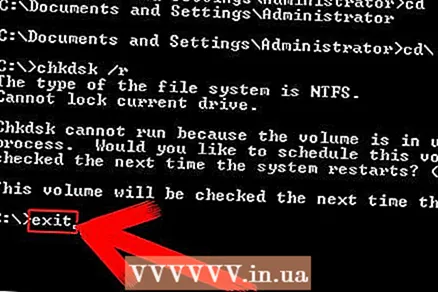 9 At the command prompt, enter exit.
- 10Reboot your computer.
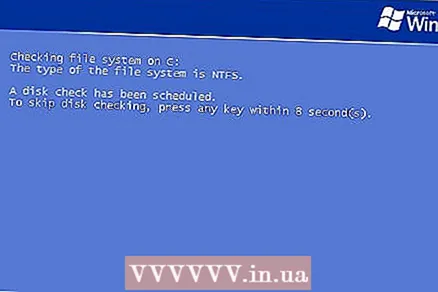 11 Chkdsk will automatically launch and check the drive you specified.
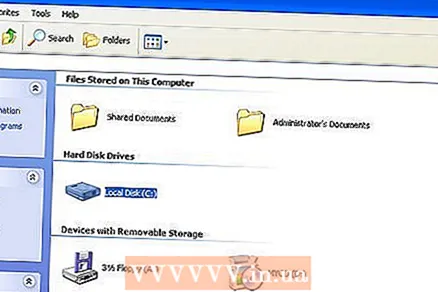 12 Second way. Open the My Computer window.
 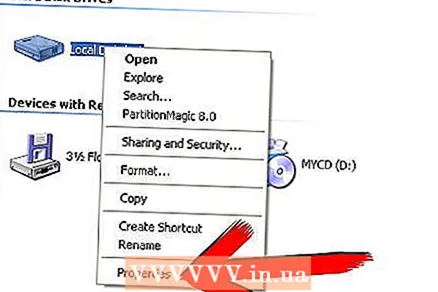 13 Right click on the drive you want to check.
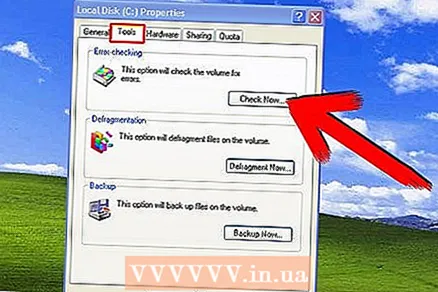 14 Click Properties - Tools - Run Check.
Tips
- For best results, configure the disk check utility to start automatically.
Warnings
- The process may take some time depending on the speed of your computer and the number of errors on your hard drive.


