Author:
Roger Morrison
Date Of Creation:
4 September 2021
Update Date:
1 July 2024
Content
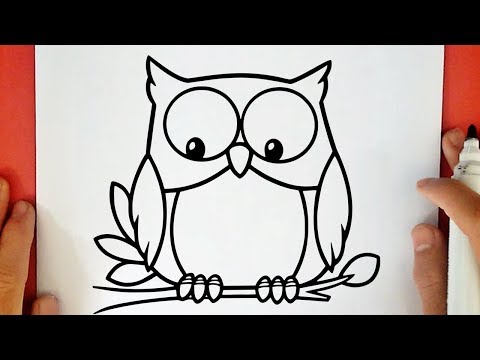
Halloween is approaching and if there is a bird that symbolizes the Halloween spirit, it is the watching, wise old owl, who sits above the passing zombies, headless horsemen, witches and goblins as they make their rounds from house to house. look for loads of tasty sweets. Do you want to draw one for your front door or window, but you have no idea about drawing? Let us help you! With a few simple lines and scribbles you will create your own owl. Here's how!
To step
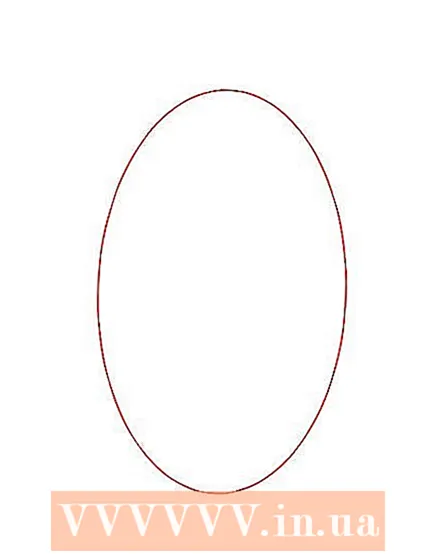 Draw a large oval. It should be about 2/3 the height of your paper. It doesn't have to be perfect, but try to make it about twice as wide as the image below:
 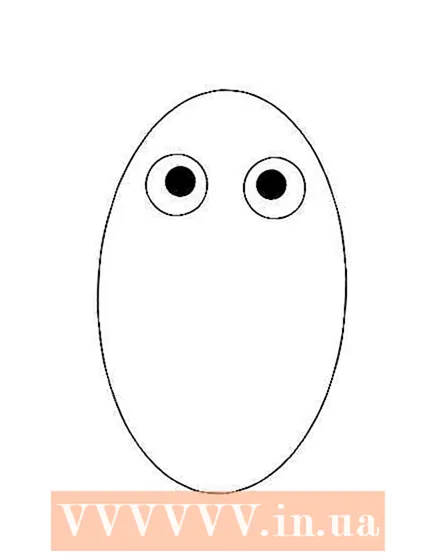 Make the eyes. Draw two circles at the top of the oval about 1/5 of the way up. Then in each circle draw a smaller circle for the owl's pupils and color them black. Have fun drawing the eyes because if you want you can create a serious owl by drawing the pupils straight ahead in the center, create an owl looking for something by drawing the pupils to the left or right, or a make silly, cross-eyed owl.
 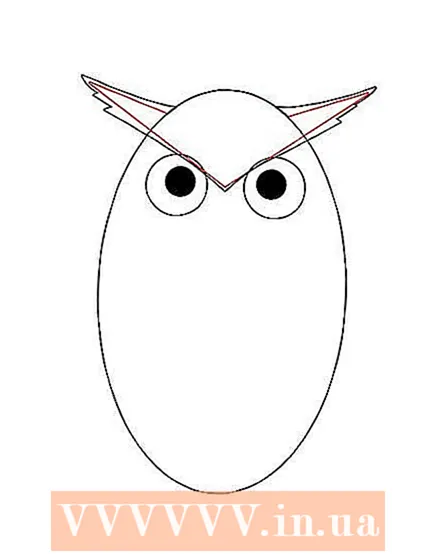 Draw the horns. Create a very wide "V" shape extending beyond the oval on both sides with the tip of the "V" roughly centered between the owl's eyes. The point in the middle gives your owl a lot of character. The less pointed the center is, the "happier" the owl will look. The deeper the point, the more angry the owl will appear. (In the image below, the red lines show the general shape, the black lines show the finished horns.)
 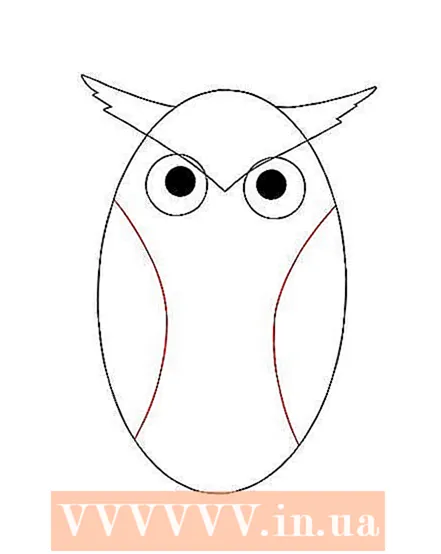 Draw the wings in it. From the top left and right, draw a curved line inward about 1/4 of the center of the oval, then further down.
 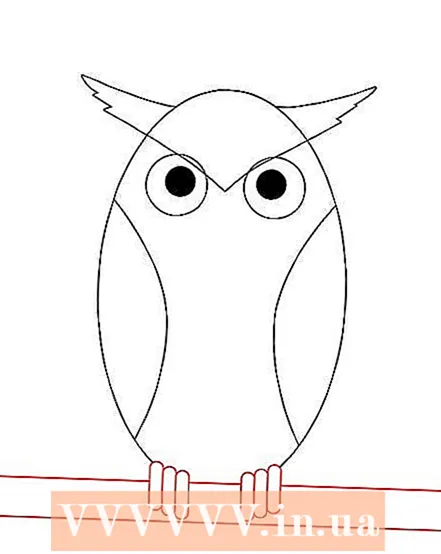 Add claws. Draw elongated ovals on the bottom of your owl, three on each side. Then draw two horizontal lines for a bar. The rod does not have to be perfectly straight, it can be a "branched" rod. Also, the claws don't have to be exact ovals, they can be pointed and sharp, which is especially good if you're making a mean owl.
 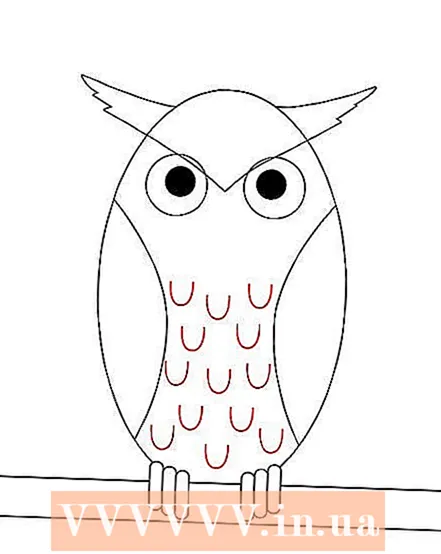 Add some feathers. Make small "U" shapes around the area between the "wings" to make it look like little feathers.
 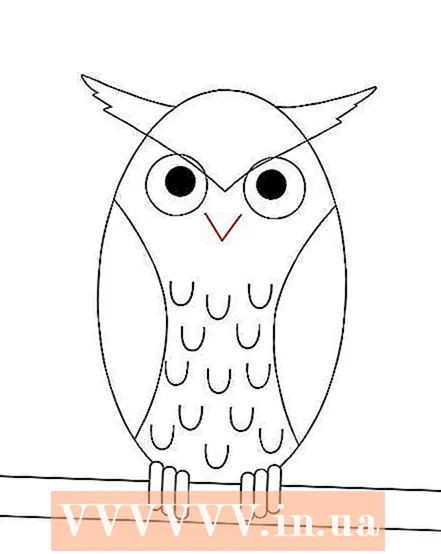 Give the owl a beak. Place a narrow "V" slightly lower than the eyes in front of the owl's beak.
 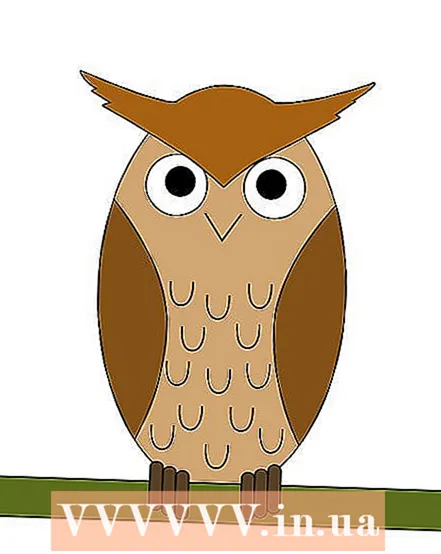 Give the owl some color. If you wish, color the "wings" brown, head and chest light brown.
 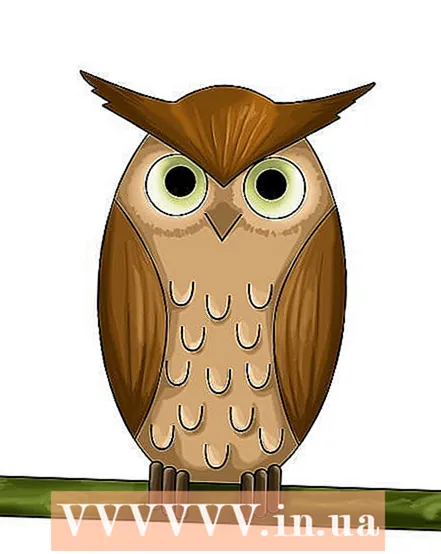 Be creative. Add other details if you want. You can follow the suggestions below for adding light and shadow or make up your own. Now that you know how to make an owl, you can create an entire herd of Halloween owls!
 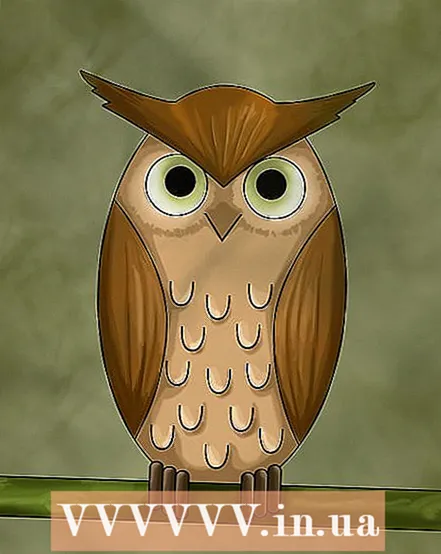 Ready.
Tips
- Use colored pencils for more details.
- Smaller owls require less detail, while large owls require a lot more feathers.
- Put on horn glasses to make the owl appear more sensible.
Necessities
- Pencil and paper
- Templates if needed
- Crayons, crayons, etc.


