Author:
Sara Rhodes
Date Of Creation:
9 February 2021
Update Date:
3 July 2024
Content
- Steps
- Method 1 of 3: PhotoRec (on Windows, Mac, and Linux)
- Method 2 of 3: Recuva (on Windows)
- Method 3 of 3: Recovering Old Versions of Files
If you accidentally overwrite an old file or folder, the deleted documents can be recovered. For each operating system there is a free program for finding and recovering deleted files on your hard drive. If your computer has a backup set up, the files can also be found in the backup.
Steps
Method 1 of 3: PhotoRec (on Windows, Mac, and Linux)
 1 Stop recording to the hard disk. If you notice that you have accidentally deleted a file or overwritten another file, do not save anything else to this hard drive. Don't run programs. If new data is written to the disk, it may interfere with the recovery of the deleted file. If you don't record anything new, your chances of a successful recovery will increase.
 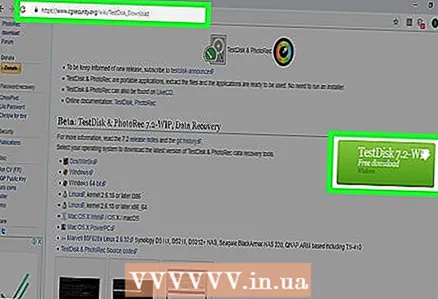 2 Download the free PhotoRec software on another computer or hard drive. It is a very effective freeware program. It's not very pretty, but it can do the same thing as more expensive recovery software. It can be downloaded completely free of charge from the site www.cgsecurity.org as part of the TestDisk utility.
 - PhotoRec is available for Windows, OS X and Linux.
- Download the program to another hard drive so as not to overwrite the file that you want to recover. You can download PhotoRec to a different hard drive, but it's better to use a separate computer.
 3 Insert a blank USB drive into your computer. It is best to use a storage device that has enough space for both the program and the files you want to recover. This is because restoring a file to the same disk on which it was damaged may overwrite the file, as a result of which it will not be restored correctly.
 - PhotoRec is only 5 megabytes in size and will fit on any USB stick.
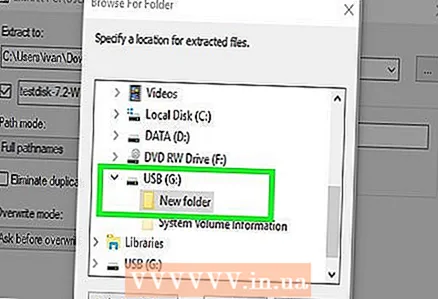 4 Unzip the downloaded file with the program. TestDisk will be in ZIP (Windows) or BZ2 (Mac) format. Unzip the TestDisk folder.
 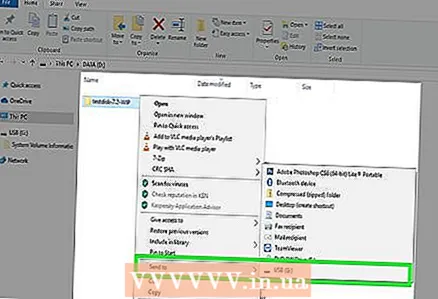 5 Copy the TestDisk folder to your flash drive. This will launch PhotoRec from the USB stick.
 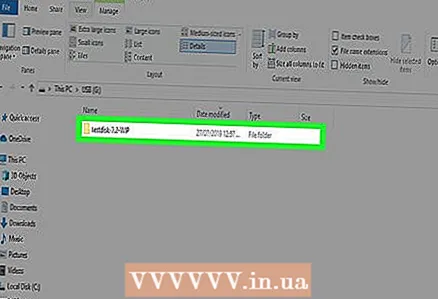 6 Insert the flash drive into the computer that contains the damaged file (or files). Open the TestDisk folder on the flash drive.
 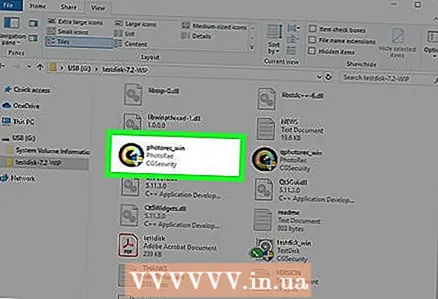 7 Start the PhotoRec program. The command line will appear on the screen.
 - Move up, down, left and right using the arrows ↑↓←→ and use buttons ↵ Enter and ⏎ Return to make a choice.
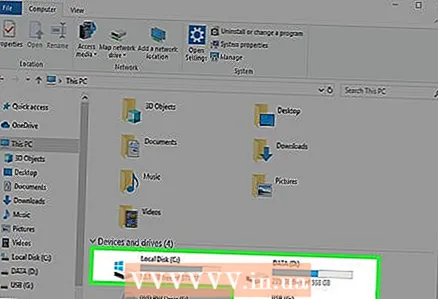
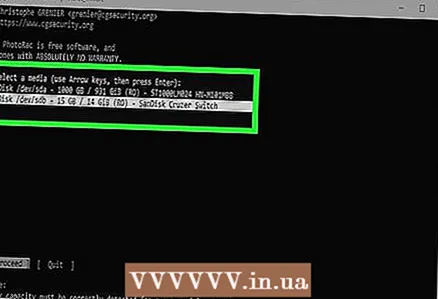 8 Select the drive where you want to recover the file. The drives will be simply numbered, so you will need to pay attention to their size to figure out which drive you want.
 - If your hard drive has many partitions (for example, C: and D :), they will not be visible until you select the drive itself.
 9 Select the type of file you want to search for. By default, PhotoRec will try to recover all files that it supports. You can speed up the process by specifying which files you are interested in.
 - You can change the file type in the menu File Opt .
- Being in the menu File Opt , deselect all files in the list by pressing S... Then go through the list and select the files that you need.
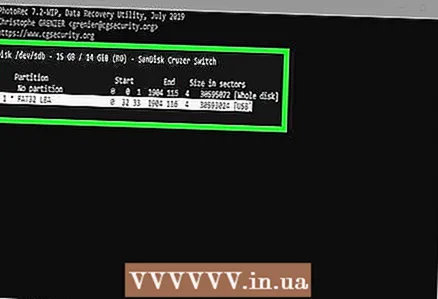 10 Select the desired disk partition. You will have to recognize the sections by size. Some of them may be signed.
 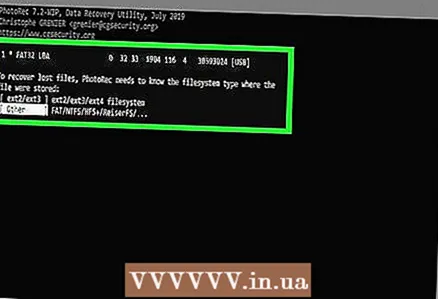 11 Select the file system type. If you are on Linux, select ext2 / ext3... If you are using Windows or OS X, select Other.
 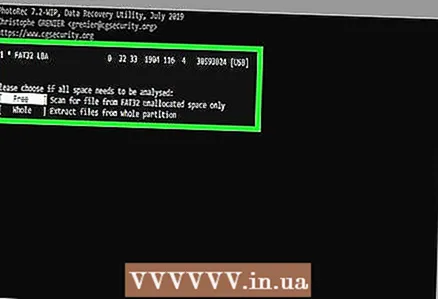 12 Decide where to find the file. Your choice may be determined by how the file was deleted:
 - Free - select this option if you have manually deleted the file or overwrote another file.
- Whole - select this option if the file was lost as a result of a hard disk error.
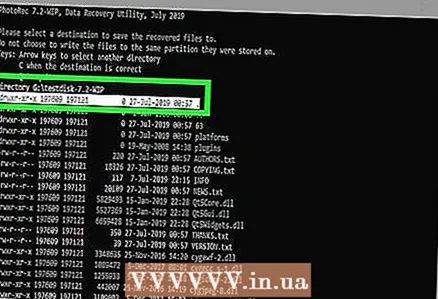 13 Select a location to write the recovered files. The files must not be on the same drive where they were deleted.
 - To return to discs, use the menu .. at the top of the directory list. This will allow you to select a location on another drive or partition of your hard drive or USB stick.
- When you find the location you want, click C.
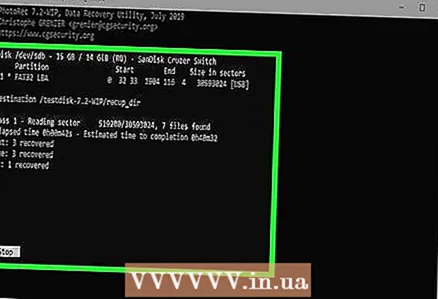 14 Wait for the files to recover. PhotoRec will try to recover all lost files at the location you specify. The execution time will be displayed along with the number of files recovered.
 - It can take a long time to recover files, especially if the partition is very large or if you are looking for a large number of files of different types.
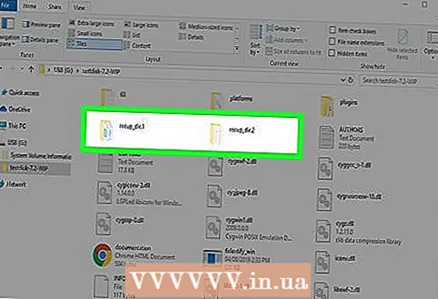 15 Check the recovered files. When the scan is complete, see if the files have recovered. Most likely, the file names will be lost, so you will have to check each file to make sure that it is recovered.
Method 2 of 3: Recuva (on Windows)
 1 Stop recording to the hard disk. If you notice that you have accidentally deleted a file or overwritten another file, do not save anything else to this hard drive. Don't run programs. If new data is written to the disk, it may interfere with the recovery of the deleted file. If you don't record anything new, your chances of a successful recovery will increase.
 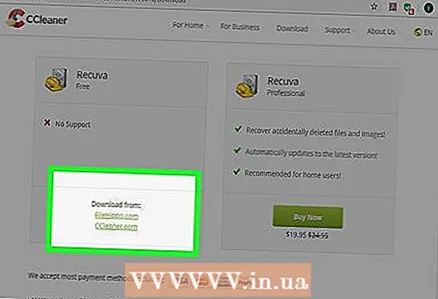 2 Download Recuva to another hard drive. Download the installer to another hard drive of your computer or to another computer. Recuva is a free program that can be downloaded from www.piriform.com.
  3 Insert a blank USB stick. The Recuva software will be installed on this drive. This will allow you to run the program without risking overwriting the files you need to recover.
 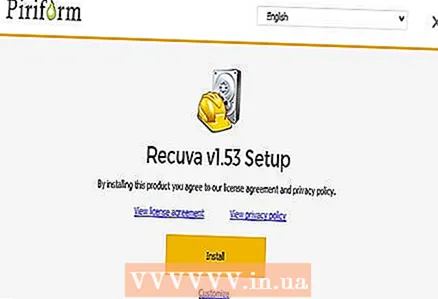 4 Run the Recuva installer. Click Next to continue.
 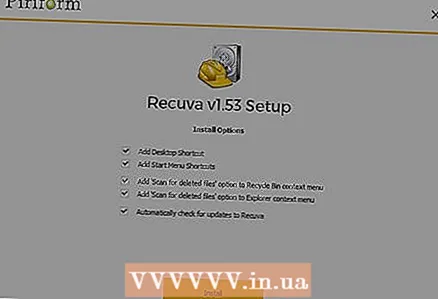 5 Click the button.Advanced to change the installation location... Choose any option to continue.
 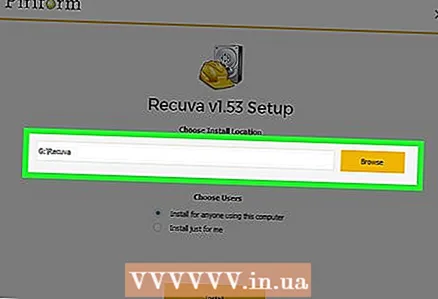 6 Select your USB drive as the installation location. You will need to create a folder called "Recuva".
 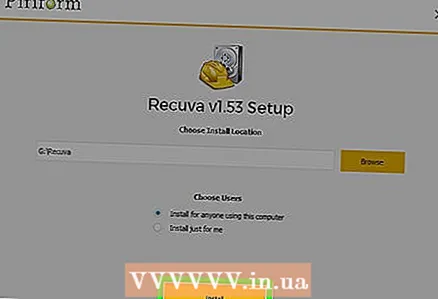 7 Deselect all additional installation options and press the button.Install.
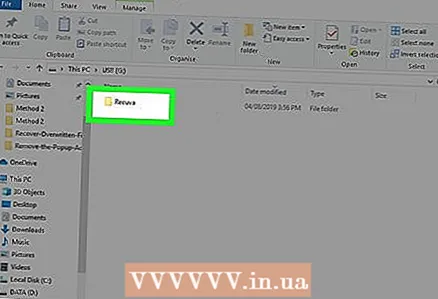 8 Open the "Recuva" folder you just created.
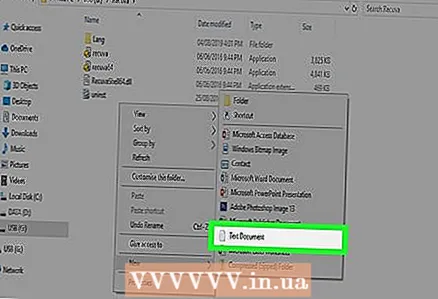 9 Right-click on an empty space and select "New" → "Text Document".
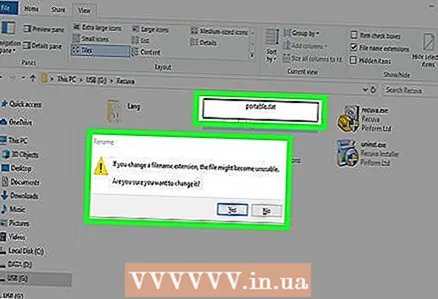 10 Change the file name to.portable.dat. Confirm the change to the file format.
  11 Insert the USB drive into the computer where you need to recover the file (s). Open the Recuva program folder on the flash drive.
 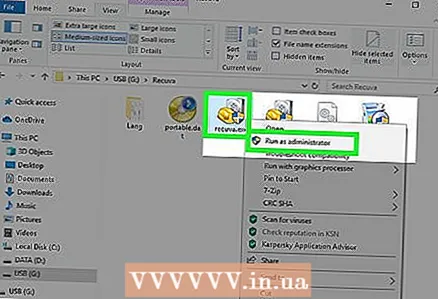 12 Run the file "recuva.exe ". The program interface will appear on the screen.
 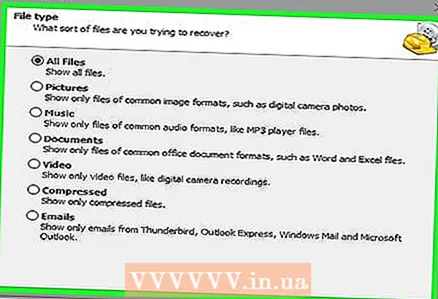 13 Select the types of files you want to find. You can search for all or just some specific documents.
  14 Select a location to search for files. You can search all over your computer or in specific locations.
 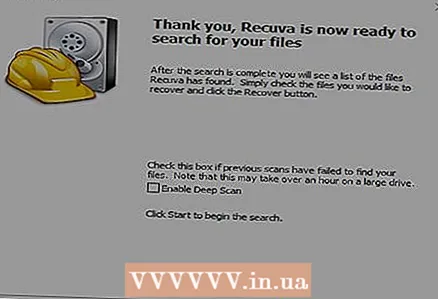 15 Start scanning. The program will start scanning the selected area of the disk and looking for the files you need.
  16 Highlight each file you want to recover. After the scan is complete, you will see a list of files. Highlight each desired file and click the Recover ... button.
 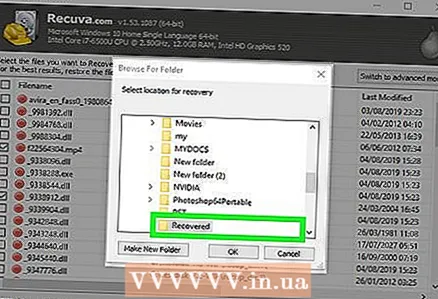 17 Select the location where you want to write the recovered files. It is worth writing them in a different place where they were damaged, otherwise the files will be restored with errors.
Method 3 of 3: Recovering Old Versions of Files
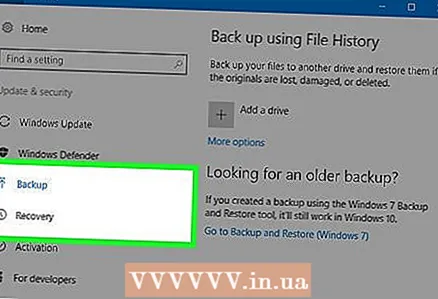 1 Take advantage of the file recovery options in Windows. Windows 7 and Windows 8 have the ability to back up the file change history. To be able to store backups, you need to enable the corresponding functions in the operating system.
 - If you do not know how to back up in Windows 8, this article will be helpful for you.
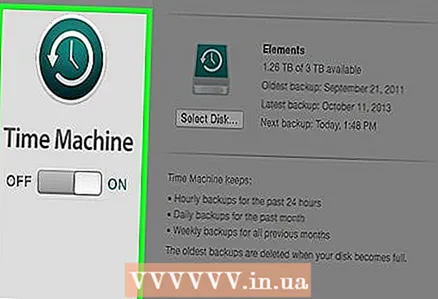 2 If you have OS X installed on your computer, use Time Machine to restore a previous version of the file. You will need to configure the program so that it stores backups on an external hard drive, however, thanks to this, you will always have access to all versions of files that will appear over time.
 - This article will show you how to use Time Machine.


