Author:
Clyde Lopez
Date Of Creation:
17 June 2021
Update Date:
1 July 2024

Content
- Steps
- Method 1 of 3: Egg selection and hatching method
- Method 2 of 3: Using an incubator
- Method 3 of 3: Using a hen hen
- Tips
- What do you need
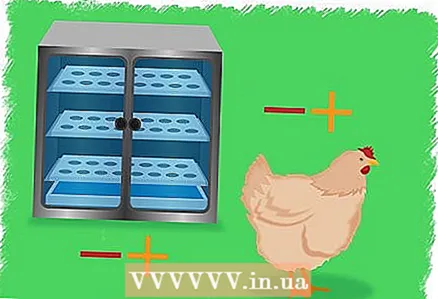
Breeding chicks is a very fun activity that requires good preparation, dedication, flexibility and observation skills. The incubation period of chicken eggs lasts 21 days, and they can be hatched either in a special incubator or using a hen hen. This article describes how you can hatch chicks in both ways.
Steps
Method 1 of 3: Egg selection and hatching method
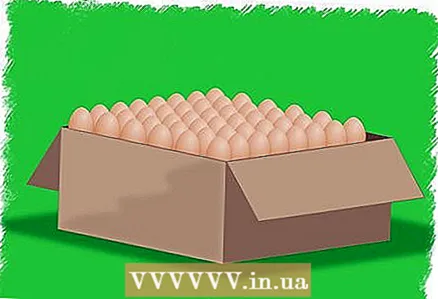
 1 Find fertilized eggs. If you do not breed chickens, then fertilized eggs can be found in hatcheries, or in large coops, where roosters are found in a group of chickens. You can buy fresh eggs from any farmer who sells their surplus. Make an appointment with the supplier in advance to know for sure that he has the breed you want and the number of eggs. Seek professional advice to select the right supplier.
 - Eggs sold in grocery stores are not fertilized eggs and nothing will hatch from them.
- To avoid multiple infections, it is best to buy all eggs from one supplier.
- If you are looking for a specific or rare breed, you should go to specialized incubation stations.
 2 Be careful when the eggs are sent to you by mail. You have to be careful when you buy eggs online and have them delivered to you by mail, especially if you are hatching eggs for the first time. Post-mailed eggs are more difficult to hatch than eggs purchased from a local farmer.
 - Usually, eggs that are not mailed have an 80% chance of hatching, while eggs that are not mailed have a 50% chance.
- However, if the eggs were not monitored when they were delivered, it is likely that no chicks will hatch, even if you do it right.
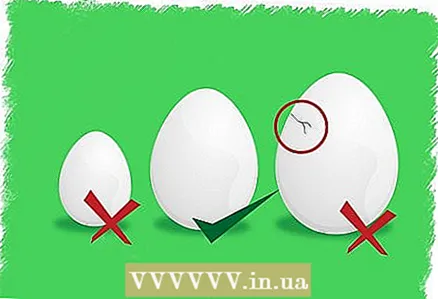 3 Choose eggs wisely. If you can choose your own eggs, then there are a few things you should keep track of. You should choose eggs that are completely mature, with good build and shape. They should be close to their partner and they should have a high percentage of fertilized eggs (about 3). Chickens intended for hatching should be given the correct feed.
 - Avoid eggs that are too large, too small or irregularly shaped. Large eggs hatch poorly, while small ones produce small chickens.
- Avoid eggs with cracked or thin shells. Such eggs do not retain the moisture necessary for the development of the chick poorly. In addition, such eggs can easily pick up various diseases.
 4 Know that you will have roosters. Remember that usually half of the eggs hatch into roosters. If you live in a city, keeping roosters can be a problem or even illegal! If you cannot keep roosters, you will have to find another home for them. In the event that you can keep roosters, you must control their number and make sure that they do not hurt other chickens.
 - It is impossible to know in advance who will hatch from the egg.Although, as a rule, the percentage of births of females and males is the same, but if you are unlucky, then you may hatch seven males out of eight eggs, which is not suitable for a carrier group.
- If you are going to keep some or all of the males, you need to make sure you have enough room to prevent too much fertilization of the females. Chickens that fertilize too often may have feathers plucked from their heads and backs, they may have injured beaks, and even worse, they may have punctures from roosters. In addition, the roosters fight among themselves.
- The best thing is to keep one rooster for every ten hens. This way you can keep a good percentage of fertilized chickens in your group.
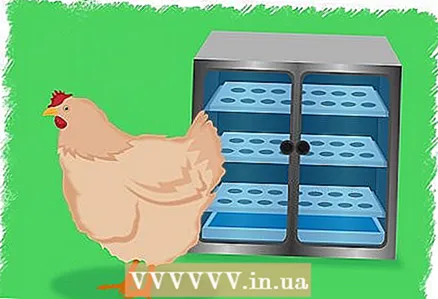 5 Decide if you will be using an incubator or a hen hen. You have a choice of how best to hatch your eggs. You can use an incubator or lay the eggs on top of the hen. Both methods have their pros and cons that you should know before making a decision.
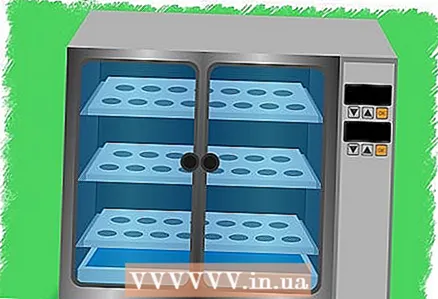
 - An incubator is a special device with adjustable temperature, humidity and ventilation. With incubators, all responsibility for the eggs is on your shoulders. You will need to prepare the incubator, monitor its temperature, humidity and ventilation. You will also have to turn the eggs over. You can buy a small incubator or you can make one yourself. If you have a purchased incubator, follow the instructions that came with it.
- A brood hen can be used to incubate and hatch chicks, even if it does not have its own eggs. This is a great way to hatch eggs. You should choose the right breed of hens. Some of the most popular breeds are the Chinese Silk, Cochin, Orpington and Old English Fighting.
 6 Learn the pros and cons of each incubation method. Each method has its own pros and cons. Knowing them will help you make the right decision when choosing an incubation method.
 - Advantages of the incubator. An incubator is a good solution if you do not have a brood hen or if you are hatching for the first time. An incubator allows you to control the entire process, and in addition, incubators are an excellent solution for large numbers of eggs.
- Cons of an incubator. The only drawback of the incubator is that it needs food. If your lights are suddenly turned off, or someone accidentally unplugs the incubator from the outlet, this will very badly affect the eggs, and may even kill the chicks that have not yet hatched. If you don't have your own incubator, then you have to buy one, which, depending on the size and quality, can be a big waste.
- Pros of a hen hen. Using a hen hen to hatch eggs is the most practical and natural way to hatch eggs. With chickens, you shouldn't be afraid of a sudden blackout as it won't affect egg development. Plus, you don’t have to worry about the correct temperature and moisture content of the eggs, and when the chicks hatch, you can see a beautiful picture of the hen’s tending to the chicks.
- Cons of hen hens. Chances are that when it's time to hatch, your hen won't want to. You cannot force a hen to hatch eggs, so you must choose the right time to hatch. You may need a separate hatching house to prevent crowding and egg damage, which in turn raises the cost of hatching. Also, keep in mind that chickens can hatch a certain number of eggs at a time. Large chickens can incubate about 10-12 eggs, while small chickens only 6-7 eggs.
Method 2 of 3: Using an incubator
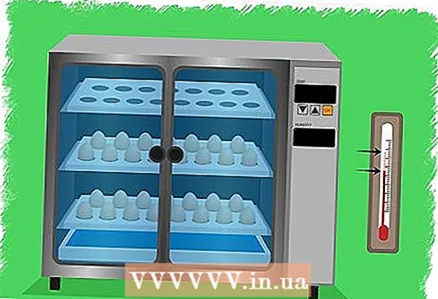
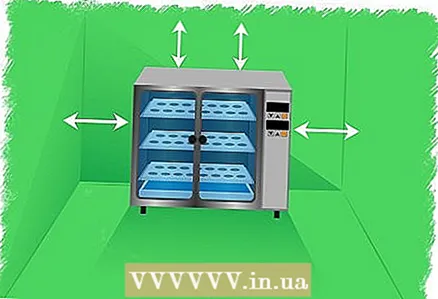
 1 Choose a location for your incubator. To keep the incubator at a constant temperature, you must place it where there is as little external temperature change as possible. Do not place the incubator near a window where it will be exposed to direct sunlight. The sun can heat the incubator so much that the embryos that form will die.
 - Use quality power outlets and prevent the possibility of accidentally unplugging the incubator.
- Keep small children and pets away from the incubator.
- Try to keep the incubator on a level, high surface so that it cannot be thrown off or stepped on. The room where the incubator will be located should have the most stable temperature, and it should be protected from drafts and direct sunlight.
 2 Learn how the incubator works. Before placing eggs in the incubator, read the instructions for it. Make sure you understand how to control the fan, light and any other incubator functions.
 - Use a thermometer to check the incubator temperature. You should check the temperature stability of the incubator 24 hours before placing your eggs.
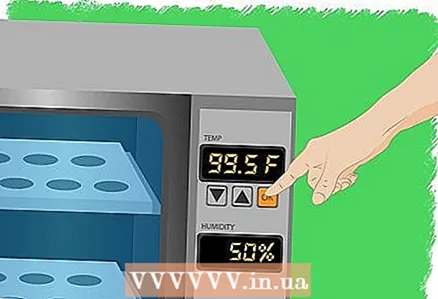 3 Prepare the conditions. In order for the chicks to hatch successfully, all conditions inside the incubator must be prepared. In order for the incubator to be ready to accept eggs, you must prepare all the conditions in advance as best as possible.
 - Temperature. For chicken eggs, the temperature in the incubator should be about 38 degrees. Avoid temperatures below 37 degrees and above 39. If the temperature has been above or below normal for a long time, this can adversely affect the number of eggs hatched.
- Humidity. Humidity should be between 50-65 percent. 60 percent humidity is considered ideal. You can provide the incubator with moisture by placing a bowl of water under the eggs, or you can use a hydrometer to monitor the level.
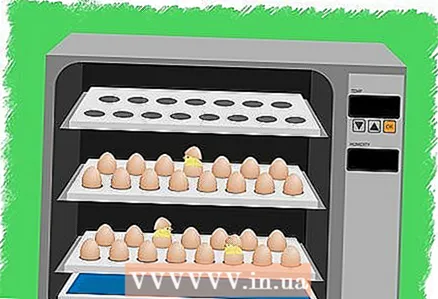
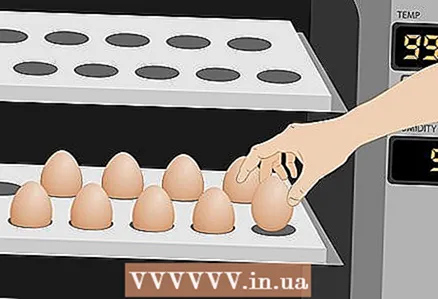 4 Lay eggs. Once all the conditions for incubating the eggs are ready, and you have monitored them for 24 hours to make sure they are stable, it is time to put eggs in the incubator. If you put two or three eggs in there, chances are that there will be no chickens, or that only one chick will hatch, even more so if the eggs were sent by mail.
 - Warm fertilized eggs to room temperature. Preheated eggs will reduce temperature changes inside the incubator when you put them in.
- Place the eggs carefully in the incubator. Make sure the eggs are on their sides. The wide side of the egg should be slightly higher than the narrow side. This will prevent incorrect position of the chick in the egg and difficulty when it is time to hatch.
 5 After placing the eggs in the incubator, let the temperature drop. The temperature in the incubator will drop for a short period of time after you place your eggs. You can re-adjust the internal temperature of the incubator.
 - Do not raise the incubator temperature to compensate for the loss, as this can damage or even kill the embryos.
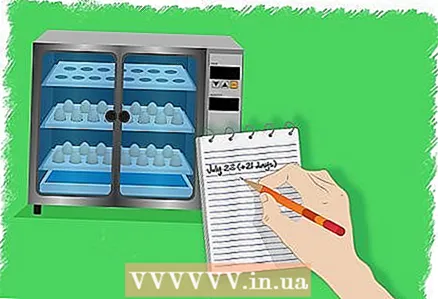 6 Write down the date. This way you will be able to guess the date when your chicks will hatch. At the right temperature, the incubation period for chicken eggs is twenty-one days. Older eggs that have been allowed to cool or those that have been kept at low temperatures may still hatch, but slightly later. If 21 days have passed and the eggs have not hatched, give them a couple more days, just in case.
 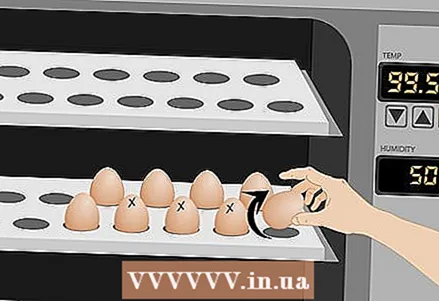 7 Turn eggs daily. You should turn the eggs at least three times a day, at regular intervals. It's even better if you turn them over five times a day. To keep in mind which eggs you turned over and which ones you didn't, you can draw a small X on one side of the eggs. This way, you will always be sure that all your eggs are upside down.
 - Wash your hands well before turning eggs to avoid transferring bacteria and oils to the eggshell.
- Eggs must be turned over before 18 days. Afterwards, it is best not to touch the eggs so that the chicks can sit in the egg for future hatching.
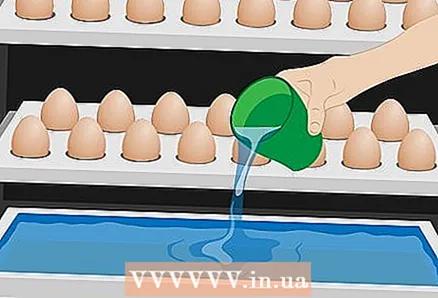 8 Adjust the humidity level in the incubator. The humidity should be around 50-60 percent, except for the last three days when you should increase the humidity level to 65 percent.The correct moisture level depends on the types of eggs you hatch. Consult an expert or look for information in books on bird breeding.
 - Remember to add water to the bowl regularly, otherwise the moisture level can drop dramatically. Always add warm water.
- If you want to increase the moisture level, you can put a washcloth in the bowl of water.
- You can measure the moisture level with a wet bulb thermometer. When you check the humidity level in the incubator, also record the temperature so that you can find the relative humidity level in the incubator. Just find a psychometric table in a book or on the Internet.
 9 Make sure the incubator is properly ventilated. The incubator must have special ventilation holes. Make sure they are at least half open. As soon as the chicks start to hatch, you should improve ventilation.
 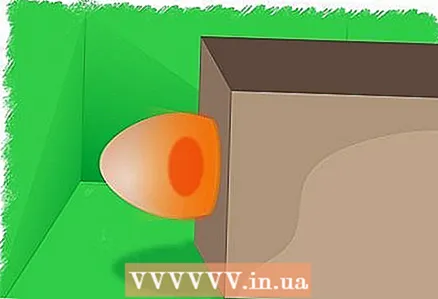 10 After 7-10 days, enlighten the eggs. Translucent eggs are when you send light through the eggs to see how much space the embryo takes up. X-ray will help you find and remove non-viable eggs.
 - Find a box or tin can that can hold the light bulb.
- Cut a hole in the jar or box. The hole should be smaller in diameter than the egg.
- Turn on the lamp.
- Take any egg from the incubator and bring it to the hole. If the egg is empty, then it means that the embryo has not developed, or the egg has not been fertilized. If there is a developing embryo in the egg, you should see a dark mass. The closer the moment of hatching, the larger the embryo will become.
- Remove any eggs that show no signs of development.
 11 Get ready to hatch. Stop turning eggs three days before chicks are due to hatch. The most viable eggs will hatch within 24 hours.
 - Place cheesecloth under the eggs before they begin to hatch. The gauze will help pick up pieces of shell and other substances that will drip during hatching.
- Increase the moisture level by adding more water or a washcloth to the water.
- Do not open incubator until all chicks have hatched.
Method 3 of 3: Using a hen hen
 1 Choose the right breed. If you decide to use a chicken to hatch your eggs, you should know which breed of chicken is best for you. Some breeds will never be ready to roost, so if you wait for your favorite hen to be in the mood, you will have to wait a long time. The best breeds for hatching eggs are Chinese Silk, Cochin, Orpington, and Old English Fighting.
 - There are many other breeds that are suitable for hatching, but keep in mind that just because a hen chooses to hatch does not mean she will be a good mother. For example, some hens, although they are willing to hatch eggs, will spend too little time in the nest, which is why there is a chance that no eggs will hatch.
- Some chickens may be so scared when the chicks hatch that they will attack the chicks or simply abandon them. If you can find a hen that is both a good brood hen and a good mother, then the hardest part is over.
 2 Know when the hen is ready to hatch eggs. If a hen sits lost in the nest, and if she spends the whole night there, then she is ready to hatch eggs. Also, you can feel the bare part of the belly of the chicken, and if it starts screaming or pecking at you, then it is ready.
 - If you don't completely trust your hen, you can check how much time she will spend in the nest before letting her hatch fertilized eggs. To do this, a couple of days before giving her fertilized eggs, you can put her a golf ball, artificial eggs, or real eggs from the grocery store, unless of course you feel sorry for them. We don't think you want your hen to leave the nest in the middle of the incubation process.
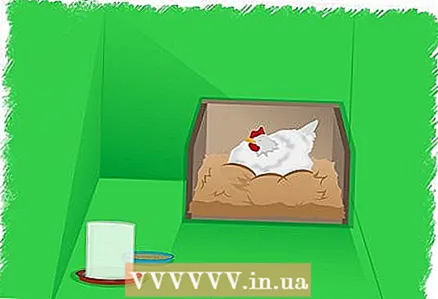
 3 Prepare a nesting site. Move the chicken to a separate room that you can use for both incubation and the time the chicks hatch and grow. Place a cozy, soft nest made of sawdust or straw on the floor of the room.
 - The room you choose to incubate your eggs should be in a quiet, dark, clean place, free of drafts and away from other chickens. It should be free of ticks and fleas, and it should protect the chicken from predators.
- Leave enough space for the hen to leave the nest to eat, water, and walk.
 4 Place the fertilized eggs under the hen. Once you are confident that you have found a brood hen and that the incubation area is ready, it is time to put eggs under the hen. Lay all the eggs at once so they all hatch within 24 hours.
 - Place eggs underneath the chicken at night, no matter what you get in the way. This will reduce the chances of the hen giving up or abandoning the eggs.
- Don't worry about placing your eggs correctly. The chicken will turn them over more than once while incubating them.
 5 Give the chicken constant access to water and food. Make sure the chicken has constant access to food and water, even if it gets up to eat and drink once a day. Place the water away from the nest so it doesn't accidentally tip over the bowl and flood it and the eggs.
  6 Try to disturb the chicken and eggs as little as possible. The chicken will do all the work herself. She herself will turn the eggs when necessary, and they will receive all the heat and moisture they need from the chicken's body. If you want to enlighten the eggs to be aware of the progress of their development, try not to do it too often.
 - Of course, it is not advisable to have spoiled eggs, as if they crack, they will be a threat to the health of other eggs. The best thing you can do is to light all the eggs together between the seventh and tenth day of the incubation period. If you find a spoiled egg or an egg without an embryo, remove it.
- When the last week of the incubation period arrives, the hen will sit on the nest all the time, not paying much attention to the eggs. This is normal so do not disturb the chicken.
 7 Have a backup plan. It's unpleasant when the chicken honestly served two weeks, and then decided to throw eggs. But don't worry. If you have a different brood hen or an artificial incubator, you will still have a brood.
 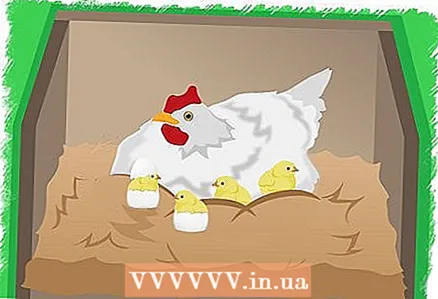 8 Let nature take care of it further. Once the chicks start to hatch, don't touch the eggs, even if you really want to look at them. Don't worry if not all eggs hatch right away. Chickens can hatch eggs without any problems and at the same time monitor young chicks. As a rule, the hen will remain in the nest for another 36 hours to allow time for all eggs to hatch, and the already hatched chicks will be kept under the wing.
Tips
- Be very careful when turning the eggs. The shell is still very thin and can break easily.
What do you need
- Incubator
- Fertilized eggs
- Spare thermometer
- Hydrometer
or
- Hen hen
- Place for incubation of eggs
- Nest


