Author:
Mark Sanchez
Date Of Creation:
27 January 2021
Update Date:
1 July 2024
Content
- Method 2 of 3: Determine where you will pull the hairs
- Method 3 of 3: How to shape your eyebrows
- Tips
- Warnings
- Try to pluck your eyebrows right after you shower. Warm water and steam will keep your skin moist and supple. Just blot your brows dry before plucking them, otherwise damp hairs will be harder to grab.
- If you need to pluck your eyebrows at other times of the day when you are not planning to shower, rinse your face with warm water and pat dry with a towel. You can also take a washcloth, dip it in hot water (but not hot enough to burn your skin), and then apply it to your eyebrows for 2 minutes. This will open up the pores and make the procedure easier.
 2 Determine the direction in which the eyebrow hairs are growing. In most people, hair grows in the direction from the nose to the hairline. For some, they grow in several different directions. You need to pay attention to this, as you will be plucking hairs in the direction of their growth. 3 Hold the tweezers in your hand as if you were holding a pencil. The open end should point up. Squeeze it a few times to adjust to the movement you will be grabbing the hairs.
 - Use clean, fine-tipped tweezers. If the tweezers are too large or too dull, the plucking process can take a long time and cause you unnecessary pain.
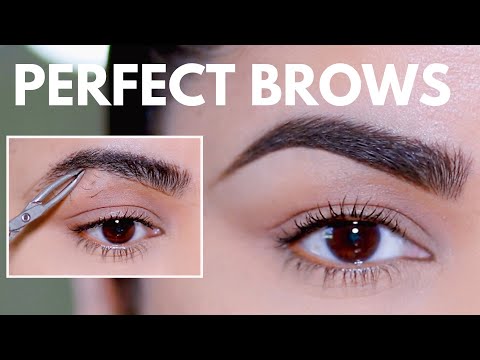
 4 Bring the tip of the tweezers to the root of the hair you want to pluck. Below we will tell you what hairs you need to pluck. Grab the hair as close to the root as possible and pull it out sharply. Always pull in the direction of hair growth and hold the tweezers at an angle as close to the skin as possible.
 - Continue until you finish plucking one eyebrow, then move on to the second.
- If you need to stop and take a break, do so. Continue plucking your eyebrows when you're ready.
- Sometimes when you pluck your eyebrows, tears flow and your nose itches. This is completely normal: just keep going until you're done.
Method 2 of 3: Determine where you will pull the hairs
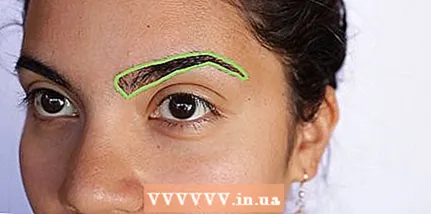
- 1 Determine where your eyebrows will start from. It will be different for each person, but the method that we will tell you about now can be used by everyone. Take an eyebrow pencil or other long object and place it over your face from the inner corner of your eye to the edge of your nose. Take a white pencil and mark a dot over where the brow pencil intersects your brow. This will be where the eyebrow should start. Determine the location for the other eyebrow.
- If you want, you can move this point slightly to the right or to the left. This technique helps to roughly determine where your eyebrows should start, but the rest depends on your preference.
- The object you use to define the beginning of the brows must be very thin. If you are using a thick object, the location of the dot will be inaccurate.
- 2 Determine where your eyebrows will have their maximum bend point. Well-groomed eyebrows have an arch over the eyes. The place where they curve the most can have a significant impact on how you look. Take the same eyebrow pencil and line it up from the outer edge of your nostril to the outer edge of your iris. Mark the place where it crosses the eyebrow and repeat on the other eyebrow.
- 3 Determine where your brow should end. This time, place your pencil from the edge of your nostril to the outer corner of your eye. Mark the spot where it hits the eyebrow. This will be where your brow should end. Repeat for the other eyebrow.
 4 Decide how wide your eyebrows will be. There is no “ideal” eyebrow width, it all depends on the shape of the face and personal preferences. You should consider the thickness of your brows before plucking them, otherwise you may pluck too much or too little. Consider the following factors:
 - The size of your eyes. If you have big eyes, then maybe wide eyebrows are better for you. If you have small eyes, try thinning your eyebrows.
- Distance between eyebrows and eyes. If your eyebrows are set high, you may want to widen them so that they better emphasize the eyes. If the eyebrows grow low, make them thinner so that they don't overhang the eyes.
Method 3 of 3: How to shape your eyebrows
- 1 Take an eyebrow brush and comb the hairs straight up. Comb lightly in the direction of growth. You will immediately see some long, unruly hairs that need to be plucked.
- If you plan on trimming your eyebrows a little, also comb them up to determine where to trim.
- 2 Pull out the hairs that extend beyond the marked points. Gently pluck one hair at a time to shape the brows as desired.
- Pluck out the hairs that grow closer to the nose and that extend beyond the point marked on the inner side of the eyebrow.
- Accentuate the curve by plucking a few hairs around where the eyebrow arches most.
- Remove hairs that grow closer to your temples and extend past the marked point on the outer edge of the side of your eyebrow.
- Pluck more hairs from the underside of the eyebrow to get the width you want.
- 3 Don't overdo it. When plucking your eyebrows, do it slowly. Take a step back and look in the mirror every few minutes to see the results. Don't pluck too many hairs - it can take 6 weeks for them to grow back, and sometimes they don't grow back at all.
- 4 Finish with eyebrow gel. Comb the brows in the direction of their growth and apply some brow gel (or hair gel) to fix them.
Tips
- If you don't have an eyebrow brush, you can brush them with a toothbrush.
- Do not pluck one eyebrow completely first and then the other. You can achieve better results by pulling a few hairs from one eyebrow and then from the other.
- To relieve pain and redness, apply cream to the area around your eyebrows.
- The best time to pluck your eyebrows is right after you shower. The procedure will be much less painful.
- Pluck your brows following the natural lines and contours of your face. It really matters a lot.
- If you have sensitive skin, apply cold to your eyebrows for 1 minute before plucking (for example, a bag of frozen peas wrapped in a towel).
- Do not use a magnifying mirror or very bright light, or you may pluck too much.
- The concealer lets you experiment with the shape and width of your brows before you pluck them.
- For a finishing touch, you can trim your eyebrows. Comb them up first. You will immediately notice unnecessarily long hairs. Take a nail scissors and trim off the ends of the hairs that protrude beyond the widest part of your eyebrow. Then comb the brows down and trim the hairs that are below the widest part. Finish the procedure by combing your eyebrows up again.
- Be careful not to make your eyebrows too short. You want long, well-defined eyebrows.
- Aloe will leave the skin just under the eyebrows (but above the eyelid) soft and smooth.
Warnings
- The angle at which you hold the tweezers and pluck hairs is important for painless hair removal and to prevent skin irritation and ingrown hairs. Pull the hairs in the direction of their growth at a slight angle (less than 45 degrees), but never pull straight up.
- Plucking hairs constantly can destroy the follicle and the hair may not grow back. Do not overdo it.


