Author:
Gregory Harris
Date Of Creation:
13 August 2021
Update Date:
1 July 2024

Content
- Steps
- Part 1 of 4: Preparing for Etching
- Part 2 of 4: Etching
- Part 3 of 4: Treatment of concrete after pickling
- Part 4 of 4: Acid Handling Precautions
- Tips
- Warnings
Concrete that has not been processed in any way after pouring will become too hard and smooth and will not be able to accept paint or the protective layer of sealant. However, acid etching (or washing) the concrete will open the pores in the concrete and prepare the surface for subsequent processing. Although concrete can be prepared by hand by grinding it with a sander, acid pickling is less labor intensive in itself.
Steps
Part 1 of 4: Preparing for Etching
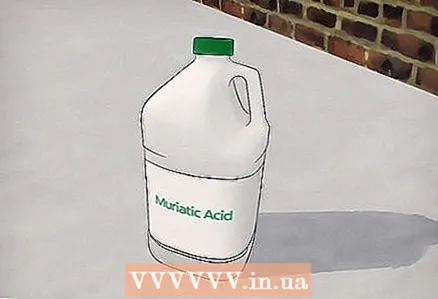 1 Take hydrochloric acid or another acid suitable for etching. Before you start acid etching, you should make sure you have enough acid to complete your project. Having to go to the hardware store in the heat of work will only give you problems. Hydrochloric acid (also called hydrochloric acid) is the most common type of acid for this project. It is difficult to know exactly how much acid will be needed in a given project, as it is usually sold in different levels of acidity. Generally speaking, one liter of acid (properly diluted) is enough for 4.5-6.5 square meters of concrete.
 - Phosphoric and sulfamic acids are also suitable for pickling concrete. Sulfamic acid is an especially good choice for beginners as it is much less corrosive and hazardous than other acids.
- If you're not sure if the type of acid is right for you, read the label on the acid container. The most suitable products will mention that this acid can be used for pickling concrete.
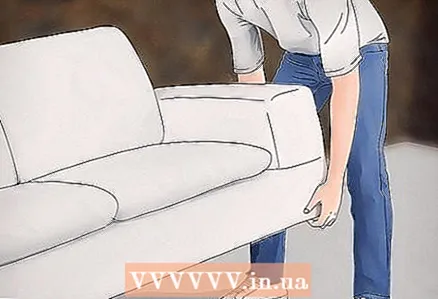 2 Remove all unnecessary items from the concrete. First of all, remove all furniture, cars and other items from the intended area of processing. Acids for etching can cause irreparable harm to things, even with short contact. That is why you first need to remove all unnecessary things from your work area.
 - It is also advisable to thoroughly sweep everything to remove accumulated dust, dirt and oil residues.The acid must penetrate all parts of the concrete surface in order to induce the desired reaction. Even small debris can interfere with this effect, which can lead to uneven etching.
 3 Use a grease remover to remove oils and greases. If you are pickling concrete in your garage or your driveway, chances are there may be traces of oil or grease left by your car. Pickling acids cannot penetrate the oily substances, which means that concrete that has an oil stain will not pickle. To remove oil stains, try cleaning them with a grease-free cleaning agent. They can be purchased at most hardware stores for a relatively low price.
 - Alternatively, you can also use regular laundry detergents. Most powders can dissolve fats and oils, which makes them very convenient for cleaning the surface of concrete from oils.
 4 Rinse the entire area with a hose. When your concrete is perfectly clean, hose down the entire surface of the concrete to wet it. The water must spread evenly over the entire surface so that all the concrete becomes wet. But keep in mind that there should be no standing water on the concrete. The concrete must remain so wet until pickled.
 - If you will be etching near adjacent walls or other surfaces, be sure to wet the area about a couple of centimeters to minimize the possibility of direct contact with the acid.
Part 2 of 4: Etching
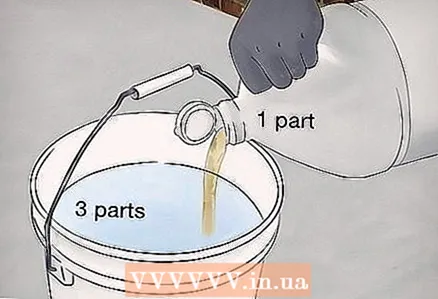 1 Mix water and acid in a 3 or 4: 1 ratio. Pour clean, clear water into a plastic bucket. Pour the acid into this bucket very carefully. Be careful not to spill or spray acid. Do not use a metal container. The acid can corrode metals, leading to possible destruction of the container.
 - Always add acid to water, but not vice versa. If acid splashes on your face, it can lead to dire scars and even blindness.
- From now on, you should follow basic acid handling precautions. Wear long sleeves, gloves, eye protection and, if necessary, a mask to protect against acid fumes. You can find more information in the security section below.
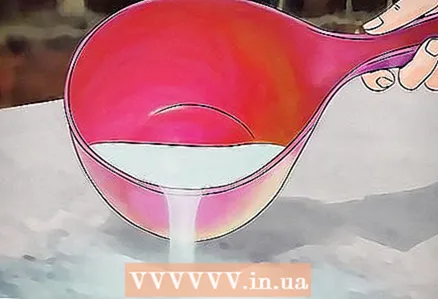 2 Test the solution on a small area. Most acidic solutions with a ratio of 3: 1 and 4: 1 will be suitable for pickling strength. However, before pouring your mortar onto the floor, it is a good idea to first test it on a small unimportant area of concrete (for example, a place that will be covered by furniture or toolboxes) and make sure it works. Pour about half a glass of mortar onto the concrete. If the solution is strong enough, you will see an immediate reaction and bubble formation.
 - If bubbles do not appear immediately, then your solution is not strong enough. Consider adding more acid to it.
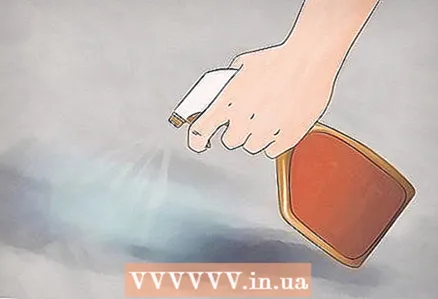
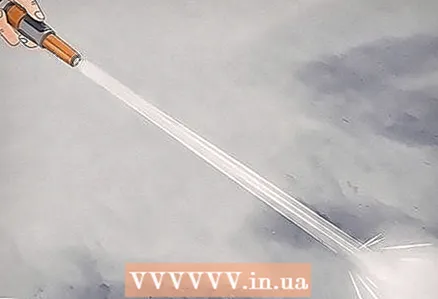
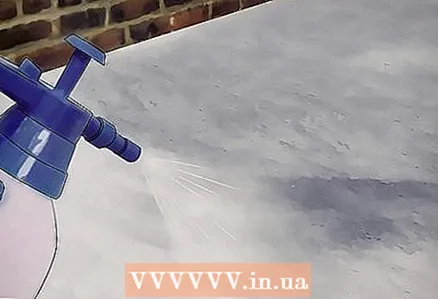 3 Take a spray bottle or watering can and apply acid with it. Instead of pouring the acid onto one spot on the floor, causing some of the acid to disappear before it reaches the far corners of the concrete, it's best to spread it out with a spray bottle or watering can. Thanks to them, you can achieve a more even distribution. Immediately after spraying, take a rubber squeegee and manually spread the acid to achieve an even coverage of the entire floor. You can also use a floor scrubber to scrub the floor and circulate the acid.
 - The floor must remain wet throughout the pickling process. Don't let the acid dry out. If necessary, you can re-spray the drying areas of the floor.
 4 Wait for the acid to react with the concrete. Once you are confident that the acid is evenly coated, simply step back and wait for the floor to stop bubbling. This usually takes 2 to 15 minutes.When acid reacts with the floor, it will open small porous holes in the concrete, making the concrete more suitable for applying sealant.
 - Examine the floor surface during an acid reaction. The acid reaction must take place evenly over the entire floor surface. If there are areas on the floor where the reaction does not go away, this may indicate the presence of a missed oil stain or that there was a sealant on the concrete. In this case, you may need to use some kind of apparatus, such as a grinder, to complete the pickling of the concrete.
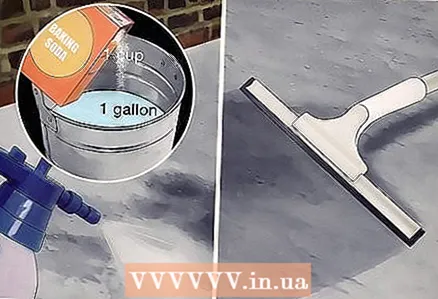 5 Neutralize the surface. Read the acid container label. To stop the reaction, many of them will need a special neutralizing solution, while the reaction of others will subside on its own. If your acid requires a neutralizing solution, mix the neutralizer and apply it evenly all over the floor, following the instructions on the package. Typically, in order to achieve neutralization of the entire floor surface, you will need to spray the neutralizer and spread it with a squeegee or floor polishing machine.
 - If you want to make a regular multipurpose acid neutralizer, add 1 cup of baking soda to 4 liters of water and stir until the baking soda dissolves.
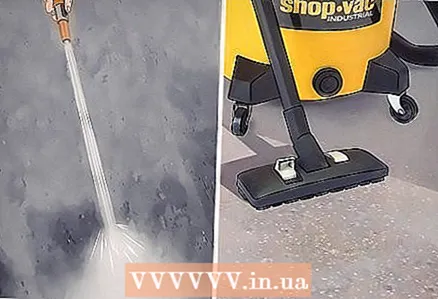 6 Rinse the floor thoroughly. At this point, your concrete should look clean, freshly etched. He is now ready to clean. Take a broom or rubber squeegee and collect the water that you washed the floor with in one place. Then vacuum up the water with a wet vacuum cleaner. Read the instructions on the acid container to learn how to properly dispose of the acid. You may need to add more baking soda to the acid and neutralize it even more before pouring it down the drain.
 - If you are working in a garage, then you may simply flush the neutralizing agent directly into the garage drain. Check local regulations before doing this, or you may be breaking the law and damaging the environment.
Part 3 of 4: Treatment of concrete after pickling
 1 Apply sealant or epoxy varnish. Many acid etch projects take place to prepare concrete flooring for treatment with synthetic epoxy varnish or other sealant. They give concrete an extraordinary shine and protect against water, grease, oil and other spills, making the floor easy to keep clean. In addition, the use of an anti-slip additive in the sealant will provide the surface of your garage or driveway with the grip you need when it rains or snows.
 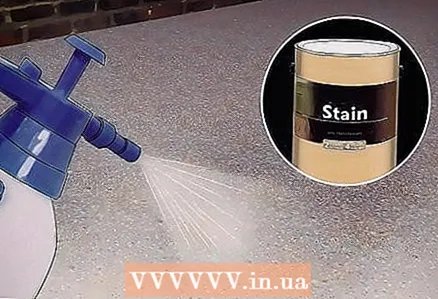 2 Add pigment or dye. By adding pigment or colorant to concrete after etching, you will make it visually more attractive. In some interiors, painted concrete will give the room a clean, elegant and modern look. Painted concrete makes even outdoor areas like patios look even better.
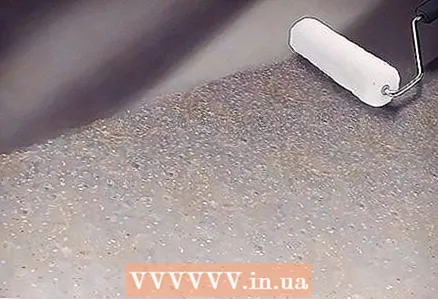
 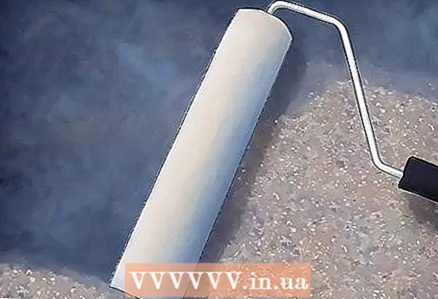 3 Paint the concrete. Concrete can also be painted fairly simply with brushes, rollers or sprayers. While painting concrete floors is not as common as painting concrete walls or ceilings, some decorators still create stunning interiors with painted concrete floors. When painting concrete floors, most often with a low gloss level, matt paints are used. Otherwise, the floor will look oddly shiny or "wet".
 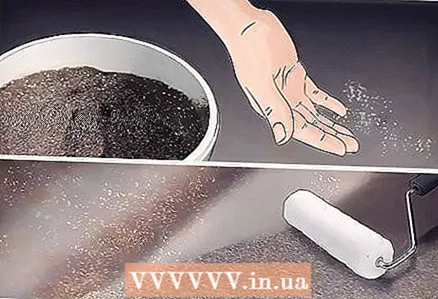 4 Add metal shavings to create a shiny surface. Many sidewalks, driveways, and other exterior concrete surfaces can be made shiny by adding metal shavings to the concrete before applying the sealant or during the pickling process. Even some indoor spaces (especially public or commercial) will benefit from this type of treatment.For example, the shiny concrete floors that are sometimes found in supermarkets or in airport corridors give the room a vibrant look.
Part 4 of 4: Acid Handling Precautions
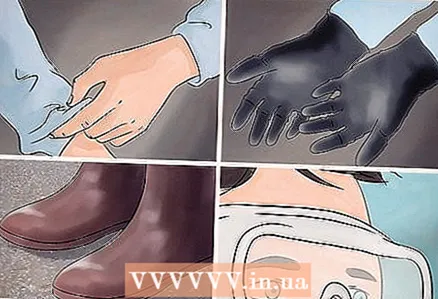 1 Wear protective clothing. All acids (especially strong acids used in pickling concrete) must be handled with care. If it comes into contact with the body, the corrosive acid can leave a painful chemical burn. Worse, acid splashed on the face and eyes can cause permanent blindness and disfiguring scars. Because of this, it is very important to always wear protective clothing when working with acid, even if you are a professional. The following are the types of protective clothing you must wear to protect yourself:
 - Safety goggles against harsh chemicals or goggles with face shield
- Gloves
- Long sleeves
- Closed Toe Shoes
 2 Do not inhale acid vapors. Strong acids like hydrochloric acid give off harmful vapors. If these vapors are inhaled, they cause chemical burns to the mouth and throat. Although this is very rare, inhaling acid fumes can cause serious injury and even death. For these reasons, you must make sure that your work area is always well ventilated. So, for example, it is advisable to open all adjacent windows and turn on the fan so that the air in your work area is constantly circulating.
 - If the acid vapors are very strong, then to avoid injury you should take an acid vapor cartridge respirator.
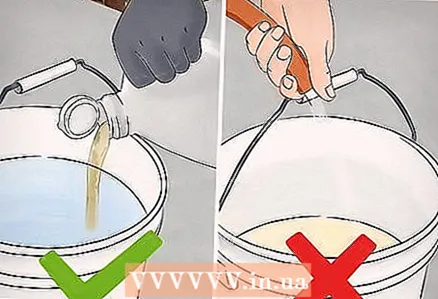 3 Always add acid to water, but not vice versa. This is a very important rule when working with acid. If you need to pour and mix acid and water, you should always pour the acid into the water. Never add water to acid. Pouring water or acid too quickly can cause the liquid in the container to splash out and spill onto you. If the liquid is mostly water, then you will most likely be fine. But if this liquid is composed mostly of acid, you could be in serious trouble. Always follow this simple rule when dealing with acid.
 - Have a second bucket or plastic container handy while you work. If you accidentally poured the acid first, you can pour the water into a second container, and then just pour the acid into it and correct your mistake.
Tips
- Be aware that hydrochloric acid is very dangerous and must be diluted before use. Always read label instructions and wear suitable protective clothing before use.
Warnings
- Again, hydrochloric acid is very dangerous - remember to take appropriate precautions.


