Author:
Mark Sanchez
Date Of Creation:
5 January 2021
Update Date:
2 July 2024

Content
- Steps
- Part 1 of 3: Planning the Work
- Part 2 of 3: Earthwork
- Part 3 of 3: Removing excess soil
- Tips
- Warnings
The reasons why you needed to dig a hole can be very different. However, whether you need a large pit or just a small hole in the ground for a post, the process is generally the same. However, the actual excavation may be more difficult than your preliminary estimates. In this case, the amount of work will depend on the type and size of the pit that you need.
Steps
Part 1 of 3: Planning the Work
 1 Check with your area's city planning department to make sure you can safely dig a hole in your area. Wherever you start excavation, always check with local authorities first about the location of underground utilities, especially if you are in the suburbs or even rural areas. Of course, the excavation does not pose a particular risk of disruption to the networks, but if your shovel accidentally bumps into the electrical networks, you can get a fatal electric shock.Even in less serious cases, prior consultation with the relevant authorities will allow you to avoid possible troubles. Remember the rule: "Consult before digging anything."
 - Please note that for most of the settlements of the Russian Federation, the layouts of engineering networks can be found on the network.
- If you are unsure of where you should seek advice, please call your local administration. There they will be able to provide you with the telephone number of the department in charge of engineering networks. If necessary, it will be possible to call an inspection to the site of future work. To do this, you will first need to mark the excavation site with paint.
- All the phones you need can be found online. Just enter the phrase "approval of earthworks" in the search engine and add the name of your settlement. The information you need will be in the first or second place in the search results.
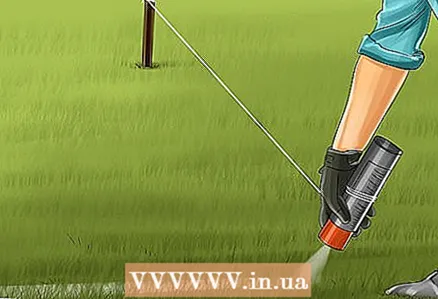 2 Mark out the contours of the pit with paint. If you are going to dig a large hole, and not just drill holes for the posts, it is a good idea to first outline the contours of the future hole. Without clear guidelines, people tend to be wrong about how big a hole should be. Take a can of white spray paint and mark the area where you want to remove the soil. Be generous with the layout: it is better to make a pit a little larger than a pit that is too small.
 - If you are digging holes for the fence posts, you will need to pull the string along the fence line and mark the posts at an equal distance with paint or pegs.
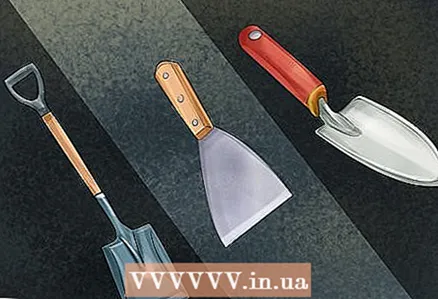 3 Prepare everything you need for work. Due to the fact that pits come in different types and sizes, it is impossible to provide a unified list of tools that you will need. However, in almost all cases, you will need a shovel. While most of the work can be done with a shovel, other tools can speed up the process. For efficiency, you may want to use the largest instruments, but remember that the instruments must be sized to fit your body. The right size tools will help you avoid quick fatigue, increasing your productivity in the long term.
 - For ordinary pits, a hoe and a shovel work well. If you need to dig holes under the posts, use a drill.
- When planning the work, you should consider what you will do with the excavated soil. If you later bury the hole, you can throw the soil into it with a shovel. If you lay a tarp next to the pit, then you will have a clean place for storing soil. To get rid of large amounts of excavated soil, it can be taken away in a wheelbarrow.
- If you plan to concrete the pillars, prepare a cement mixture (cement, sand, gravel), water and a concrete mixer. Also, prepare the poles in advance from the material of your choice (these can be round or profiled metal pipes, or wooden beams).
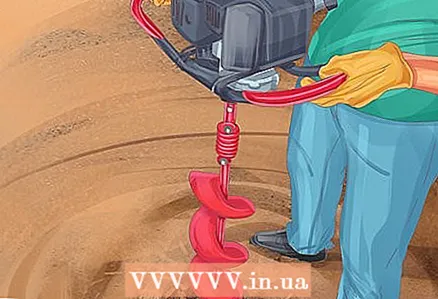 4 If possible, use the technique. Dig the hole by hand only when necessary. Earthwork takes a lot of energy, so it is better to refrain from manual work if you can use the machine. For example, to dig holes for fence posts, you can rent an electric earth auger or a motor-drill.
 - The principle of operation of a motor-drill is similar to a lawn mower. It is better to rent such equipment than to buy it for yourself. Depending on the equipment available for rent, you may have a choice between a single or dual operator motor drill. Make your decision based on the size and number of holes you need to dig. If you are in any doubt, consult an employee of the equipment rental shop.
- If you need to dig many holes for the fence posts, it is better to use a two-operator walk-behind drill.Working with a motor drill alone is generally very difficult and even dangerous if you are new to such equipment.
- Digging stony clay soil can be difficult even with a motorized drill. In this case, a drill bit and drilling rig will come in handy.
- Observe all safety precautions when working with machinery. Avoid overly loose clothing, and remember to wear leather work shoes, eye protection, and earplugs.
Part 2 of 3: Earthwork
 1 Wait for dry weather if possible. It is very difficult to do earthwork in rainy weather. And if the pit is large enough, then rainwater will eventually start to accumulate at the bottom, which will create its own difficulties depending on the type and depth of the pit that you need. Moreover, it is obvious that it will be more pleasant to work in good weather. Waiting for good weather is not strictly necessary, but it will allow you to get more pleasure from such work.
 - Frozen ground is extremely difficult to work with, so it is best not to schedule work during extreme weather conditions.
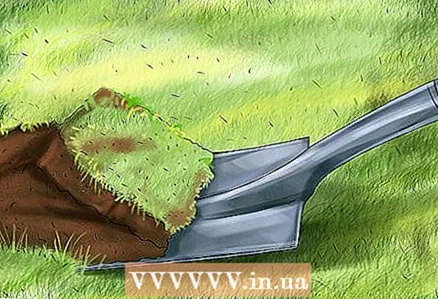
 2 Soften the top layer of earth with a hoe. Rather than grabbing onto the shovel right away, you can save a lot of time and energy if you prepare the soil with a hoe first. The hoe is specially designed to penetrate the soil and tear the roots of plants. In most cases, digging the topsoil is the hardest part. As soon as you manage to open the surface layer, you can switch to the shovel and start the main excavation work.
 - A good steel pickaxe with a pointed end on one side and a thin flat end on the other is also a good help. It is especially useful when you need to open the top layer deeper than 15–20 cm, which can no longer be done by a hoe.
- If you don't have a hoe, you can simply pre-grind the turf with a bayonet shovel.
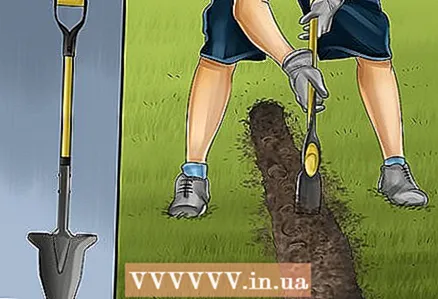
 3 Start digging with a shovel from the outer perimeter of the hole and move towards the center. After you have opened the top layer of the soil, the main stage of work on extracting soil from the pit begins. This stage can be short-lived or, conversely, quite long - it depends on the required size of the pit. When starting the main work, it is better to start digging from the outer perimeter of the hole and gradually move towards the center. So you will have a clear perimeter of work ready, and you will not make the pit more than you need.
 - Sturdy work shoes are required to dig the ground with a shovel. Step confidently on the blade of the shovel and push it straight down. Slightly rock the shovel back and forth and side to side to help the blade sink into the ground more easily.
- As for the depth of the hole, it is also better to dig a little more here than to get a hole that is not deep enough.
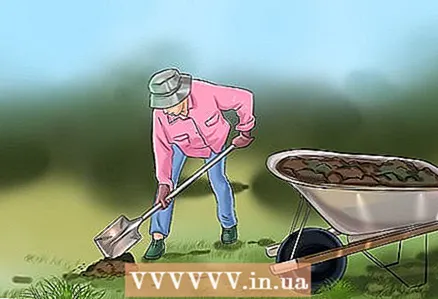 4 Drop the ground in one place. Keeping the work area clean is very important in most situations, and earthwork is no exception. It is best to provide yourself with a dumping spot near the pit, as this will shorten the time between swings of a loaded shovel. Just make sure that the allocated spot is not too close to the edge of the pit, so that the discarded earth does not fall back down. If the volume of work is large enough, it is a good idea to load the soil directly into the wheelbarrow. Once the wheelbarrow is full, drive the dirt away to the side and return with an empty wheelbarrow to refill it.
 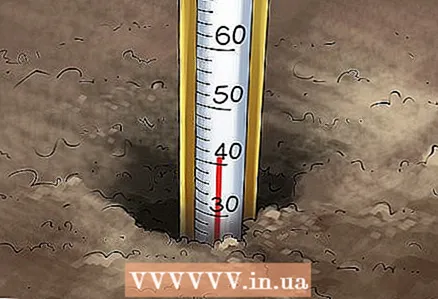 5 Check the depth of the hole periodically. While working, keep a 10m tape measure handy or mark the desired hole depth on a stick and use it to check the depth. Take measurements only after you have removed all loose soil from the pit.
Part 3 of 3: Removing excess soil
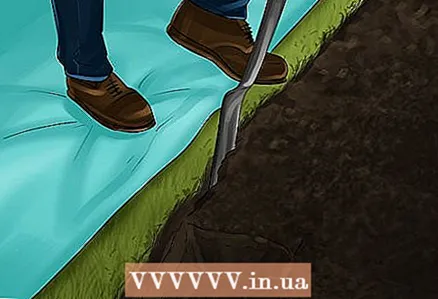 1 Place a tarp next to the pit to be dumped onto it. This step is optional, but it helps to clean up the area very well afterwards.Storing the excavated earth on a tarp reduces the clutter it can leave behind. Depending on the amount of soil that needs to be dug, you can easily transfer the soil on the tarp directly to the trash can, or then simply dig in a hole without much difficulty, removing the soil from the tarp with a shovel.
  2 Advertise that you are giving away the soil for free. If you dug out an impressive amount of soil and do not know where to put all this land (for example, you have already used part of it for your plants, but there is still a lot of land), there may be someone in the area who needs soil for their landscape projects. The best solution for you is to post a free ad. Of course, there is no guarantee that the ad will resonate, but it will give you the chance to get rid of the extra land for free and help the stranger at the same time, if you don't mind.
  3 Take the soil to a landfill. If you have a lot of excavated soil that has nowhere to go, it can be sent to landfill as clean soil to isolate landfill waste. You can send excess land to a landfill if it is clean and meets sanitary requirements. Everything will depend on where exactly you live, but usually the necessary information can be found on the administrative web resources of your city.
 - Be aware that you may be charged a fee for taking the land to the landfill.
Tips
- You will be noticeably faster digging holes with a couple or more helpers. To prevent quick fatigue from a large amount of work, enlist someone from your family or friends to help you.
Warnings
- Excavation work is relatively straightforward, but it can be very stressful, especially in hot weather. Remember to drink enough water and take breaks when your body starts to fatigue.
- The thought that you need to coordinate your excavation with local authorities can be frustrating. But even simple gardening work can potentially be fatal if you don't.


