Author:
Janice Evans
Date Of Creation:
24 July 2021
Update Date:
1 July 2024
Content
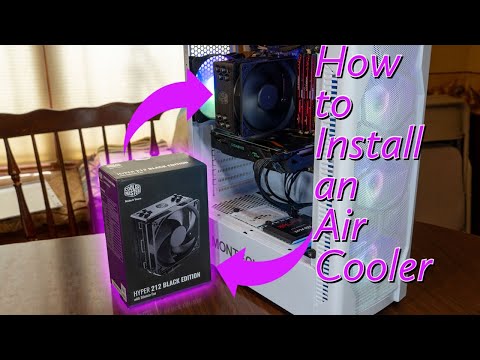
A computer is a complex device with many components that must run smoothly. Computer fans are an essential part of any computer as they help cool components by creating airflow. If your computer is overheating or you need to replace an existing fan, install a new fan, which will lower the temperature and make the computer quieter.
Steps
Part 1 of 3: Buying a Fan
 1 Check the specifications of the computer case. There are two main sizes of computer fans: 80mm and 120mm. The case can also support other dimensions, such as 60mm or 140mm. If you are unsure, remove one of the fans and take it with you to the hardware store to find out its size (or measure it yourself).
 - Today, 120mm fans are used in most cases.
- If you are replacing an old fan with a new one, consider whether the new fan will generate the amount of air required to cool a specific component (this is beyond the scope of this article). Certain components, such as the graphics card and processor, require coolers (this is a fan that directs air to the heatsink).
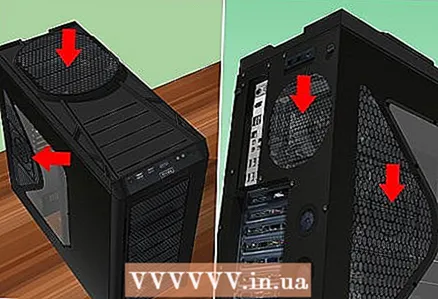 2 Look at the computer case. Find places where you can install additional fans. Typically, fans can be installed on the back, side, top, and front of the chassis. Each chassis has its own configuration for the location of fans and their maximum number of fans.
  3 Choose large fans whenever possible. If you can fit different sized fans in your case, large fans are always preferred over small ones. 120mm fans are significantly quieter and also generate more airflow, making them much more efficient.
  4 Compare different fans. To do this, read their specifications and reviews about them. Look for reliable and quiet fans. Fans are generally inexpensive, and you can benefit from buying four fans at once. Here are the most popular fan manufacturers:
 - Cooler Master;
- Evercool;
- Deep Cool;
- Corsair;
- Thermaltake.
 5 Choose between a regular fan or a backlit fan. If you want to spruce up your case a little, buy backlit fans. They illuminate the case in different colors, but they cost a little more.
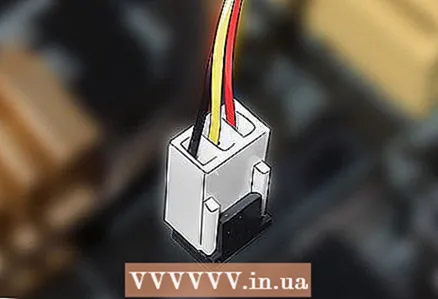
  6 Make sure the fans you choose match the power connectors on the computer chassis. To do this, open the case and check the cables supplying the fans. The most common power connector is Molex (3-pin and 4-pin). Some fans have multiple power connectors, but make sure they are compatible with the connectors in your case. If you want to control the fan speed, connect it to your motherboard (3-pin or 4-pin header).
Part 2 of 3: Opening the Case
 1 Turn off your computer and unplug the AC adapter from the outlet.
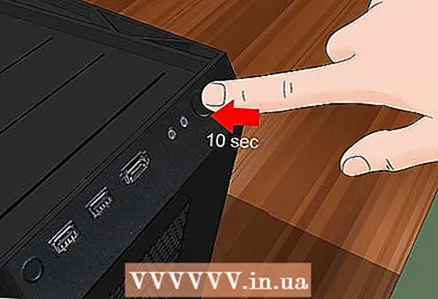 2 Dispose of residual charges. To do this, hold down the power button for at least ten seconds.
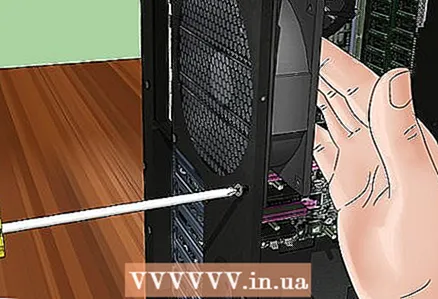
 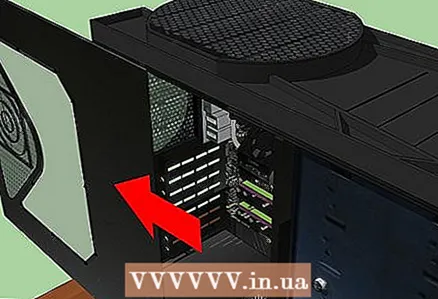 3 Open the side panel. You need to remove the side panel of the computer opposite the motherboard to access the inside of the case. Remove the screws securing the side panel and remove it. In some cases, the side panels are fixed with special latches.
 - The side panel opposite the motherboard is usually on the left.
- The side panels are fixed with screws or latches of various configurations.
 4 Ground yourself. Always dispose of electrostatic discharge before handling computer components. Electrostatic discharge can seriously damage components. Therefore, use an electrostatic bracelet or just touch a metal object.
 - Eliminate electrostatic discharge when handling computer components.
 5 Find the vents. In any case, there can be several such holes. They can be located on the back, front, side and top of the case.
 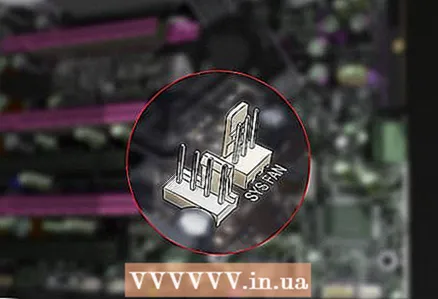 6 Locate the power connectors on the motherboard. As a rule, there are only two of them and they are marked as CHA_FAN# or SYS_FAN#... Check your motherboard documentation if you cannot find the correct connectors.
 - If you have more fans than the connectors on the motherboard, connect them to the power supply (via a Molex connector).
Part 3 of 3: Installing the fans
 1 Understand the effectiveness of the air cooling system. Fans not only supply air to computer components (they are not the most efficient way to cool a computer). Fans must create airflow inside the chassis - draw in cold air and expel hot air.
  2 Examine the fan. The fans create airflow in one direction, indicated by the arrow (indicated on the fan housing). Look at the case of the new fan and find an arrow on it; it indicates the direction of air flow. If there is no arrow, look at the sticker on the fan motor. The air flow is usually directed towards the sticker.
  3 Install the fans to create the correct airflow. To do this, install the fans for blowing and blowing air. It is better to install more fans for blowing out than blowing in order to create a kind of vacuum inside the case. This effect will cause cold air to enter the housing from any opening.
 - Back panel. The fan of the power supply located at the rear of the chassis is designed to blow out air. Therefore, install 1–2 more fans on the back panel, which will work for blowing.
- Front Panel. Install one fan on it, which will work on blowing air. You can install a second fan in the hard drive bay (if possible).
- Side panel. Install a fan on it that will blow out air. Most chassis support only one side fan.
- Top panel. The fan on this panel must be blown in. Do not assume that it needs to be blown out, as hot air rises upward - this will simply lead to an excess of blowing fans and a shortage of blowing fans.
 4 Install fans. To do this, use four screws (supplied with the fan). Fix the fan firmly so that it does not make noise. Tighten the screws so that you can loosen them if necessary.
 - Make sure that cables (including the cable supplying the fan) do not get caught in the fan blades. If necessary, pull the cables to the side using cable ties.
- If you are having trouble fixing the fan with screws, tape it to the air vent and then fix the fan with the screws. Do not stick tape on any components or microcircuits. Remember to remove the tape after securing the fan.
 5 Connect the fans. Connect two fans to the connectors on the motherboard and the rest to the power supply (via a Molex connector).
 - If the fans are connected to the power supply, you will not be able to control their rotation speed (they will run at maximum speed).
 6 Close the case. It is assumed that an air flow will be created inside the case to cool the components, and an open case will not allow such a flow. Remember that components in open cases are much less efficiently cooled.
  7 Check the operation of the fans. If your fans are connected to the motherboard, you can monitor their operation by entering the BIOS. You can also change the fan speed in the BIOS. Use a program like SpeedFan to control the fan speed in Windows.
 - If the fans are connected to a power supply, you will not be able to control their rotation speed (they will run at maximum speed).
 8 Monitor the temperature of computer components. The purpose of installing or replacing fans is to cool the computer components. Download a component temperature monitoring program (e.g. SpeedFan). If your computer does overheat, you need to change the location of the fans or install a different cooling system.


