Author:
Mark Sanchez
Date Of Creation:
5 January 2021
Update Date:
2 July 2024

Content
1 Find a capacitor. Start capacitors are metal tubes that store electrical charge, usually located near the motor of the instrument. Use a screwdriver to open the device and find the capacitor. Use pointed pliers with insulated handles to disconnect the wires.- Before looking for a capacitor, make sure that the device is disconnected from the mains and turned off.
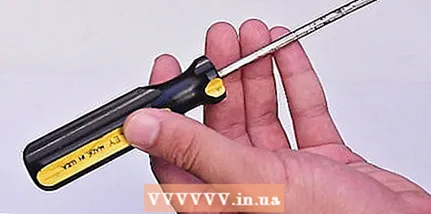 2 Use a screwdriver with an insulated handle. You can purchase this screwdriver at a hardware and tool store or hardware store. The rubber grip will keep an electric current out of the metal onto your hand.
 - Be careful when working with electrical appliances. Electric shock can cause serious injury or even death.
- Make sure there are no cracks in the handle of the screwdriver and no metal protruding from it. Such defects can result in a dangerous electric shock.
 3 Wear gloves that are designed for household work or electricity. Since you are using a screwdriver with an insulated handle, gloves for household chores are fine. However, tight-fitting rubber gloves can be worn for added protection against electric shock.
 - Gloves can be purchased at a hardware store or hardware store.
- Do not use oversized rubber gloves, otherwise you will be uncomfortable.
 4 Grasp the handle of the screwdriver so as not to touch the metal. Grasp the handle firmly and make sure that your hand does not come into contact with metal parts, otherwise you may get an electric shock even if you are wearing gloves.
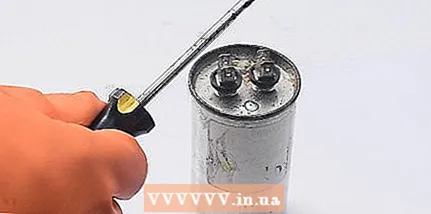
  5 Press the shaft of the screwdriver against the positive terminal. Position the screwdriver so that the tip touches the capacitor terminal at a distance of 2-3 centimeters from the tip. This should be a positive (+) contact. At this stage, the screwdriver should not touch the second contact of the capacitor.
 - If the capacitor has more than two contacts, the positive terminal is designated as "common".
6 Tap the negative terminal lightly with the tip of the screwdriver. While still pressing the screwdriver shaft against the positive terminal of the capacitor, tilt the screwdriver so that the tip of the negative terminal touches it. When you touch the negative terminal, you will hear a slight click and spark at the tip of the screwdriver. Don't worry: this is a sign that the capacitor is discharging. - Do not continue to press the tip of the screwdriver against the negative terminal. The capacitor is capable of storing a large amount of energy, so it must be discharged gradually so as not to cause a strong spark or high current.
7 Reconnect the capacitor terminals again to drain the remaining charge. After the first spark, bring the screwdriver back to the pins and touch the negative terminal one or two more times. After the first discharge, current may remain on the capacitor. Part 2 of 2: Use a multimeter
- 1 Set the capacitance option on the DMM. Multimeters are electronic devices with which you can determine the voltage and capacitance of a circuit section or power source. Find a multimeter with specific capacitance settings to get the most accurate results.
- Before using the multimeter, make sure that the capacitor under test is completely discharged and disconnected from the power supplies. Excessive voltage can damage the meter or cause electric shock.
- A digital multimeter can be purchased at an electronics store.
- Capacitance is measured in farads (F).
- 2 Press the red test lead to the positive lead and the black test lead to the negative lead of the capacitor. Hold the test leads by the bases and do not touch the metal rods at their ends. After you press the probes against the contacts of the capacitor, the readings of the multimeter will begin to change.
- If you suspect that a charge may have remained on the capacitor, wear gloves before using the multimeter.
- 3 Hold the test leads in place until the meter reading stops changing. If the capacitor is OK, the numbers on the multimeter display will change for a few seconds. Wait for the multimeter to show the same value for 5 seconds before disconnecting the test leads.
- Record your multimeter readings so you don't forget them.
- If the numbers on the display do not change at all, then the capacitor is open and should be replaced.
 4 Make sure that the reading on the multimeter matches the range of the values indicated on the capacitor. In addition to other information, the minimum and maximum capacitance must be indicated on the side of the capacitor. The allowable spacing depends on the size of the capacitor. If the measured capacitance is lower or higher than the indicated values, the capacitor should be replaced.
 - If the reading on the multimeter display increases to the upper limit, the capacitor is short-circuited and should be replaced.
- On some capacitors, capacitance is indicated with a permissible relative deviation in percent. For example, if the capacitor says "50 ± 5%", this means that its capacitance can vary from 47.5 to 52.5 F.
Tips
- Some older capacitors develop a bulge at the top between the terminals when they fail. Inspect the starting capacitor and check for a small protrusion.
Warnings
- Make sure there are no cracks in the handle of the screwdriver and that the metal shaft does not protrude from the back of the handle.
- Never touch the terminals of a charged capacitor with bare hands. Treat any capacitor as if it were charged.
What do you need
Capacitor discharge
- Insulated screwdriver
- Pointed pliers
- Work gloves
Using a multimeter
- Digital multimeter


