Author:
Ellen Moore
Date Of Creation:
20 January 2021
Update Date:
1 July 2024
Content
- Steps
- Method 1 of 3: Select and Remove
- Method 2 of 3: Using the Home tab
- Method 3 of 3: Using the Borders and Fill dialog box
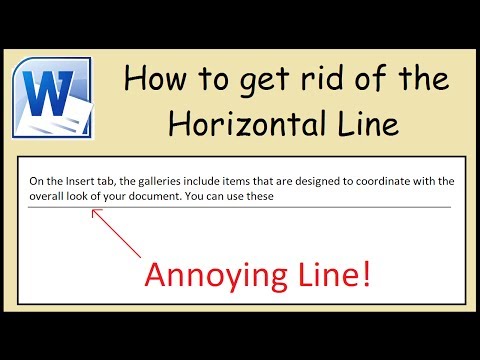
This article will show you how to remove a border in Microsoft Word that you may have accidentally created by typing three hyphens (-), underscores (_), equal sign (=), or asterisks ( *) and pressing Enter.
Steps
Method 1 of 3: Select and Remove
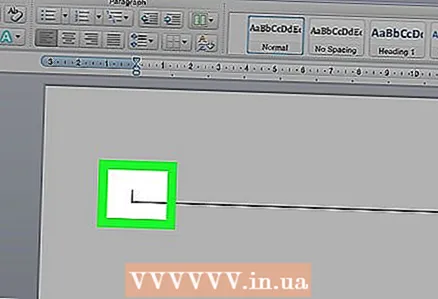
 1 Click on the line just above the unneeded line. If there is text above the line, select the entire line above the line.
  2 Move the cursor to the line immediately below the unneeded line. The left end of the line is highlighted.
  3 Press the key Delete. In many versions of Word, this will remove the line.
Method 2 of 3: Using the Home tab
 1 Click on the line just above the unneeded line. If there is text above the line, select the entire line above the line.
  2 Move the cursor to the line immediately below the unneeded line. The left end of the line is highlighted.
 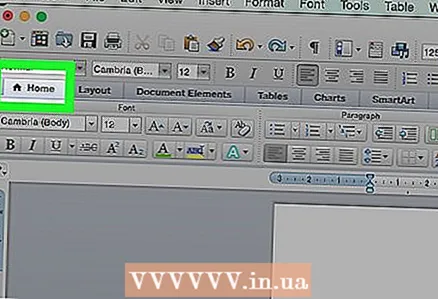 3 Click on the tab the main at the top of the screen.
 4 Click on the "Borders" icon. It is a square divided into four cells in the "Paragraph" section.
  5 Please select No borderto remove the border.
Method 3 of 3: Using the Borders and Fill dialog box
 1 Click on the line just above the unneeded line. If there is text immediately above the line, select the entire line above the line.
  2 Move the cursor to the line immediately below the unneeded line. The left end of the line is highlighted.
  3 Open the tab Design at the top of the window.
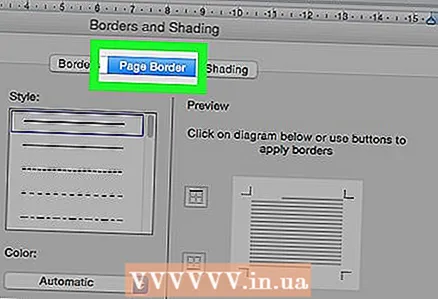 4 Press Page borders in the upper right corner of the window.
 5 Click on the tab The border at the top of the dialog box.
 6 Press No on the left pane.
 7 Click on OK. The border will disappear.


