Author:
Eric Farmer
Date Of Creation:
7 March 2021
Update Date:
1 July 2024
Content
1 Take regular toothpaste. There is no need to choose a paste with whitening effect, breath freshening and exotic aromas. Instead, use regular white paste to polish the CD. Any toothpaste contains enough abrasive minerals to do the job!- Regular toothpastes are much cheaper than their more publicized counterparts. This is especially important if you need to polish multiple CDs.
 2 Apply toothpaste to the disc surface. Squeeze some toothpaste onto the scratched surface of the CD and use your finger to spread it evenly over the surface. 3 Buff the CD. Using a slow, radial motion, start rubbing the toothpaste into the CD. Start at the center and work your way in a straight line to the outside edge. 4 Wipe and dry the CD. Rinse the disc thoroughly under warm water. Then wipe the CD with a soft, clean cloth and make sure all traces of toothpaste and water are removed.
 - After the disc has been cleaned and dried, wipe it again with a soft cloth.
Method 2 of 3: Abrasive Polishing
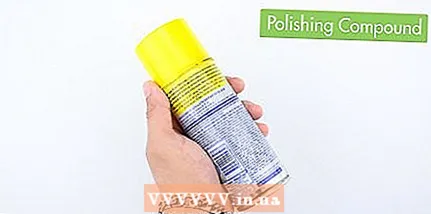 1 Decide which mixture to use. A number of common household products can be used to polish a CD, but the most reliable and proven of these are the 3M and Brasso cleaning agents. Another option is to use a fine-grained car polish or roughing compound.
 - If you decide to use Brasso, do so in a well-ventilated area and try not to inhale the vapors. Be sure to read the safety instructions and any chemical warnings, as many of them (such as rubbing alcohol) are flammable and / or can irritate the skin, eyes or respiratory tract.
- 2 Apply polishing compound to the cloth. Apply a small amount of 3M Blend or Brasso to a soft, clean, lint-free cloth. An old shirt or eyeglass cleaning cloth is perfect for this.
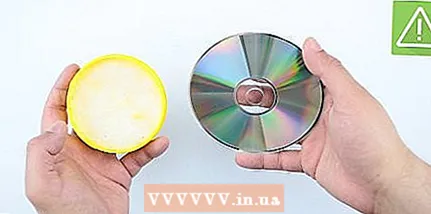
- 3 Buff the CD. Using gentle radial strokes, rub the mixture into the scratch. Start from the center and work towards the edge as if you were rubbing the spokes in a wheel. Repeat this 10-12 times throughout the CD. Concentrate your efforts on the scratches and scuffs you find.
- Place the disc on a flat, hard surface before polishing. Data is stored on layers of foil or varnish at the top of the disc (front side), and the top protective layer can be easily scratched or peeled off. Pressing on a disc that is too soft can crack or delaminate.
- Polishing in a circular motion (as opposed to radial) can lead to small scratches that negatively affect the reading of the disc in the drive.
- 4 Remove the polishing compound from the disc. Rinse the disc thoroughly under warm water and let it dry. Be sure to remove all mixture and let the disc dry completely before attempting to play it. Wipe off any remaining product and let the disc dry. Then, gently wipe the disc with a clean cloth.
- 5 Check the disk. If the problem persists, buff the disc again for 15 minutes, or until the scratch is gone. The surface around the scratch should be covered with many small scratches and begin to shine. If after a few minutes you do not notice any difference, the scratch may be too deep or you are polishing the wrong scratch.
- If the disc still does not work, take it to a technician at a computer store or CD repair shop.
Method 3 of 3: Waxing
 1 Determine if wax is an acceptable option. Sometimes the polymer needs to be physically removed by polishing. However, rubbing off a large amount of polymer can affect the refractive index of the lens, impairing readability. Waxing up scratches is effective because the laser passes through the defects, even if they are not visible to the naked eye.
 - 2 Wipe the scratches with wax. Apply a thin layer of Vaseline, colorless lipstick, liquid car wax, neutral shoe polish or furniture wax to the surface of the CD. The wax must fill in the scratch so that the disc can be read again, so leave the wax in the scratches for a few minutes.
- 3 Wipe off excess wax. Using a radial (outward) motion, wipe the disc with a clean, soft, lint-free cloth. If using wax, follow the manufacturer's instructions (some varieties should dry first, while others should be wiped off immediately).
- 4 Recheck the disk. If wax or petroleum jelly is up to the task, burn a new disc immediately. Waxing is only a temporary solution to ensure that the CD lasts long enough for you to transfer the data to your computer or a new disc.
Tips
- To avoid additional damage, hold the CD by the edges.
- Badly damaged CDs can hardly be salvaged.Very deep scratches and cracks that reach the disc's protective layer will turn it into useless debris. Disc erasers exploit damage to the protective layer to make CDs and DVDs unreadable!
- Before you start polishing important discs, practice repairing scratched discs that you don't mind losing.
- Try removing scratches with a dry melamine Mr. Clean Magic Eraser ". Lightly wipe the disc from the center to the outside as described in the other methods. You can bring the restored area to a shine using the other described methods of polishing or waxing.
- Make a copy of the data on the disks in case of possible damage.
- If the disc cannot be recovered, use it as a glass holder! For more interesting ideas, see our article on how you can use old CDs.
- Xbox drives can be returned directly to Microsoft and replaced with working ones.
- Use peanut butter instead of toothpaste. The oily viscosity of peanut butter will provide an effective polish. Just make sure the butter is soft!
Warnings
- To avoid damage to your CD player, make sure the discs are completely dry and free of polishing compounds or wax before trying to read information from them.
- Do not apply thinner to the surface of the CDs, as it can change the chemistry of the polycarbonate backing and lead to the formation of an opaque film, which will make the disc unreadable!
- Any repair method may result in further damage to the disc. Be sure to follow the instructions.
- If you want to turn the CD towards the light to check for holes in the protective layer, try not to stare into the light for too long. A 60-100 watt lamp will be more than enough to see the holes in the foil layer. Do not turn the disc towards the sun!
What do you need
- A clean, soft, lint-free cloth (microfiber cloth works best)
- Water (or rubbing alcohol)
- Brasso metal polish, fine polish or toothpaste
- Car polishing liquid wax or petroleum jelly
- Cotton or polyethylene food handling gloves (they are easier to handle CDs and will not leave fingerprints)


