Author:
Marcus Baldwin
Date Of Creation:
15 June 2021
Update Date:
1 July 2024

Content
- Method 2 of 3: Using a glass polish (glass screens)
- Method 3 of 3: Preventing scratches
- Tips
- Warnings
- A baking soda solution has similar abrasive properties. Once you've opted for baking soda, knead it to a pasty consistency and use in the same way.
 2 Apply the toothpaste with the applicator. Since this is a home remedy, you can use any applicator. This can be a soft cloth, paper towel, cotton swab, or toothbrush. Squeeze out a small pea-sized ball of toothpaste. Excessive amounts will only stain your smartphone. 3 Apply toothpaste to the scratch. After squeezing the toothpaste onto the applicator, start rubbing it in with light circular motions. Continue until the scratch is barely visible. Since the paste is abrasive by itself, you do not need to apply excessive pressure. Rub until you see the result. Even if the scratch is too big to get rid of completely, light sanding will reduce its size.
 - If the scratch is significant, then an ode of toothpaste will not be enough. In any case, it will significantly reduce the size of any scratch.
4 Clean your phone. After the scratch is reduced, the toothpaste must be removed from the screen. Using a soft and slightly damp cloth, wipe off any remaining toothpaste from the screen. After that, you should take a polishing cloth and remove any dirt and grease present on the screen. Thanks to this, you will update the look of your phone to its original state. Method 2 of 3: Using a glass polish (glass screens)
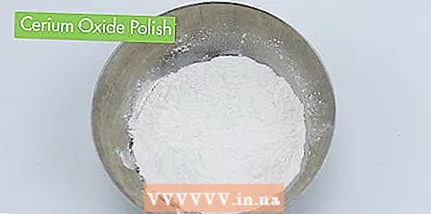 1 Buy a cerium oxide polish. If your phone has a glass screen (not a plastic one), then you need to use a solution that is more effective than toothpaste or baking soda to remove scratches. In this case, a cerium oxide polish is recommended. It can be purchased either in the form of a soluble powder or ready-made. The second option is more convenient, but in the first case, you will get a better product.
 - To polish your phone screen, 100g of cerium oxide powder will be enough. Can be stocked with additional amount in case of future scratches.
- 2 Mix the powder solution. If you purchased cerium oxide powder, you will first need to prepare a solution. It is very simple and also economical. Pour powder (about 50-100 g) into a small container. Add water slowly until the solution is creamy. Stir the solution well as you add water to maintain proportions.
- The polish does not have to be in perfect proportions. The main thing is to add so much water that the polish is normally absorbed into the applicator.
- Skip this step if you bought a finished polish rather than a powder.
- 3 All vulnerable parts of the phone must be sealed with tape. Cerium oxide polish should not fall into openings such as the speaker, headphone jack, or charger. Also, in theory, polish can be dangerous to the lens of a telephone camera. Considering all of the above, first you should tape the area that you are going to polish with tape. Seal all parts of the phone that need to be protected from liquids.
- Sealing the phone before cleaning it may seem like an excessive precaution, but we strongly recommend that you do not skip this step, otherwise the phone could be irreparably damaged if you make a mistake.
- 4 Apply polish to the scratched area. Soak a soft polishing cloth in the cerium oxide solution and start buffing the scratched area with vigorous circular motions. Keep an eye on the appearance of the scratch. It is best to wipe the solution off with the dry end of the cloth approximately every 30 seconds, re-dip the cloth in the polish and repeat the process again for maximum effect.
- When using an abrasive polish, be sure to use more harsh treatment than when cleaning the screen normally. It is important not to overdo it with effort. There is absolutely no need for you to get new defects on the screen in an attempt to get rid of old scratches.
- 5 Cleaning your phone. After applying and removing the polish, wipe the entire phone with a polishing cloth. This will remove dirt and mortar residues from it. Remove the protective tape and wipe your smartphone one more time. In just a couple of minutes, you'll be amazed at how much better your phone starts to look.
- Wipe your smartphone screen regularly. Twice a day might seem overwhelming, but after a couple of seconds, your screen will always look clean.
Method 3 of 3: Preventing scratches
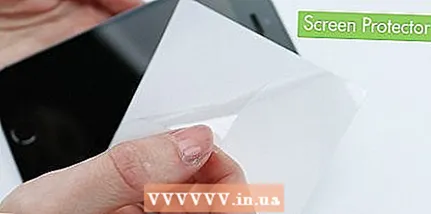 1 Buy a screen protector. Smartphones have never been as fragile and scratch-prone as they are today. If you are worried about the safety of your screen, then take the money and buy a screen protector. They are not very expensive. Either way, protection will cost you less than replacing a screen or buying a new phone. Expensive options for screen protectors provide almost 100% protection, while more economical options, in any case, take the first blow.
 - Choosing between plastic and tempered glass protection, it is better to give preference to the second option. Tempered glass guards for increased durability, visibility and ease of use.
- 2 Wipe the screen regularly. Minor scratches are caused by foreign particles on the screen. Wiping your screen clean with a microfiber or silk cloth a couple of times a day will keep your phone looking its original state. This care is especially important for phones with a touchscreen, as the accumulation of greasy streaks and fingerprints will make the screen less responsive to touch.
- A clothing fabric like a shirt sleeve or even a dish towel will also work, although microfiber or silk cloth is best used to maintain the screen.
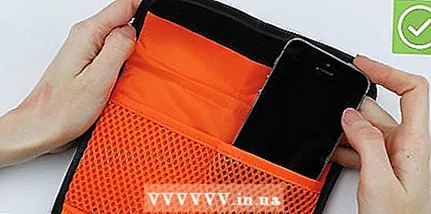 3 Carry your phone in a safe place. More often than not, phones get scratched and damaged while you're on the move. It is important to understand how and for what reason scratches appear on your screen. Don't put your phone in the same pocket with keys or change. If possible, it is better to put it in a closable pocket so that it does not accidentally fall out while walking.
 - Better not to carry your phone in your back pocket. In addition to the risk of crushing the phone by accidentally sitting on it, they also report possible problems with the nervous system due to the pressure it exerts on the buttock.
Tips
- If you are unable to determine the type of screen coverage by touch, then check the description of your phone model (on the Internet or user manual) to know which material you should use.
- Screen scratches are a very common problem, which is why there are many professionals today who make a living fixing these problems. If your screen has a large enough scratch or you do not have time to solve the problem on your own, then on the Internet you can always find the phone of the nearest repair shop. You should be aware that some craftsmen may charge a considerable fee for their work, so first we recommend that you try to get rid of the defect yourself.
- Today there are new and announced phone models on the market, which are positioned as "self-healing". The plastic coating on these phones can actually regenerate from minor scratches. If you often scratch your phone, but want to keep it in good condition, then when buying a new phone, we recommend that you pay attention to just such models.
Warnings
- When using a high performance polish, there is a risk of rubbing off some of the screen cover. A screen coating (eg, oleophobic) is applied to reduce friction and improve the usability of the device. Always keep this in mind and weigh the pros and cons before performing screen polishing.


