Author:
Janice Evans
Date Of Creation:
23 July 2021
Update Date:
23 June 2024

Content
Adding shadow to an image can create a dramatic effect, especially if you experiment with the angle of the light. You can create a simple shadow in Photoshop CS3 by duplicating the image layer, slightly distorting it and making the shadow layer active. Easy peasy.
Steps
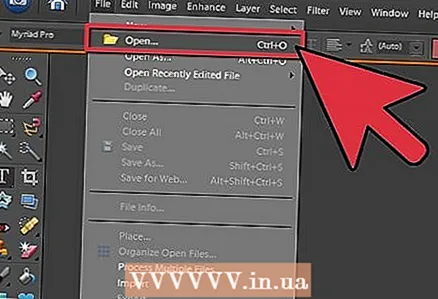 1 Open your image. Make sure your image is cut out and on a transparent layer. Name the layer whatever you want. Leave enough area for the shadow. Br = clear>
 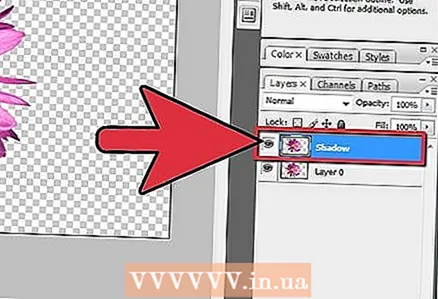 2 Duplicate the drawing layer. Rename the copy of the layer to "shadow" and drag it under the layer with your art. Create a new layer, change its color to white and drag it to the very bottom, making it the bottom layer. Br = clear>
  3 Set the picture to black. Fill the drawing of the copy layer with black by pressing CTRL, Shift, and the Delete button. Go to Filters -> Blur -> Gaussian Blur and set the blur to range 3 or 5.br = clear>
  4 Distort the shadow. Make sure the shadow layer is active and press CTRL and T at the same time. You will see a bounding box with 8 small squares; look from which side the light falls on your drawing, and move this frame with the mouse to the desired place. Move the frame by holding CTRL and moving the mouse. Move the shadow so that it looks nice in your drawing. When done, press Enter or the Accept button. br = clear>
  5 Make the shadow layer active and lower the Opacity to make it more gray, about 70-80% will be enough. Now copy the shadow layer.
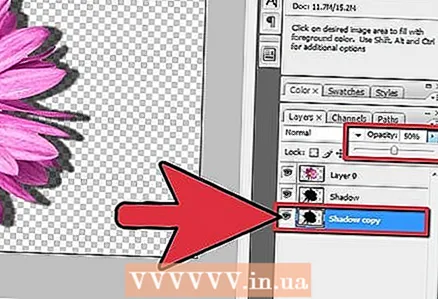 6 Activate a copy of the shadow layer.. Lower the opacity of this layer and you will see a gradient from black to gray and lighter.
 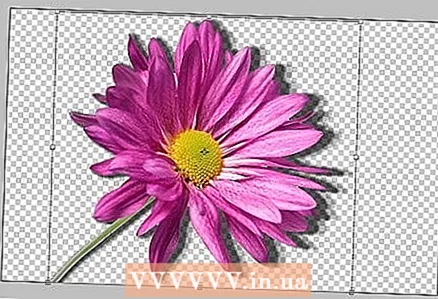 7 Resize the copy of the shadow layer. Make it slightly larger than the shadow layer.
  8 Save your drawing as PNG or GIF and enjoy your work. Saving on a transparent background will allow you to import your drawing anywhere.
Tips
- If you see that there is something wrong with your shadow, or that it does not fit correctly, or in the wrong place, you can remove these parts using the Eraser with the "soft" property.
- You can merge two shadow layers and then apply a blur effect to them.
- When setting the opacity of the shadow layer, play with the opacity and watch how the shadow looks as you change the settings.
- You can blur the shadow again after completing all the steps above for the best effect.
Warnings
- Try not to use JPG for saving - it will remove transparency and create a white background in your drawing.
- Remember to remove the white background layer later so you can import the drawing anywhere.
- If you are going to print this drawing, save it in TIFF format if you need to scale (enlarge) it for printing. Tif files also support transparency, so your shadow will appear with a smooth transition.
- This is a crude technique and if your goal is a realistic drawing, it will often look unnatural. This method creates a single, high-contrast shadow that can only occur under special conditions. But at the same time, it will add dynamism if the object is an abstract image, as in our example.
You will need
- Photoshop CS or higher - Photoshop CS3 was used in this example
- Picture


