Author:
Bobbie Johnson
Date Of Creation:
8 April 2021
Update Date:
1 July 2024

Content
- Steps
- Method 1 of 2: Create Animated GIFs Using Online Tools
- Method 2 of 2: Create Animated GIFs in GIMP
- Tips
- Warnings
An animated GIF file is a simple form of animation. You can create an animated GIF using the online tools if you have a set of pictures or a short video. If you want to edit images and control animation speed, download the free GIMP graphics editor and use its functionality to create GIF animations.
Steps
Method 1 of 2: Create Animated GIFs Using Online Tools
 1 Select a set of images or videos. Create a folder on your computer containing the images you want to animate. Each image will be a separate animation frame.Moreover, you can convert short video to animated GIF file.
  2 Open the online animated GIF generator. There are many free animated GIF generators online, including imgflip, makeagif, and gifmaker. They don't have the rich functionality of GIMP or any other graphics editor, but they're easy to use (and don't need to download).
  3 Cut the video clip (if you like). If you want to make an animated GIF from a video file, cut out a fragment from it (rather than download the entire video file). This can be done for free using VLC. Download this program and follow these steps:
 - Launch VLC and click "File" - "Open" to open the video file.
- Find the beginning of the video you want.
- Click "Play" - "Record".
- Play the video file and stop playback when the end of the video is reached. Click Record again to stop recording. The new video file will be saved in the same folder as the original video file.
 4 Upload images or videos. To do this, click "Upload Images". If you want to convert a video file, please click "Download Video".
 - It can take a long time to download a video file if you have a slow internet connection or if the video file is large. It is recommended to download video clips no longer than a few seconds.
 5 Online tools usually allow you to change the order of images (in case you downloaded them in the wrong order). You can also add text, resize images, and set the animation speed.
 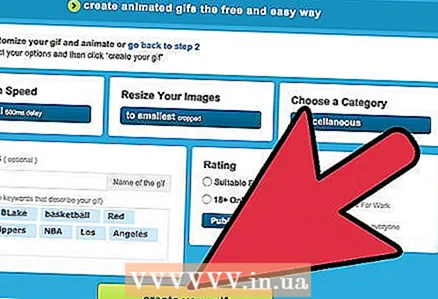 6 To create an animated GIF file, click Create GIF, Create Now, or a similar button. Once created, a list of options will be displayed, including links for submitting the animation to the forums, downloading it, or embedding it on a web page.
Method 2 of 2: Create Animated GIFs in GIMP
 1 Download Gimp. It is a free graphics editor. Using GIMP, you can edit every frame of your GIF animation, adjust the animation speed, and save it in an optimized format (which will load faster).
  2 Open the image you would like to animate. To do this, click "File" - "Open" and select the image saved on your computer. If you want to create a GIF animation from scratch, click File - New.
 - If you are using an image with multiple layers, click Image - Align Drawing to merge all layers into one layer.
 3 Adding additional images. If you already have a series of images to turn them into GIF animations (for example, a series of screenshots), open them by clicking File - Open As Layers. If you have only one image, use the Duplicate Layer option in the Layers window (right). To do this, right-click on the image icon and click "Duplicate Layer", or select the image icon and click on the button in the form of two folded photos.
 - Each layer will be one frame of GIF animation. The image at the end of the list will be displayed first (and so on up the list). To change the order in which the images are displayed, swap them in the image list.
- All images must be the same size; large images will be cropped when saving GIF animation.
 4 Hide the layers to edit the layers below (if you like). If you plan to edit images or add text to them, hide all layers above the layer you are editing in the list. There are two ways to do this (in the Layers window):
 - Click on the eye icon next to the layer to hide it. Click on the same icon to display the layer.
- Or select the layer and set the opacity (at the top of the Layers window). A low opacity will make the layer more transparent. This is useful if you want to add text or other additions to multiple frames.
 5 Image editing (optional). Learn about the functionality of GIMP or simply follow these steps. Select the image you want to edit in the Layers window (right) and then use the following tools:
 - In the Toolbox window (left), select the Zoom tool to resize the image. Make all layers the same size.
- In the Toolbox window (left), select the Text tool to add text. Enter your text and use the pop-up toolbar to set the size, type, and color of the font. When you're done, click Layer - Merge to merge the text layer with the layer below it.
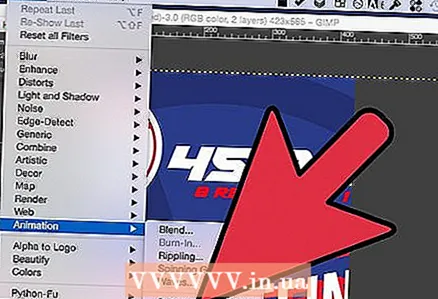
 6 Watch the animation. Once you've finished editing, click Filters - Animation - Play. Click on the play icon in the window that opens to view the animation.
  7 Set the animation speed. Open the Layers window and right-click (or Control + Right-click on some Macs) the layer. Select Edit Layer Attributes. After the name, enter (XXXXms), replacing XXXX with the number of milliseconds that this layer should be displayed. Do this with each layer. Play the animation again to view it with your changes.
 - The speed of most video-based GIF animations is around 10 frames per second (100ms per frame).
- You can skip this step and set the default speed later (during file export).
 8 Optimize your animation to load faster. Click "Filter" - "Animation" - "Optimize (for GIF)". This will create a much smaller copy of the original file. In the next steps, work with a thumbnail copy of the original file.
 - Before optimization, each frame of the animation is fully loaded. After optimization, only changing areas of images are loaded.
- You can skip this step and optimize the animation when exporting it.
 9 Export your animation to GIF format. To do this, click "File" - "Export As". At the bottom of the window that opens, click "Select a file type" - "GIF". Then click "Export".
  10 In the new Export Image as GIF window, check the box next to As Animated. Then click "Export" or make the following changes:
 - Uncheck the Loop checkbox if you only want to play the animation once.
- If you haven't set the animation speed, do so now. By default, the animation speed is set to 100ms, or 10 frames per second. Decrease this value to speed up the animation (and vice versa).
- If you haven't optimized your animation, find the Remove Frames option and select Shared Layers (Combine).
Tips
- Older versions of Adobe Photoshop included Adobe ImageReady. If you have one, take each frame separately in Photoshop, and then use Adobe ImageReady to create the animation as described above (in a similar way).
- GIMP has several animation effects in the Filters and Animations menus. These effects are inserted between frames, such as ripples.
- For additional effects, install the Gimp Animation Plugin (GAP) and read this tutorial. GAP does not work in 64-bit versions of GIMP 2.8, so you may need to download GIMP 2.6.
Warnings
- The size of an animated GIF file can be so large that it will load slowly (for example, on a web page). Use fewer colors and do not insert blurry images to reduce the size of the animation.


