Author:
Bobbie Johnson
Date Of Creation:
9 April 2021
Update Date:
1 July 2024
Content
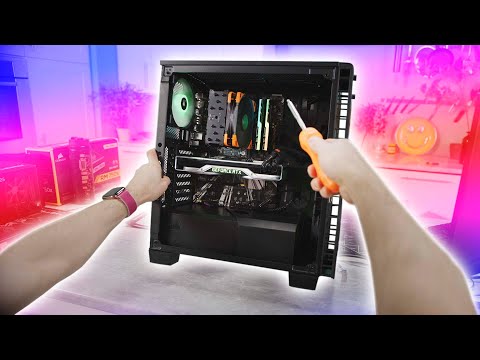
This manual will teach you how to build your own personal desktop computer. There are several steps you need to follow. After completing the assembly of all components, you will receive your own computer and will be able to customize the system in relation to the tasks that you are going to perform on the computer.
Steps
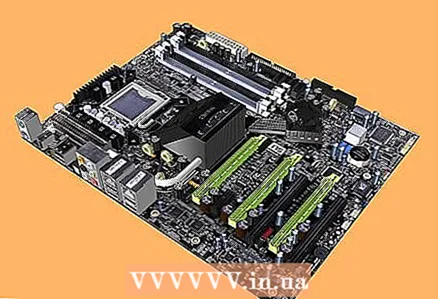 1 Prepare the motherboard of the NVIDA model. If you want to build a good device, use motherboards of the following models: Intel G31, GMA3100 or AMD 780.
 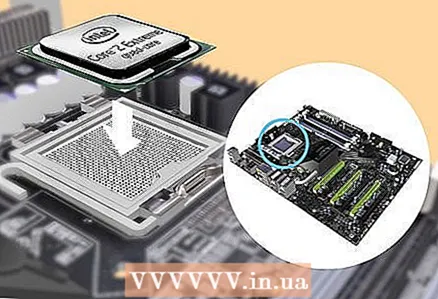 2 Mount the processor (CPU) into the socket on the motherboard. You must select the correct processor for your motherboard and install it according to the processor manual. Be careful to install the correct processor type in the designated socket. Otherwise, the computer will not work and a short circuit may occur, which will damage the motherboard.
 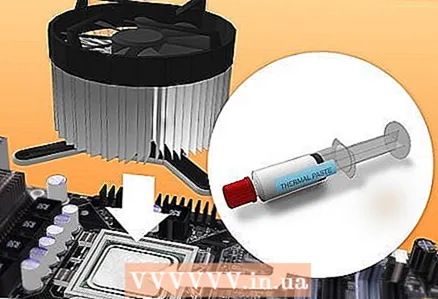 3 Connect the CPU cooler to the motherboard.
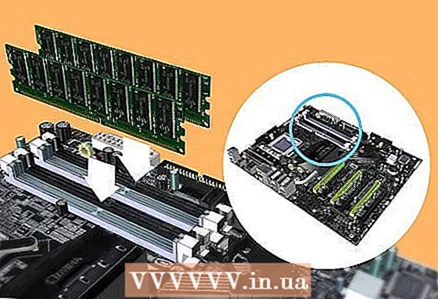 4 Insert the random access memory (RAM) cards into the appropriate slots. The motherboard should have several rows of slots with 2-3 sections of different lengths. Make sure the connectors on the motherboard fit into the notches on the memory cards. Don't confuse memory slots with PCI slots. The PCI slot is usually wider.
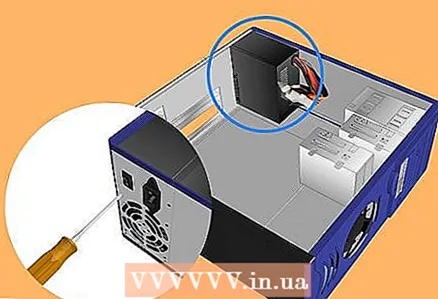 5 Open the case and install the M-ATX power supply. Make sure you connect all the wires to your disc readers and motherboard.
  6 Place the motherboard in the case and check that it is secure and correctly seated. The correct position of the motherboard should be described in the operating instructions for the motherboard.
 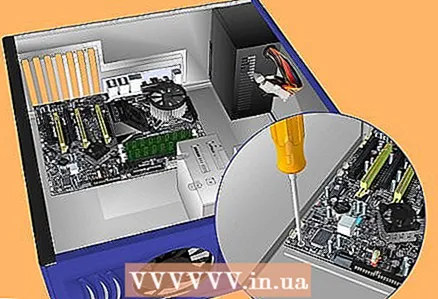 7 Position the motherboard in the case accordingly.
 8 Install the hard drive and connect it to the power supply and to the motherboard. On a hard disk using the SATA Hard disk, remove the jumper.
 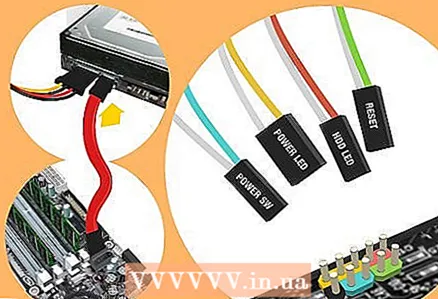 9 Connect the SATA connectors to the drive and the USB connectors to the motherboard. The instruction manual will tell you where the connectors for these connectors are. [[Image: Step9_790.webp | 300px |]
 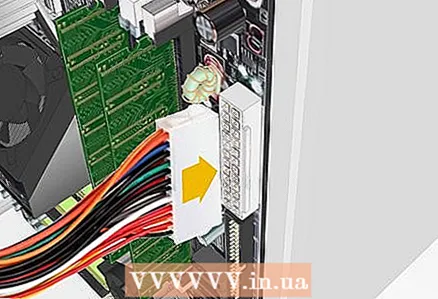 10 Connect the 20 or 24 pin ATX connector and the 4 pin PSU connector to the motherboard.
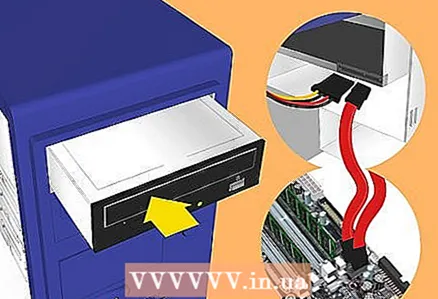 11 Install the DVD-ROM drive. After connecting the ATA cable to the device, connect the drive to the power supply.
 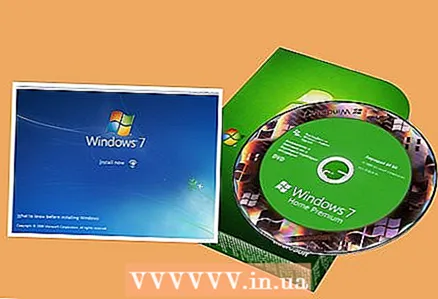 12 Finally, select the appropriate operating system and install it following the instructions.
Tips
- Retain all operating instructions and user guides.
- Read the instructions for the case of the system unit.
Warnings
- Do not turn on your computer until it is fully assembled.
- Do not use too much force when installing components into slots.
What do you need
- Motherboard, Hard disk, RAM cards, processor (CPU), CPU cooler, DVD-ROM drive, power supply, system case, screwdriver and operating system.


